
SHARE Knowledge Hub
How should construction hazards be controlled?
Start with the design and sequence. Avoid height and deep excavation where reasonably practicable, engineer collective fall and collapse protection, and keep demolition stable at every stage. A method statement is useful only if a competent team can verify its assumptions and stop when conditions change.
Understanding How should construction hazards be controlled?
Start with the design and sequence. Avoid height and deep excavation where reasonably practicable, engineer collective fall and collapse protection, and keep demolition stable at every stage. A method statement is useful only if a competent team can verify its assumptions and stop when conditions change.
Why this matters at work
Consider whether the task can be done from the ground or otherwise avoid exposure to a fall. Where height work is unavoidable, select suitable collective protection and equipment to prevent falls before relying on personal fall protection; minimise distance and consequences where a fall cannot be prevented. Assess access, working position, loads, ground, fragile surfaces, weather, nearby traffic and people below. A short duration or low height does not automatically remove the risk of serious injury.
Obtain relevant information about the structure, stability, previous alterations, hazardous materials, services, neighbouring property and public exposure. Competent planning must select a demolition or alteration sequence and any temporary support or exclusion needed. Consider whether work can be carried out remotely or from protected equipment. Do not assume a wall is non-loadbearing, a service is disconnected or an apparently sound floor can carry demolition plant.
How organisations manage this in practice
Review the excavation method and necessary technical controls, including safe access, water management and inspection. Verify the selected corrective work and document the inspection and release decision through the actual site process. Communicate restrictions and review whether other excavations are affected by the same weather. Plan for a collapse emergency without exposing unprotected rescuers. The example deliberately gives no safe waiting time or setback distance; these depend on the real ground, geometry, support design and loading.
Map the interfaces rather than approving each trade independently. A demolition sequence may remove support, an excavation may undermine scaffold foundations, and lifting can place loads above occupied work areas. Agree sequencing, physical separation, access and authority for changes. Check current design information, temporary works, public boundaries and emergency routes. Include health exposures such as dust and noise that can travel beyond the immediate task. Use the construction phase coordination process to resolve conflicts before work. The responsible specialist supplies and verifies technical controls; supervisors check that actual conditions match them. Inspect barriers and supports and prevent unauthorised removal. Record material changes, hold points, owners and verification, and communicate them to all affected trades and shifts. Stop the affected work when a critical assumption is unproven. A permit, plan or briefing cannot provide structural or ground stability in the absence of suitable physical controls.
Agree the revised method through the actual responsible roles and brief everyone affected. Check equipment condition and relevant instructions before use. Record the change, technical evidence, restrictions and rescue arrangements, then verify implementation before authorised restart. Consider whether movement of materials also introduces loading or falling-object hazards. This scenario supplies no anchorage rating, clearance calculation or approval for a particular roof; those depend on real design and equipment information.
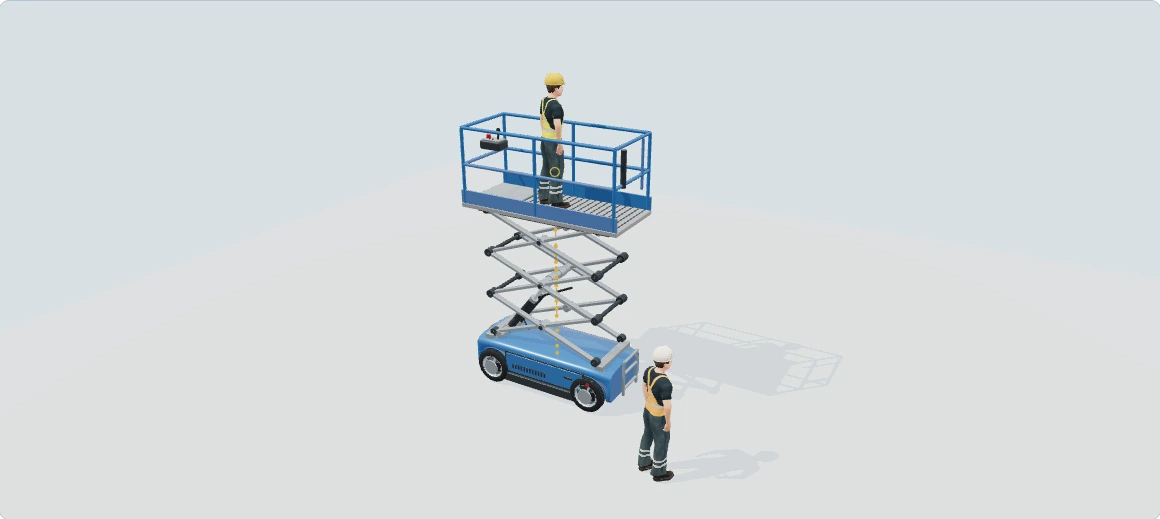

MEWPs: prevent crushing, overturn and falls during the task
Explore how this equipment can harm its users and other people, then follow the practical measures that interrupt each pathway. This is a hazards and good-practice lesson; the separate checklist remains the pre-use/safety-check activity.
Hazards and good practice: learn what can hurt people during use, change and maintenance. Pre-use and safety checks stay in the separate checklist.
Checksheets and risk assessments
Equipment checksheets
- Mobile elevating work platforms — 3D checks · Word · PDF
- Harnesses and lanyards — 3D checks · Word · PDF
Risk assessment forms
Risk assessment examples
Full written walkthrough — all 9 steps
1. Choose access that suits the real job
What is happening: The scissor platform is one access type, not a universal answer for all height work.
How harm can occur: An unsuitable reach, location or work method can create fall, crushing and stability risks.
Best practice to apply: Avoid height work where reasonably practicable; select the access method for task, reach, surface and surroundings.
Why this works: Planning the method can remove the need for overreaching or improvising once elevated.
How should construction hazards be controlled? · How can the ISO 45001 hierarchy of controls reduce work-at-height, demolition and excavation risks?2. Do I need a harness in this scissor lift?
What is happening: On a vertical scissor lift, the deck, closed gate and complete guardrails provide collective fall protection. Keep both feet on the floor. Reposition the machine if the job is out of reach.
How harm can occur: Climbing a rail, standing on a box or leaning outside can put you beyond the guardrails. A harness alone cannot prevent a fall, overturn or crushing.
Best practice to apply: In Great Britain, the Work at Height Regulations require the job to be planned and collective protection prioritised. A harness is usually unnecessary on a guarded scissor lift. Follow this machine’s instructions and the task risk assessment. If a residual fall risk requires restraint, use a suitable harness and short restraint lanyard on a manufacturer-designated anchor. This model identifies no such anchor. Never clip to a guardrail.
Why this works: Restraint limits where you can reach. Fall arrest catches a person after a fall has started and needs a suitable rated anchorage, sufficient clearance and a rescue plan. Do not assume a restraint anchor can take arrest loads. If the required protection cannot be provided, stop and choose a suitable machine or method.
How should construction hazards be controlled? · What is the work-at-height decision order?3. Follow the wheel as it drops into a recess
What is happening: Move the travel slider from left to right. On the level approach all four wheels are supported. Watch the nearest leading wheel reach the marked opening, drop below floor level and tilt the chassis and occupied platform.
How harm can occur: The diagonally opposite wheel lifts. With an elevated load the machine can lose stability and overturn, throwing the occupant or crushing someone beside it. The illustration stops at the onset of tipping.
Best practice to apply: Walk and assess the complete wheel route first. Check floor bearing capacity, recesses, edges and the capacity and security of covers. Keep clear of the opening and exclude people from the danger area. Travel elevated only where the manufacturer permits it and the assessed route is suitable.
Why this works: A smooth-looking indoor floor can hide a void. The guardrails move with the machine, and wearing a harness cannot restore support beneath a wheel.
How should construction hazards be controlled? · How should construction hazards be planned together?4. See the trapping gap beneath a fixed beam
What is happening: Start the slider at the left. Look across the operator’s helmet to the steel beam. The beam stays still as the elevated platform travels towards it. Follow the gap until the scene stops just before contact.
How harm can occur: Driving or raising into a beam can trap a head or chest between steelwork and the platform rail or controls. The operator can be pushed onto the controls and unable to release them. Crushing can be fatal even when the chassis stays level.
Best practice to apply: Check overhead and along the whole travel and raising envelope from the ground. Choose a clear route and suitable machine. Stop and reposition if the clearance or view is uncertain. Agree signals and practise the machine-specific rescue plan with someone familiar with the ground controls.
Why this works: Guardrails protect the platform edge. They cannot keep a beam outside the operator’s space. The rescue plan must consider which movement frees the casualty without making the crush worse.
How should construction hazards be controlled? · What is the work-at-height decision order?5. Separate moving access equipment from others
What is happening: People on the ground may not share the operator's view of the route or platform.
How harm can occur: Movement can strike pedestrians, other vehicles, structures or overhead electrical hazards.
Best practice to apply: Coordinate routes, work boundaries and adjacent operations; stop if sight or communication needed for the task is lost.
Why this works: Separation and coordination control people who are outside the platform but inside the task's effects.
How should construction hazards be controlled? · What is the work-at-height decision order?6. Keep people outside the drop zone
What is happening: The wider view shows the linked barriers put in place before the lift was raised. They enclose the drop zone on all four sides. The pedestrian stays outside while work takes place overhead.
How harm can occur: A falling tool or loose material can strike someone below or beside the platform. Excess load or shifting materials can also put the occupants at risk.
Best practice to apply: Before raising the platform, secure tools and materials, check the load and barrier off the assessed drop zone. Keep pedestrian routes outside it. Stop work if anyone enters or the barrier is moved.
Why this works: The barrier controls access. Its position depends on the task, platform travel and where an object could fall or deflect. Reassess the boundary when the lift moves.
How should construction hazards be controlled? · How should plant, vehicles and public interfaces be controlled?If the new light falls during installation
A fitter is securing a 15 kg light unit, 10 m above the floor. Imagine someone steps inside the barriers. The fitting slips before its fixings take the load and strikes the person below.
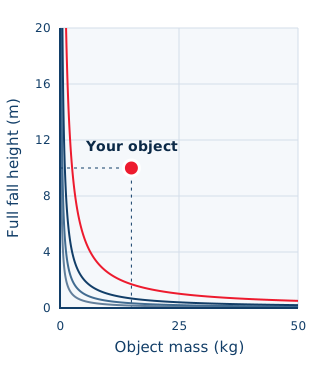 Potential outcome: fatal injury
The SHAREhub dropped-object model flags a potentially fatal injury. Its reference chart ends at 10 kg. Even a 10 kg blunt fitting falling 10 m reaches the fatality band. This screen assumes standard PPE and the full distance to the floor. A sharp edge or broken lens needs separate assessment.
The dot marks the light unit. The lines compare energy. They cannot tell you how much force reaches the person or how likely a particular injury is.
Before raising the platform, plan how the fitting will be supported until its fixings are secure. Check the platform load and keep the fall and deflection area clear. If someone enters, stop work.
Open this example in the SHAREhub dropped-object model7. Check overhead power lines before raising the scissor lift
What is happening: The amber arrow shows the platform’s upward travel. Look along the approach route and above the proposed work position. Include the person, extended deck and any long material held above the guardrail.
How harm can occur: A raised platform or a length of metal can approach a conductor closely enough for electricity to arc. Occupants can receive fatal shocks or burns. A helper touching the machine can be injured too.
Best practice to apply: Assume the line is live. Choose a route and set-up position clear of it. If avoidance is impossible, ask the line owner about diversion or confirmed isolation. Any work near a live line needs owner-agreed clearances and physical controls. Stop if the lift or its load could enter the restricted area.
Why this works: The route may clear the lowered platform while the raised deck or a long fitting could still reach the line. The barrier in the model illustrates the decision to stop; its position gives no clearance distance. If contact or flashover is suspected, stay in the platform and warn everyone away. Call 999 and the line owner. Keep off the ground controls and wait for the line owner to confirm safety.
Plan plant movement near overhead lines Respond to contact or flashover8. Make rescue practical before elevation
What is happening: Ground controls and communication form part of a planned response to a stranded or trapped occupant.
How harm can occur: Delay or improvised rescue can worsen injury and expose more people to height or machine hazards.
Best practice to apply: Provide a suitable practised rescue plan and a competent ground response familiar with the actual machine.
Why this works: A reachable control is useful only if someone can safely use it as part of a workable plan.
How should construction hazards be controlled? · How do excavation controls protect nearby structures and other construction work?9. Reassess changes and intrusive work
What is happening: New weather, ground changes, a different task or maintenance changes the original exposure.
How harm can occur: Unexpected descent, stored energy or an invalidated working envelope can injure occupants and fitters.
Best practice to apply: Stop when assumptions change; use the actual isolated/support arrangements for maintenance and competent verified hand-back.
Why this works: A pre-use check does not keep the operation safe after its conditions have materially changed.
How should construction hazards be controlled? · How should temporary works and structural stability be managed?
Illustrative awareness learning. Geometry, colours and movement do not establish safe distances, capacity, exposure, isolation or work permission. Use the actual assessment, equipment information and competent arrangements.
The wider workplace has its own account and subscription access. Exploring this lesson does not grant access, record course completion or authorise work.
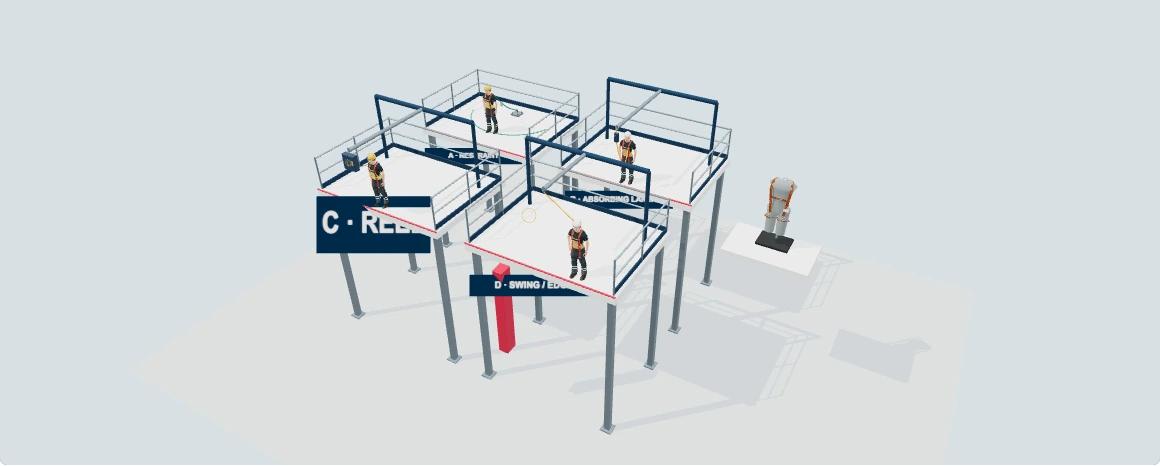
Roof-edge protection: restraint, fall arrest and rescue
Compare four roof-edge bays in one detailed scene: travel restraint, an energy-absorbing lanyard, a retractable reel and an offset/edge-contact arrangement. Follow the people, components and mechanisms of harm, then apply the source-linked good practice. The separate checklist is for pre-use checks. See suspended-person clearance views, compare two lanyard lengths and read the redesigned clearance diagram.
Hazards and good practice: learn what can hurt people during use, change and maintenance. Pre-use and safety checks stay in the separate checklist.
Checksheets and risk assessments
Equipment checksheets
Risk assessment forms
Risk assessment examples
Full written walkthrough — all 21 steps
1. Start with prevention, not a harness choice
What is happening: Four roof bays compare different personal systems. The open edges are teaching contrasts, not a recommended work layout.
How harm can occur: Every bay can expose the user to a fall; other workers can be struck by dropped equipment.
Best practice to apply: First avoid height or provide a protected place, collective edge protection or suitable access equipment. Personal protection needs a justified task-specific system.
Why this works: Preventing exposure protects people before a fall sequence starts.
Belts and harnesses for work at height · How does ERICPD apply to belts and harnesses?2. Anatomy: the full-body harness
What is happening: Inspect the separate detailed mannequin: shoulder/back webbing, chest strap, thigh loops, load-bearing stitching, adjusters, identification and dorsal ring. Other products have different approved attachment arrangements.
How harm can occur: Wrong body support or attachment can concentrate force, allow ejection or defeat the system.
Best practice to apply: Use the exact full-body harness and fall-arrest attachment specified for the system. A side positioning ring, tool loop or convenient strap is not automatically a fall-arrest point.
Why this works: Body support and load paths are designed functions; a ring-shaped part alone does not establish its purpose.
Belts and harnesses for work at height · What types of belts and harness systems are used?3. Fit the person and the complete task
What is happening: Fit includes leg and chest adjustment, strap routing, loose-tail control, clothing, movement and the total user-plus-tools mass. The mannequin is only a component display.
How harm can occur: Loose, twisted or incorrectly routed webbing can move during arrest and injure the wearer.
Best practice to apply: Follow the manufacturer’s fitting sequence and adjustment checks on the actual wearer. Confirm size, rated mass range, compatible PPE and supervised practical competence.
Why this works: Correct fit helps keep the designed load paths in position; appearance on a mannequin cannot prove fit.
Belts and harnesses for work at height · How should belts and harnesses be selected?4. Connectors, locking gates and absorber pack
What is happening: The close-up identifies the connector body, gate and locking sleeve, plus an energy absorber’s protective cover and folded webbing.
How harm can occur: An open gate, cross-loading, incompatible connection or bypassed absorber can cause connection failure or excessive arrest force.
Best practice to apply: Use compatible connectors and correct orientation, verify closure/locking and preserve the approved energy-dissipating element. Follow instructions for spare-leg stowage; do not clip it to an arbitrary ring.
Why this works: A complete compatible system must function together under load.
Belts and harnesses for work at height · How should belts and harnesses be selected?5. The structure is part of the system
What is happening: The illustrative gantry extends its connection point beyond the roof edge. The arrest line hangs clear of the edge and directly above the suspended dorsal attachment. The structure is illustrative, with no design rating.
How harm can occur: An unsuitable structure or wrongly placed anchor can fail or increase free fall, swing and rescue difficulty.
Best practice to apply: Use a competently specified and accepted anchor/structure for the actual system, load direction and number of users. Attach from a safe position before exposure and maintain connection through transitions. Have any outboard anchor, cantilever and support designed and accepted for the actual load paths; never improvise an extension. Check the entire fall path, swing and deflection, not just the final hanging position.
Why this works: A visible eye or a convenient handrail is not evidence of a suitable anchorage.
Belts and harnesses for work at height · What should be checked about anchor points?6. Bay A: travel restraint prevents reaching the edge
What is happening: An adjustable restraint lanyard limits travel. The green arc represents a constrained route, not a universal safe radius. The wearer remains inside the roof edge.
How harm can occur: A setting that still allows the person’s body to pass an edge or reach a fragile rooflight fails to restrain the fall.
Best practice to apply: Plan the anchor, full line length, stretch, adjuster setting, body reach and every accessible edge/opening. Establish that the whole task can be performed without reaching a fall position.
Why this works: True restraint prevents the fall beginning; merely wearing a short lanyard does not establish restraint.
Belts and harnesses for work at height · What types of belts and harness systems are used?7. Worked task: rooflight beside a ventilation unit
What is happening: A worker needs to inspect a unit beside a fragile rooflight. An outer-edge restraint setting may still allow access to the rooflight.
How harm can occur: Falling through an internal fragile surface can occur while the worker remains far from the outside edge.
Best practice to apply: Review ground-based inspection and protected access first. If personal restraint is justified, verify all openings, access routes and changing anchor geometry; stop if the task cannot remain within the protected route.
Why this works: The relevant boundary includes every fall position, not only the roof perimeter.
Belts and harnesses for work at height · How should a harness system be selected and released for use?8. Bay B: an energy absorber arrests a fall
What is happening: Fall arrest permits a fall to begin. A compatible system then dissipates energy and supports the person; it does not turn the open edge into a safe working platform.
How harm can occur: The user may strike a lower obstruction, experience arrest forces or remain suspended awaiting rescue.
Best practice to apply: Verify the exact product, anchorage geometry, user mass, clearance, edge compatibility and rescue plan before use. Prefer a high suitable anchor and avoid slack in the approved configuration.
Why this works: Energy absorption needs space and compatible components; it does not eliminate the fall or its consequences.
Belts and harnesses for work at height · Why does fall clearance matter?9. Worked free fall: what happens before arrest
What is happening: Imagine standing directly under the anchor with the line vertical. The anchor is 2.20 m above the deck and the dorsal ring is 1.40 m above it. A 1.50 m assembly could move 0.70 m vertically before taking load (1.50 − 0.80). The pictured worker starts inboard and moves over an edge. Their actual free fall cannot be read from this subtraction.
How harm can occur: Additional absorber deployment, anchor/line deflection and harness movement increase total descent after free fall.
Best practice to apply: Use a common reference and the exact manufacturer’s diagram. This simplified arithmetic omits edge transition, swing and device dynamics and must not be used to approve a real setup.
Why this works: Free fall and total stopping distance are different quantities.
Belts and harnesses for work at height · Why does fall clearance matter?10. Worked clearance: keep one anchor datum
What is happening: Start at the unloaded anchor. The lowest soles in this example are 4.20 m below it. Allow another 1.00 m beneath the soles, giving 5.20 m required. The top of the obstruction is only 4.80 m below the anchor. Read the two rulers from the same starting point.
How harm can occur: Missing an allowance, mixing platform and anchor datums, or double-counting a manufacturer’s combined term can give a misleading result.
Best practice to apply: Read the actual product-specific clearance diagram and definition of each term. Account for the real user, anchor/line system and obstructions, without reusing or double-counting the fictional allowances.
Why this works: A consistent datum makes the calculation auditable; only the actual system instructions establish required clearance.
Belts and harnesses for work at height · Why does fall clearance matter?11. Worked decision: this example does not fit
What is happening: There is daylight under the boots, but only 0.60 m of it. The example needs 1.00 m under the boots, so it falls short by 0.40 m. The red obstruction enters the required reserve. Reject this arrangement.
How harm can occur: The arrest path or its required margin conflicts with the obstruction; a harness is not a reason to proceed.
Best practice to apply: Reject this configuration. Reconsider avoidance, collective prevention, restraint or a different competently specified system. Do not reduce the stated allowance or guess that a reel will solve the shortfall.
Why this works: Changing the control or task is necessary when the chosen configuration cannot meet its clearance requirement.
Belts and harnesses for work at height · Why does fall clearance matter?12. More room: compare the same 1.5 m system
What is happening: Only the obstruction moves. Its top is now 5.60 m below the anchor and the lowest soles are still 4.20 m down. The gap is 1.40 m. After allowing 1.00 m, there is 0.40 m left in this vertical comparison.
How harm can occur: Passing this one arithmetic comparison does not verify edge contact, system compatibility, rescue or structural capacity.
Best practice to apply: Verify every part of the actual system and work route. The clear line path shown requires a designed and accepted outboard anchorage; do not make an improvised cantilever.
Why this works: Available space is compared with the whole stopping envelope, including the clearance allowance.
Belts and harnesses for work at height · Why does fall clearance matter?13. 2 m lanyard: the complete stopping envelope
What is happening: With the 2.00 m assembly, the lowest soles are 5.45 m below the unloaded anchor. Add the 1.00 m reserve for 6.45 m required. An obstruction 6.90 m down leaves 1.45 m under the boots, or 0.45 m beyond the reserve.
How harm can occur: Confusing the total height of the person with the dorsal-to-feet term, or omitting real line deflection, can understate required clearance.
Best practice to apply: These are invented teaching values, not a universal minimum or a specification for a 2 m product. Use its exact instructions, actual wearer and complete anchor system. Do not add a term twice if the manufacturer already includes it.
Why this works: The drawing and the suspended-person model use the same inputs. With an initial dorsal height of 1.40 m, idealised vertical free fall is 2.00 − (2.20 − 1.40) = 1.20 m; absorber extension and other movement follow.
Belts and harnesses for work at height · Why does fall clearance matter?14. Bay C: the self-retracting fall arrester
What is happening: Often called an inertia or tension reel, this device pays line out/retracts during permitted movement and locks during a fall, with product-specific energy dissipation. It is not automatically a restraint system.
How harm can occur: A reel can still allow a fall, collision, swing or edge contact; a taut-looking line does not prove sufficient clearance.
Best practice to apply: Confirm the exact device’s mounting, orientation, user mass, line path, allowed working area and clearance. For a non-vertical or edge application obtain the manufacturer’s suitability confirmation.
Why this works: Locking behaviour, braking distance and permitted geometry vary by device; there is no universal “reel drop distance”.
Belts and harnesses for work at height · What types of belts and harness systems are used?15. Reel: hanging does not establish enough clearance
What is happening: Read from the deck in this bay. The first obstruction is 2.60 m below it. The suspended pose illustrates where the line connects. The exact reel and its instructions are needed to decide whether it can stop a fall in the space available.
How harm can occur: A reel still needs room for activation, stopping, harness movement and the required allowance; sideways travel also creates swing and edge-contact hazards.
Best practice to apply: Find the exact reel’s required clearance for this orientation, user mass and anchorage. Use its stated datum and compare with the measured available space. No generic numerical reel requirement is supplied here.
Why this works: Different reels and configurations have different stopping envelopes. A short visible line or a stationary hanging person is not proof that the fall can be arrested safely.
Belts and harnesses for work at height · What types of belts and harness systems are used?16. Reel anatomy and clearance decision
What is happening: Use the inspection toggle to reveal a schematic spool, return spring and locking pawl. This illustrates separate return and locking functions; it is not a service drawing.
How harm can occur: A damaged device, unsuitable edge or arrangement outside its tested limits can defeat protection even if the line retracts.
Best practice to apply: Use the manufacturer’s clearance table for the actual overhead/offset/edge arrangement. Inspect and function-check as instructed; never open, modify or repair a safety device from this model.
Why this works: Line retraction is not a fall-arrest test and does not establish a fixed stopping distance.
Belts and harnesses for work at height · How should belts and harnesses be selected?17. Bay D: swing fall and leading-edge contact
What is happening: The offset anchor introduces a pendulum path towards a side obstruction. The line can also run over the roof edge. The red curve is qualitative, not a calculated swing envelope.
How harm can occur: The person can strike the structure and the line can abrade or cut. Vertical clearance alone does not address these mechanisms.
Best practice to apply: Plan anchor position and lateral working limits; avoid swing and edge contact. If edge contact cannot be avoided, use only equipment confirmed for the exact edge/configuration and the full rescue/clearance assessment.
Why this works: Edge-rated or retractable equipment is not permission for unlimited offset or every edge material.
Belts and harnesses for work at height · Why does fall clearance matter?18. Restraint is different from work positioning
What is happening: Restraint restricts travel. Work positioning supports someone in tension while they work. These roof bays do not demonstrate a complete positioning or rope-access system.
How harm can occur: Loss of primary support can expose a positioned worker to a fall. A belt alone is not a general substitute for full-body fall-arrest support.
Best practice to apply: Specify the intended function and the required independent backup where failure of positioning could cause a fall. Specialist positioning, rope access and rescue require their own methods, compatible equipment and training.
Why this works: The task function determines the required system; tension in a line does not make different systems interchangeable.
Belts and harnesses for work at height · What types of belts and harness systems are used?19. After arrest: suspension intolerance / trauma
What is happening: The lowered worker illustrates a conscious or incapacitated casualty awaiting rescue. Motionless upright suspension can reduce effective blood circulation and lead to faintness or loss of consciousness; injury from the fall may also be present.
How harm can occur: Delay, leg-strap pressure and an inability to move can worsen the emergency. There is no universal safe time to remain hanging.
Best practice to apply: Raise the alarm and implement the planned trained rescue promptly. Relief straps, if provided and usable as instructed, do not replace rescue; do not unclip or improvise a dangerous self-rescue.
Why this works: Preventing a long unsupported wait is part of the original work plan, not an optional response after a fall.
Belts and harnesses for work at height · What rescue arrangements are needed before harness work starts?20. Rescue must work from this actual position
What is happening: A rescue plan needs a reachable casualty route, suitable anchors/equipment, trained people, communications, supervision and a controlled practice before reliance on it.
How harm can occur: Unplanned rescuers can become additional casualties; relying only on emergency services can leave a suspended worker without timely help.
Best practice to apply: Rehearse the chosen method safely, without exposing people to uncontrolled falls or suspension. Summon appropriate emergency help and follow current standard first aid and medical guidance after recovery. Do not use outdated rules about keeping everyone upright after rescue.
Why this works: A practical task-specific rescue capability is needed wherever fall arrest is used.
Belts and harnesses for work at height · What rescue arrangements are needed before harness work starts?21. After use or an arrest: record and withdraw
What is happening: The final step returns to the component display. A visual lesson does not complete an equipment inspection or release it for use.
How harm can occur: Fall-loaded, damaged, contaminated or uncertain-history equipment can return to service if withdrawal and records are weak.
Best practice to apply: Stop using and quarantine affected equipment after an arrest or suspected defect. Follow exact manufacturer withdrawal, inspection and disposition instructions. Use the separate pre-use checklist and formal inspection process for actual equipment.
Why this works: Clear separation of learning, inspection and competent release prevents an animation being mistaken for safety approval.
Belts and harnesses for work at height · How should belts and harnesses be inspected?
Fictional awareness examples, not equipment selection, structural approval or a working clearance calculator. Geometry and figures are teaching inputs. Use the exact manufacturer’s instructions and competent task-specific planning. Preserve separate GB and Northern Ireland legal routes.
The wider workplace has its own account and subscription access. Exploring this lesson does not grant access, record course completion or authorise work.
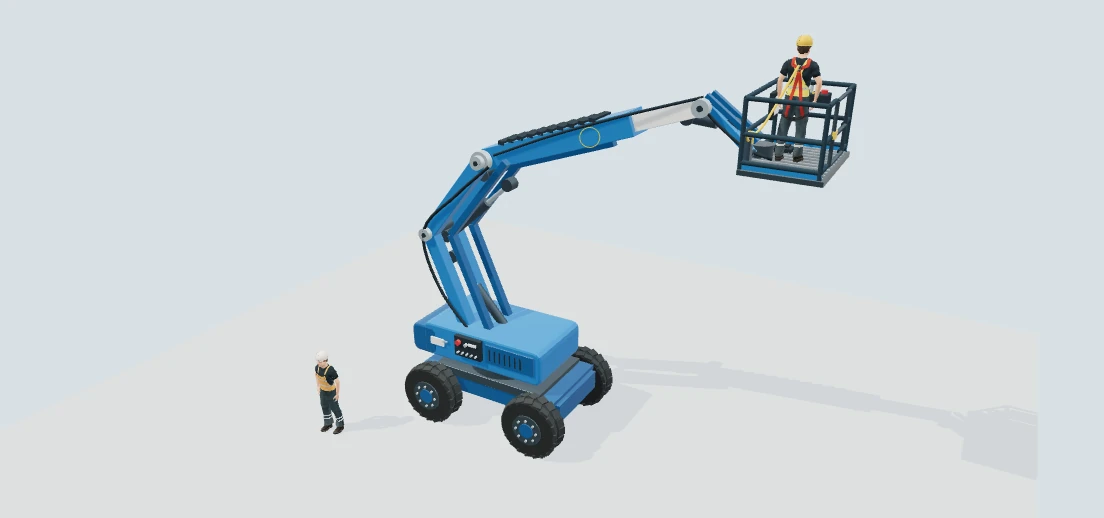
Cherry picker: working safely from an articulated boom
Follow a maintenance team reaching a high-level light. Compare what happens at the wheels and at the basket, find the restraint anchor and plan how the team would bring a stranded colleague down.
Checksheets and risk assessments
Equipment checksheets
- Mobile elevating work platforms — 3D checks · Word · PDF
- Harnesses and lanyards — 3D checks · Word · PDF
Risk assessment forms
Risk assessment examples
Forms and tools
Full written walkthrough — all 11 steps
1. Choose access for the job
What is happening: A high-level light sits beyond an obstruction. The rising arm, extending section and jib let the basket reach sideways. A scissor platform mainly moves vertically.
How harm can occur: Selecting on height alone can leave someone leaning out, or manoeuvring into a structure to reach the work.
Best practice to apply: First consider doing the job from the ground. If a boom is appropriate, check its working envelope for the approach, load and return route. Use a trained operator familiar with this model.
Why this works: Planning the return as well as the approach gives the team a way out if conditions change.
How should construction hazards be controlled? · How can the ISO 45001 hierarchy of controls reduce work-at-height, demolition and excavation risks?2. Follow the restraint from harness to basket
What is happening: Trace the short line from the operator’s full-body harness to the marked basket anchor. On a mobile boom, a sudden chassis movement can throw an occupant upwards even with the gate shut.
How harm can occur: A long lanyard may let someone leave the basket. A guardrail or nearby structure is an unsuitable attachment point.
Best practice to apply: IPAF strongly recommends restraint in a boom. Check harness fit, compatible connectors and the manufacturer-designated anchor for each wearer. Adjust the line so the wearer stays inside. Keep both feet on the platform floor and the gate closed.
Why this works: A guarded vertical scissor lift usually provides collective protection without a harness. A boom adds the risk of ejection. Fall arrest needs a specifically suitable system, enough clearance and a rescue plan.
Belts and harnesses for work at height · What types of belts and harness systems are used?3. Compare a wheel drop with movement at the basket
What is happening: Move the leading tyre towards the open recess. Watch the chassis tilt, then reset the camera to see how far the raised basket moves with it.
How harm can occur: A small movement at ground level can cause a much larger movement at the end of the boom. Loss of support can eject an occupant or overturn the machine.
Best practice to apply: Walk the wheel route first. Verify ground strength, gradients, edges and any covers. Keep the route away from openings. Only travel elevated if the manufacturer permits it and the assessed route is suitable.
Why this works: Restraint may help keep the occupant in the basket. The primary control here is a route that supports every wheel.
Load-Handling Equipment and Lifting Operations · What technical lifting details should learners understand?4. See the closing gap under overhead steelwork
What is happening: Slew the basket in the demonstration. The chassis and gantry stay still. The controls and the operator’s head travel sideways towards the beam.
How harm can occur: Someone pinned between the controls and steelwork may be unable to release the control. Continuing movement can crush them.
Best practice to apply: Assess the whole movement envelope from the ground. Choose a position with clear sight and room for the occupant. Stop when clearance or signals are uncertain. Consider suitable secondary guarding and plan recovery for entrapment.
Why this works: The platform floor can clear an obstruction while the person above it cannot. Reversing or lowering blindly can worsen a crush.
How should construction hazards be controlled? · How can the ISO 45001 hierarchy of controls reduce work-at-height, demolition and excavation risks?5. Keep pedestrians out of the slewing area
What is happening: Turn on the shaded areas to see the counterweight sweep and an example of restricted vision behind the chassis. The responder needs a clear approach to the ground controls.
How harm can occur: A person outside the tyre tracks can still be struck or trapped by the counterweight, or enter beneath the basket.
Best practice to apply: Separate pedestrians and adjacent work from the travel, tail-swing and overhead work areas. Agree how to communicate, who can stop the job and where a signaller can stand safely.
Why this works: The painted arcs explain the mechanism. Set the actual boundary using the machine, site conditions and task.
Load-Handling Equipment and Lifting Operations · What should stop a lifting operation?6. Protect people below and around the boom
What is happening: Follow the dashed line from the basket to the hatched drop zone. Slew the boom and watch the line move. The red and white barriers enclose the full work area, including the counterweight and the space beneath the boom.
How harm can occur: A dropped tool or fitting can strike someone below or bounce beyond the basket footprint. The moving boom, basket or counterweight can strike a passer-by or trap them against a fixed object.
Best practice to apply: Before elevating, barrier off the assessed area and divert pedestrians and nearby work. Allow for the planned reach, tail swing, work height, wind and falling items. Contain loose materials and use suitable tool retention where appropriate. If anyone enters, stop movement and overhead work until the area is clear.
Why this works: The responder stays outside with an agreed safe route to the ground controls for recovery. The hatching illustrates one job. Set the boundary for the actual lift and review it before repositioning.
How should construction hazards be controlled? · How should plant, vehicles and public interfaces be controlled?7. Check the whole boom against overhead power lines
What is happening: The amber arrow shows the basket’s proposed sideways movement. Trace the jib, boom elbow, basket and anything carried through raising, slewing and recovery. The red and white barrier marks a restricted approach.
How harm can occur: A conductor can arc across an air gap before the basket or boom touches it. A flashover or contact can cause fatal shock or burns. The chassis and the ground around it may also be live.
Best practice to apply: Treat the line as live. Move the job outside the boom’s full reach if possible. Otherwise, ask the line owner about diversion or confirmed isolation. For work near a live line, agree site-specific clearances and physical controls with the owner before work. Stop if any part could enter that area.
Why this works: A basket that looks clear can still swing the jib or elbow towards the line. The picture gives no safe working distance. If contact or flashover is suspected, stay in the platform and warn everyone away. Call 999 and the line owner. Keep off the ground controls and wait for the line owner to confirm safety.
Plan plant movement near overhead lines Respond to contact or flashover8. What if a 5 kg hand tool falls 8 metres?
What is happening: A 5 kg hand tool slips clear of the basket, 8 m above the floor. Follow its fall into the empty exclusion zone. People, tools and fittings all count towards the platform load.
How harm can occur: A blunt tool falling this distance carries about 392 J just before impact. DROPS rates this example as having fatality potential if someone is struck. An overloaded platform or a large panel exposed to wind can also make the machine unstable.
Best practice to apply: Check the load and wind limits for this machine and configuration. Secure loose tools and materials, select compatible tool retention for the load, and keep people clear of the fall and deflection area. Stop if anyone enters.
Why this works: Retention prevents the release. The barrier protects people if retention fails. A hard hat alone cannot control this risk. Reassess gusts and the wind area of large materials even when their mass is within the limit.
How should construction hazards be controlled? · How should plant, vehicles and public interfaces be controlled?A 5 kg hand tool falls 8 metres
The model shows a blunt tool slipping from the basket into the empty work zone. The 8 m measurement runs from its release point to the floor.
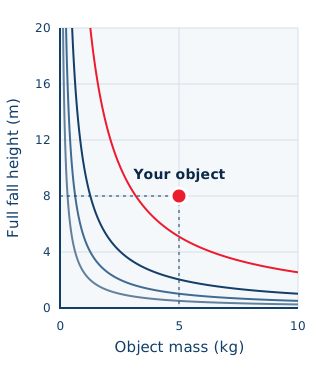
Ideal fall energy 392.27 J
Potential injury outcome Fatality potentialIdeal speed before impact 12.53 m/s. Someone struck by the tool could be killed. The SHAREhub model assumes a blunt object, standard PPE and a fall to the floor or deck. The actual injury depends on the contact.
Secure tools before raising the basket. Use a compatible, rated retention system where appropriate. Allow for deflection or bounce when setting the exclusion zone. Stop work if anyone enters.
Open these values in the SHAREhub dropped-object model9. Check the machine before use
What is happening: Locate the machine information and instruction holder. Inspect tyres, pins, hydraulic lines, platform gate, anchor and controls; function-test the safety systems as the manual describes.
How harm can occur: A worn joint, disabled safety device or faulty emergency lowering system can leave occupants exposed or stranded.
Best practice to apply: Report defects and take unsafe equipment out of use. Check maintenance and thorough-examination records. In Great Britain, equipment lifting people normally needs thorough examination every six months unless a competent person’s examination scheme sets another interval.
Why this works: Pre-use checks, maintenance and formal thorough examination serve different purposes. A current report cannot clear a fault found today.
Load-Handling Equipment and Lifting Operations · What checks, inspections and examinations are needed?10. Make recovery possible before going up
What is happening: Find the ground control panel. Imagine power is lost with the basket beside the beam. Where can the responder see the occupant and access the recovery controls?
How harm can occur: An unplanned descent may tighten a trapping gap. Waiting without a practicable recovery route can delay urgent care.
Best practice to apply: Before elevation, brief and practise the machine-specific rescue plan. Provide a familiarised ground responder, access to controls and keys, two-way communication and an agreed escalation route. Check the path clear before recovery. Call emergency services when needed.
Why this works: A usable rescue plan identifies who will act and how they will recover someone from the actual position, including if normal lowering fails.
Belts and harnesses for work at height · What rescue arrangements are needed before harness work starts?11. Stop for a change, isolate and hand back
What is happening: A hose fault appears at the articulated riser. The task changes from using the machine to maintaining it.
How harm can occur: Gravity, hydraulic pressure or an unexpected command can move an arm while someone is in a crush zone.
Best practice to apply: Stop and secure the machine. Have authorised maintainers follow the manufacturer’s isolation, pressure-release and mechanical support arrangements. Record the defect and verify repairs and tests before hand-back.
Why this works: A stopped engine or an emergency-stop button alone cannot support a raised boom. Never work beneath an unsupported arm.
Load-Handling Equipment and Lifting Operations · What checks, inspections and examinations are needed?
This generic machine illustrates how harm can occur. Its shape and movements give no working limits, safe clearance or operating sequence. For an actual lift, use the machine manual, the site assessment and a practised rescue plan.
The wider workplace has its own account and subscription access. Exploring this lesson does not grant access, record course completion or authorise work.
UK guidance for further reading
HSE: MEWPsIPAF H1: Fall protection in MEWPsHSE: Entrapment and crushing in MEWPsHSE: working near overhead power linesHSE: thorough examinations of lifting equipmentGreat Britain: Work at Height Regulations 2005HSENI: working at height in Northern IrelandHSE GS6 · Avoiding danger from overhead power lines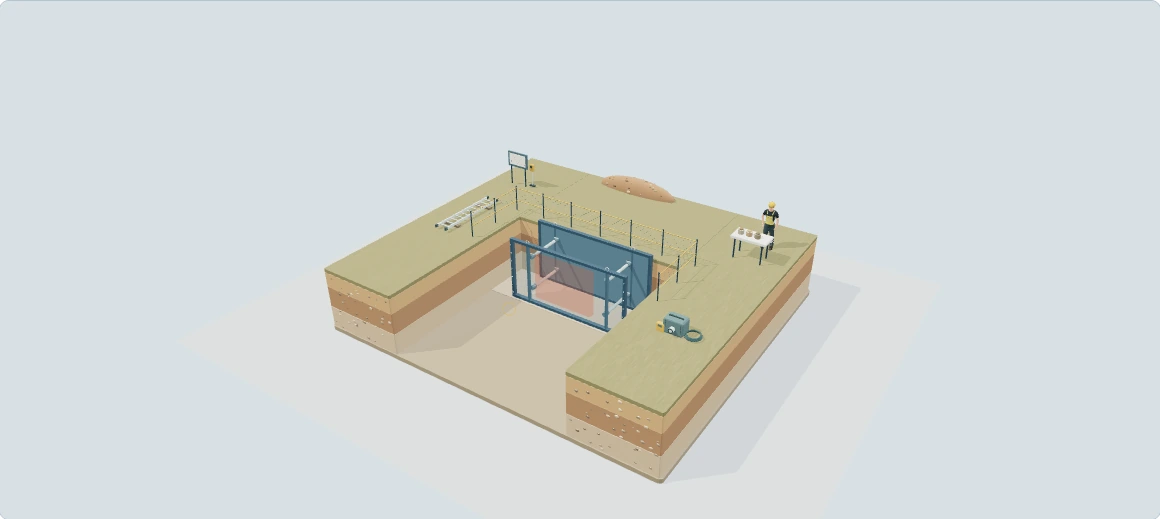
Excavations: see the ground, support and people
Follow a groundworker from planning the excavation to leaving it safely. Compare three ways of dealing with the sides, trace the route in and out, then decide what to do when a machine approaches the edge or water enters.
Checksheets and risk assessments
Equipment checksheets
- Excavations and trench access — 3D checks · Word · PDF
- Excavators and backhoe loaders — 3D checks · Word · PDF
Risk assessment forms
Risk assessment examples
Full written walkthrough — all 13 steps
1. Decide whether anyone needs to enter
What is happening: The cutaway reveals the space a groundworker may occupy and the material surrounding it. The empty excavation is a learning view, not permission to enter.
How harm can occur: Ground movement can bury or crush someone and prevent their escape. People outside can fall into the opening.
Best practice to apply: Consider avoiding entry or using a different method. Establish the design, work sequence, people affected and responsible supervision.
2. Check the ground and neighbouring structures
What is happening: The exposed layers help you see why conditions may change through the ground. Colour does not classify the soil or prove stability.
How harm can occur: Fissures, disturbed ground or undermined foundations can release material or destabilise adjacent structures.
Best practice to apply: Use appropriate site investigation and competent design/review. Check surrounding buildings and services; do not infer stability from a dry-looking face.
3. Locate services before breaking ground
What is happening: The planning station represents records, locating and safe exposure of services. It does not show surveyed service positions.
How harm can occur: A service strike may cause electrocution, burns, fire, explosion or flooding, affecting the operator and nearby people.
Best practice to apply: Plan and verify the actual service locations and precautions. Use the topic’s HSG47 guidance and resolve uncertainty before digging.
4. Trench box — stay inside the shield
What is happening: Look between the two steel panels. The green floor marks the shielded footprint; the spreaders hold the panels apart. The open ends are outside that protection.
How harm can occur: Ground can still move outside the box. A worker reaching past an end or standing between a panel and the trench face can be buried or trapped.
Best practice to apply: Check the specified box, its position, end protection and how workers reach it. Follow the designed sequence for installation, movement and removal. Keep people clear during movement.
5. Shoring — follow the ground load
What is happening: The sheeting bears against the trench faces. Follow the arrows from the ground into the sheets, along the horizontal walers and across the struts to the opposite side.
How harm can occur: A gap behind the sheeting, a displaced waler or a damaged strut can interrupt this load path and allow ground movement.
Best practice to apply: Check the support against the temporary works design and installation sequence. Report a displaced member from a safe position; never remove a brace to make space for access.
6. Battered sides — look at the whole slope
What is happening: Compare the wider opening with the box. Ground has been cut back to form a sloping face, reducing the mass that can fall into the work area. There are no box panels in this example.
How harm can occur: Water, loose layers and loads at the crest can make a previously stable face slip. The end faces also need assessment.
Best practice to apply: A competent person determines the profile for the ground and changing conditions. Allow room for the full batter and protect its crest. Never copy an angle from the model.
7. Compare a stepped cut with a continuous batter
What is happening: The same cross-section now has benches. Notice the short faces and ledges instead of one continuous slope.
How harm can occur: An individual face or the whole cut can fail. A ledge can collect loose material that then falls onto people.
Best practice to apply: Use benches only where specified for the actual ground. Choose a separate access route; the ledges are not a staircase.
8. Enter through the protected landing
What is happening: Follow the green arrows from the approach, through the guarded landing and down the secured ladder. Both feet of the ladder rest on the firm base inside the box, between the spreaders.
How harm can occur: Stepping over the side panel, climbing a brace or landing beyond the box exposes a person to a fall or collapse.
Best practice to apply: Use stairs or another suitable means where the task calls for it. When a ladder is appropriate, secure it on a firm, level base. Extend it at least 1 m above the landing unless another suitable handhold is provided. Face the ladder and keep a secure grip.
9. Trace the escape route back to the surface
What is happening: The arrows reverse. Trace the route along the protected floor to the foot of the ladder, up to the handholds, and back onto the clear surface approach.
How harm can occur: Spoil, hoses or a delivery across either landing can cut off the way out. A clear opening viewed from above tells you little about conditions at the foot.
Best practice to apply: Check both landings before entry. Keep tools off the ladder and arrange to move loads separately. Plan how to raise the alarm and recover an injured person; the ladder alone is not a rescue plan.
10. Keep plant and spoil outside the planned limit
What is happening: Find the excavator behind the marked plant limit and the separate spoil heap. Even a stationary machine adds load to the ground beneath its tracks.
How harm can occur: Extra weight can overload the side or its supporting system. Falling spoil, a slewing bucket or a reversing machine can strike people.
Best practice to apply: Agree the plant route, exclusion zone and spoil location against ground conditions, plant loads and the design. Use suitable barriers or stop blocks where required. The illustrated line gives no safe distance.
11. Plant crosses the limit — stop the movement
What is happening: The same excavator is now between the marker and the trench. Red arrows show extra load beneath the near track. A crack at the crest illustrates one possible warning.
How harm can occur: The edge can give way under the tracks, the machine can overturn, or soil can move towards the trench. Failure can occur before a crack is visible.
Best practice to apply: Stop plant movement, warn others and withdraw from the affected area by the safe route if available. Keep people away. Have the competent team agree safe recovery and reassess the excavation before anyone returns.
12. Water enters — withdraw and reassess
What is happening: Blue streaks show water seeping through the rear face near the end of the box. The blue pool reaches the trench floor and the ladder foot. The red sign marks the hold on entry.
How harm can occur: Flow can wash out fine material, weaken the face and undermine the foot of the ladder. A box does not keep out water or protect the open ends.
Best practice to apply: Stop affected work, raise the alarm and use a safe exit if available. If it is cut off, use the emergency plan. Keep others out. Review inflow, support, drainage and discharge together; uncontrolled pumping can make the ground less stable.
13. Who can release the excavation for work?
What is happening: The route remains on hold while the competent inspector checks the actual excavation. This last scene is a decision point: a clear floor after pumping is insufficient evidence to restart.
How harm can occur: An unseen void, damaged support or undermined landing can remain after water recedes or the machine has moved.
Best practice to apply: Inspect at the start of each shift and again after an event likely to affect stability or a fall of material. Record the findings as required, correct defects, check access and brief the team. Resume only once the competent inspection confirms safe conditions.
Illustrative awareness learning. The model does not design equipment, authorise work, verify safe conditions or complete a real inspection.
The wider workplace has its own account and subscription access. Exploring this lesson does not grant access, record course completion or authorise work.
UK guidance for further reading
HSE: excavation safetyHSE HSG47: avoiding danger from underground servicesHow can I practise this topic in 3D?
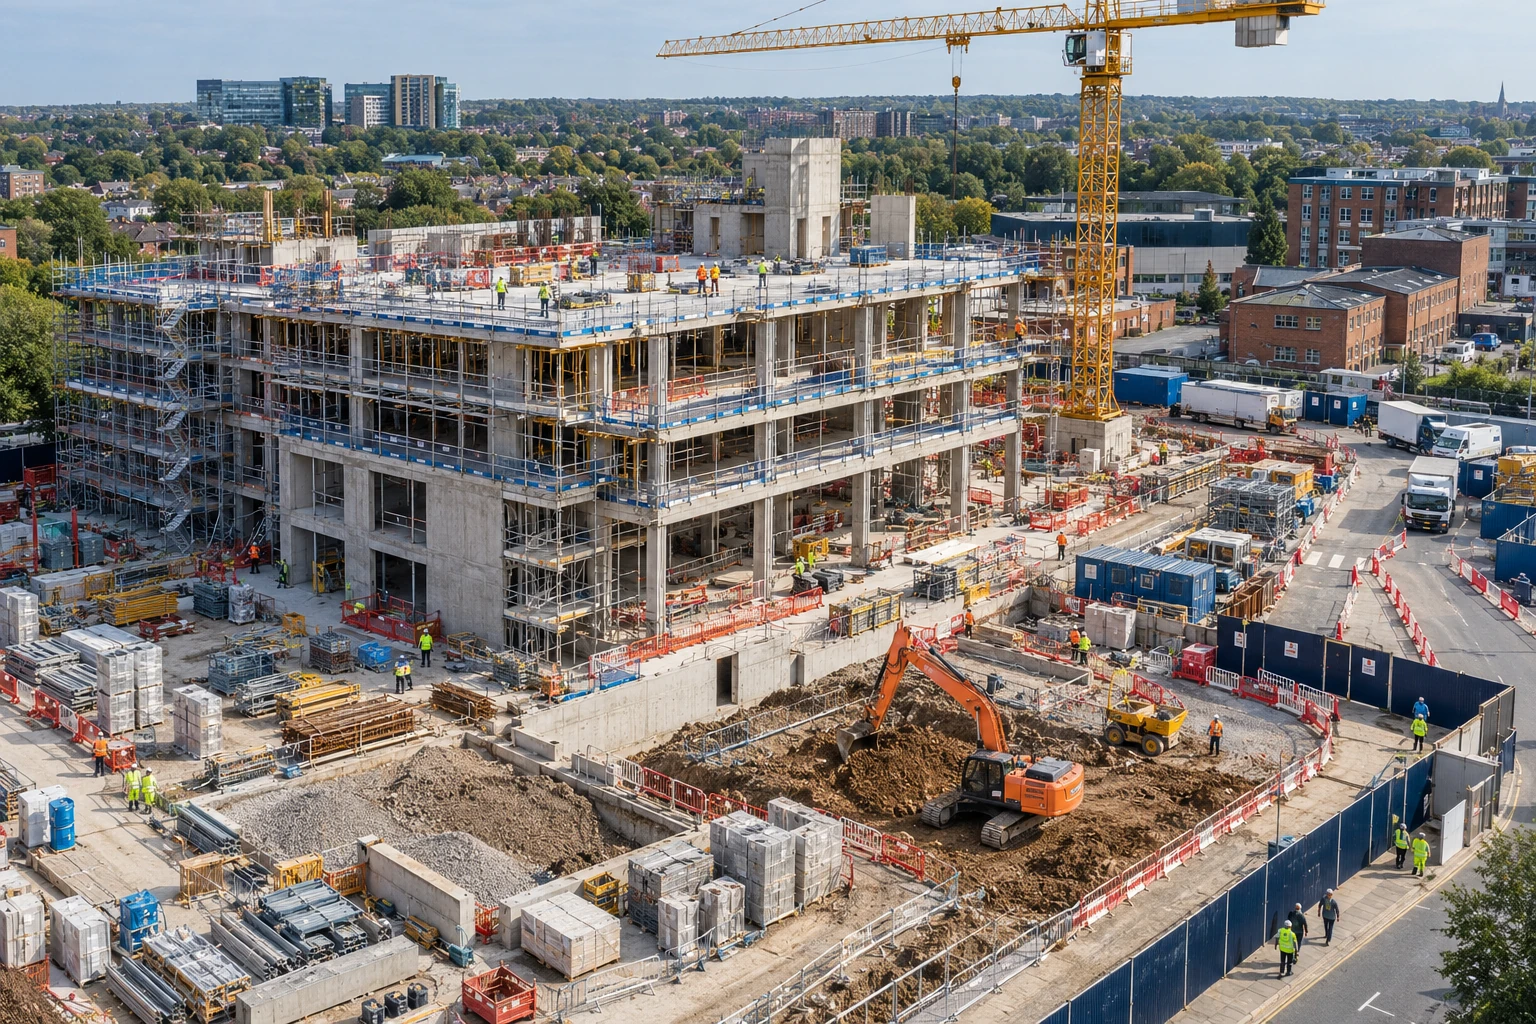
Prop removal is proposed without design review
All related inspection points 4 across 1 location
Construction site 4 inspection points
Practice in the SHAREhub environment. Browser practice is separate from workplace competence and formal learning records.
Plan the interfaces when construction hazards overlap
This is an orientation route to three different decisions, not a single technical method. Work at height starts with avoidance and fall prevention; demolition starts with adequate structural information and competent sequencing; excavation starts with ground, services, stability, access and surrounding loads. Combined work needs the interfaces planned together.
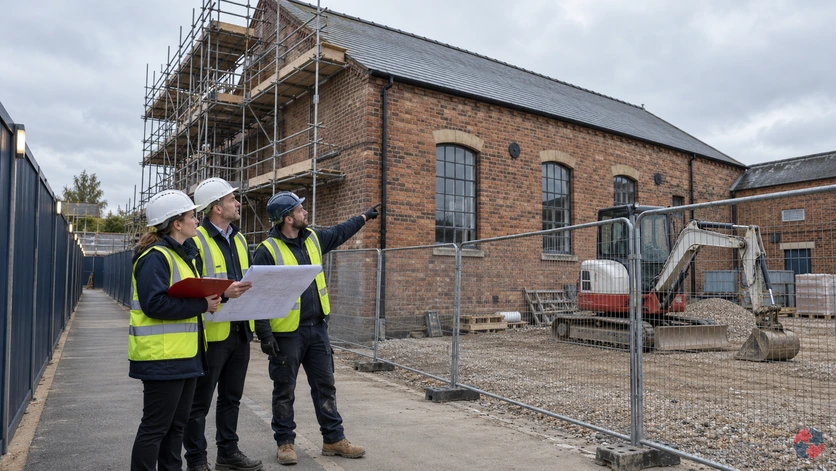
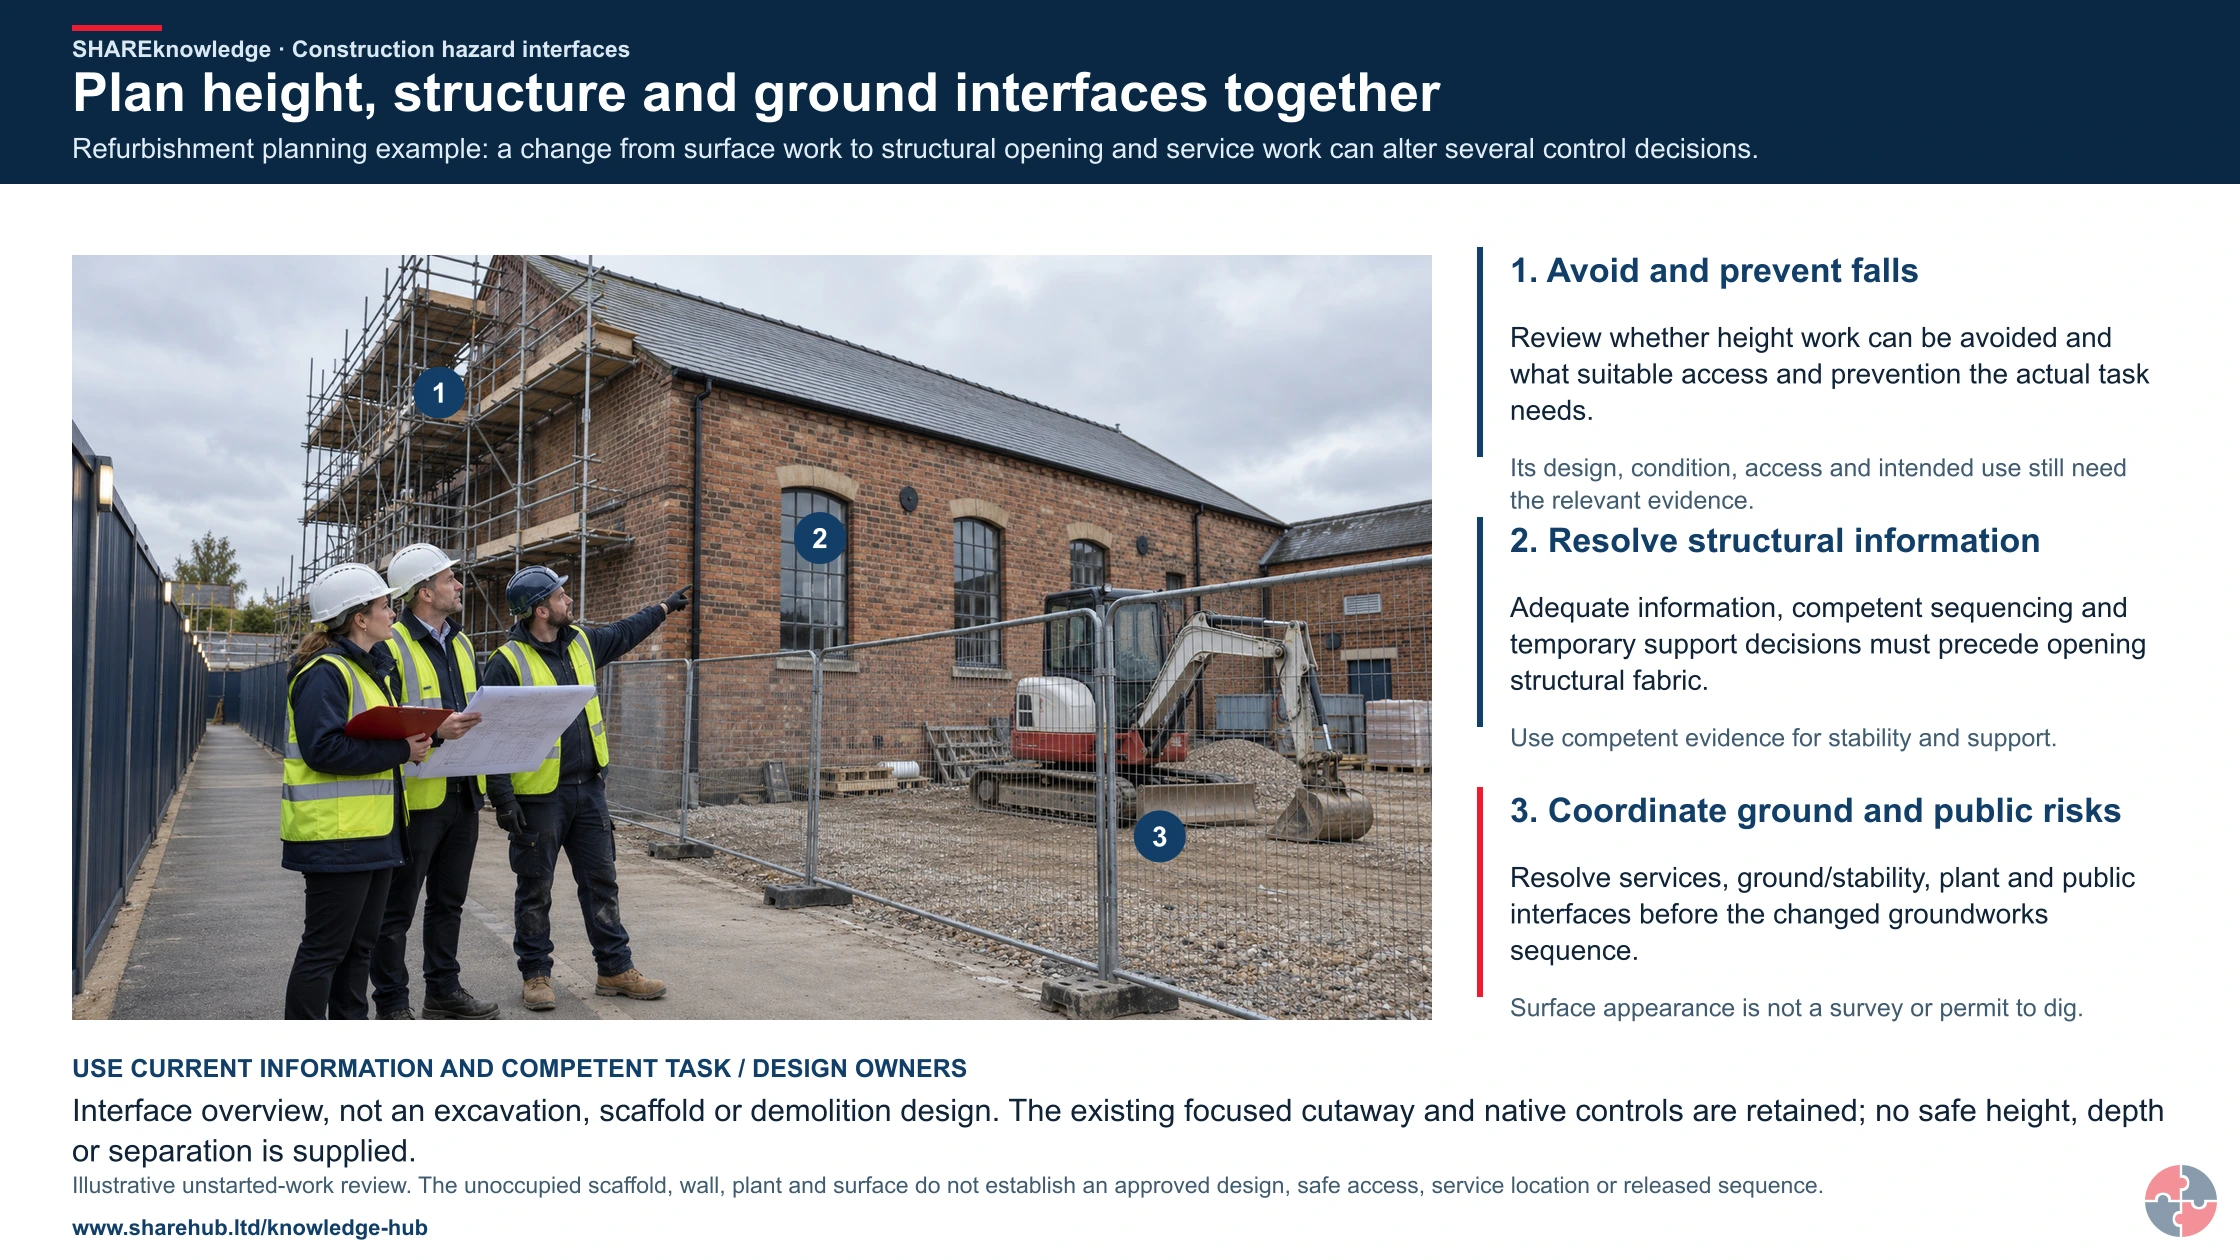
Plan height, structure and ground interfaces together
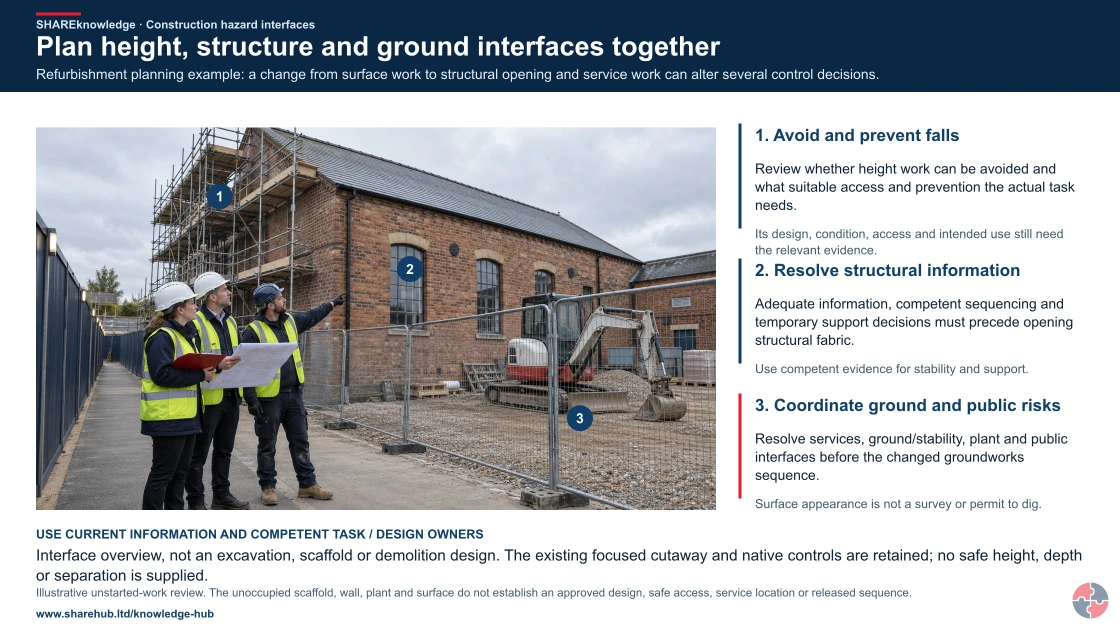
Full written explanation
Refurbishment planning example: a change from surface work to structural opening and service work can alter several control decisions.
- Avoid and prevent falls. Review whether height work can be avoided and what suitable access and prevention the actual task needs.
- Resolve structural information. Adequate information, competent sequencing and temporary support decisions must precede opening structural fabric.
- Coordinate ground and public risks. Resolve services, ground/stability, plant and public interfaces before the changed groundworks sequence.
Change the pathway
- Do not read approval from a scaffold. Its design, condition, access and intended use still need the relevant evidence.
- Do not open up on assumption. Use competent evidence for stability and support.
- Do not infer the underground layout. Surface appearance is not a survey or permit to dig.
Evidence check: Interface overview, not an excavation, scaffold or demolition design. The existing focused cutaway and native controls are retained; no safe height, depth or separation is supplied.
Existing focused excavation cutaway and its design limits
Primary references: HSE: temporary works and sequence (GB) · HSE: excavation precautions and nearby structures (GB) · HSE: demolition planning (GB)
Open the complete HD image (new tab)Download image
Existing focused excavation cutaway and its design limits
Primary references: HSE: temporary works and sequence (GB) · HSE: excavation precautions and nearby structures (GB) · HSE: demolition planning (GB)
For an opening-up job beside an occupied building, resolve structural information and temporary support before removing fabric, protect edges as the opening develops, locate services before excavation and keep the public separated. A change in sequence may alter every control. The project needs competent design and task authority where required, rather than one generic permit or an assumed safe height or depth.
BuildOut: opening a wall beside a service trench
Illustrative example. A refurbishment changes from surface repair to opening structural fabric beside an excavation and public route.
Decision. The site manager holds the changed sequence while competent designers and task leads resolve stability, support, services and segregation.
Evidence to check. Current structural and service information, temporary-works decisions, protected access and coordinated method and briefings.
Hold or escalation point. No opening-up or excavation while essential information or interacting controls remain unresolved.
Follow-up. Check the changing workface against the coordinated plan and reauthorise after relevant findings or design change.
Check the structural and access interfaces together
Work at height, demolition and excavation can affect one another through loads, stability, falling material and routes. Separate task assessments need a coordinated interface review.

Dependencies
Identify how removal, excavation or loads can affect structural support and adjacent work.
Routes and exposure
Control falling material, plant/public movement and access; protect services and emergency routes.
Change and verification
Keep people out of affected areas when assumptions change and obtain the competent coordinated reassessment before restart.
The cross-section gives no dismantling sequence, scaffold loading, trench support design or clearance dimension.
What are the key points about construction, work at height, demolition and excavation?
The key points are that construction risk changes quickly and must be planned, coordinated, supervised and reviewed as the project develops.
Plan before work starts
Pre-construction information, surveys, programme, sequencing and dutyholder appointments shape the control standard.
Use the hierarchy seriously
Avoid work at height, design out entry into excavations and use machines or remote methods where they remove exposure.
Control interfaces
Construction incidents often occur where trades, plant, temporary works, public routes, live services and changing workfaces meet.
Do not rely on generic RAMS
The method must match the site, structure, ground, weather, access, adjacent activities and people involved.
Health risks count
Dust, silica, asbestos, noise, vibration, manual handling and cement can cause serious long-term harm if treated as background issues.
Evidence must be live
Inspections, permits, briefings, temporary works checks, excavation reports and dust controls should prove work is controlled today.
What does this construction hazard group cover?
This construction hazard group covers the core safety and health risks that arise during site setup, work at height, demolition, excavation and changing construction workfaces.
Construction is not a single hazard. A typical project may combine temporary access, scaffolding, lifting, excavations, demolition, dust, plant, electricity, fuel storage, hot work, manual handling, weather, temporary works and members of the public nearby. The risk profile changes as the project moves from enabling works to demolition, groundworks, structure, fit-out and commissioning.
This page is a gateway page. It gives the overall logic and directs readers to deeper topic pages for work at height, buried services, construction dust, silica, asbestos, demolition, excavation, temporary works and permit-to-work systems. That keeps the page useful for beginners while still giving managers and learners a structured view of how the risks fit together.
| Area | Typical risks | Deep-dive page link |
|---|---|---|
| Work at height | Falls from edges, roofs, ladders, scaffolds, MEWPs and fragile surfaces. | <a href="working-at-height.html">Working at height</a> |
| Demolition | Structural collapse, falling debris, dust, asbestos, services and public risk. | <a href="demolition.html">Demolition</a> |
| Excavation | Collapse, falls, services, water, fumes and undermining structures. | <a href="excavation.html">Excavation</a> |
| Construction health risks | Dust, silica, asbestos, noise, vibration, cement and manual handling. | <a href="construction-dust.html">Construction Dust</a> |
| Temporary works | Falsework, scaffolds, shoring, propping, formwork and temporary stability. | <a href="temporary-works.html">Temporary works</a> |
| Project controls | CPP, CDM dutyholders, RAMS, permits, inspection and contractor coordination. | <a href="construction-phase-plan.html">Construction phase plan</a> |
How do the main construction hazards connect?
Construction hazards connect through sequencing, space, interfaces, temporary structures, plant movement and changing site conditions.
A construction hazard rarely exists alone. An excavation may also involve buried services, plant movement, temporary works, public protection, water ingress and confined-space conditions. Demolition may involve work at height, dust, asbestos, hot work, lifting and structural instability. Work at height may be affected by weather, poor access, fragile materials and falling objects.
A useful hazard map groups risks by how harm could occur: falls, collapse, struck-by, caught-between, contact with energy, inhalation, fire, explosion, manual handling, health exposure and emergency failure. This helps planners avoid treating every trade package as a separate island.
| Hazard pathway | Examples | Control focus |
|---|---|---|
| Falls | Roof edges, ladders, scaffolds, MEWPs, fragile roofs and excavations. | Avoid height, prevent falls, collective protection and rescue. |
| Collapse | Excavations, demolition, temporary works and unstable structures. | Engineering design, sequencing, support, exclusion and inspection. |
| Struck-by | Falling materials, plant, vehicles and lifted loads. | Segregation, exclusion zones, lift plans and material control. |
| Energy contact | Electricity, services, pressure, hydraulics and moving plant. | Isolation, detection, permits and competent work. |
| Health exposure | RCS, wood dust, asbestos, cement, noise and vibration. | Assess, control, review, LEV, water suppression, RPE and surveillance. |
| Emergency failure | Fire, collapse, rescue, access blockage and poor communication. | Emergency plan, drills, access routes and site briefings. |
How should construction hazards be planned together?
Survey the site and sequence interfaces before work; one contractor’s excavation, lift or demolition can remove another team’s safe route or support.
The HSE CDM overview places coordination across client, designers, principal contractor and contractors. Before a city-centre refurbishment, obtain structural and asbestos information, locate services, plan access and plant routes, set public exclusion, identify temporary support and agree hold points. The plan should identify who authorises each change, what needs inspection and how people report a weakened edge, trench or prop. Separate task-specific assessments and engineered designs still matter; a generic construction phase plan cannot calculate a prop or safe excavation.
On a small screen, scroll this table sideways to read all columns.
| Interface | Owner and evidence | Stop trigger |
|---|---|---|
| Height and edge | Site manager checks platform/guardrails and fragile-surface survey. | Stop if protection or route fails. |
| Demolition and structure | Demolition engineer validates sequence and temporary support. | Stop on unexpected movement or unsupported load. |
| Excavation and services | Excavation lead confirms service scan, support and access. | Stop on unknown cable/pipe, water or ground movement. |
| Public and plant | Principal contractor checks barrier, traffic plan and spotter. | Stop on public intrusion or lost separation. |
What is the work-at-height decision order?
Avoid work at height where reasonably practicable; if not, prevent falls, then minimise their distance and consequences, putting collective measures before personal protection.
The HSE hierarchy is a specific legal sequence, so a harness is not the default first choice. Assemble edge protection at ground level where feasible; otherwise use a safe existing place or a suitable guarded platform/MEWP. Where prevention is not possible, choose a suitable fall-mitigation system with a realistic rescue plan. A competent supervisor checks the anchor and inspection records and stops for a missing guardrail, fragile rooflight, failed access or adverse conditions. In NI, HSENI identifies its separate 2005 rule and the same priority for collective protection.
The work-at-height avoid/prevent/minimise sequence and preference for collective protection remain the specific fall-risk decision order. The general five-level hierarchy complements that sequence; a harness or generic hierarchy table does not replace it.
How should demolition be planned and controlled?
Demolition should be planned by competent people using structural information, surveys, sequencing, exclusion zones, dust controls and public protection.
Demolition can expose hazards that are hidden or poorly understood: asbestos, lead, silica, unstable modifications, damaged structural elements, live services, voids, post-tensioned components, fire load, falling debris and dust. The method must be based on the structure and site, not on a generic demolition sequence.
Clients and designers should provide information before demolition starts. Contractors need competent demolition planning, structural stability consideration, exclusion zones, plant selection, dust and debris controls, traffic management, service isolation and emergency arrangements. The public and neighbouring properties must be considered where the site boundary is close or structures are shared.
| Control area | Good practice | Evidence |
|---|---|---|
| Surveys and information | Identify structure, services, asbestos, hazardous materials and adjacent risks. | Pre-demolition survey and PCI. |
| Method and sequence | Plan a stable sequence with competent engineering input where needed. | Written demolition method and review. |
| Exclusion and public protection | Keep people away from collapse, falling materials and plant. | Hoarding, barriers and traffic/pedestrian plan. |
| Dust and health | Control RCS, asbestos, wood dust, lead and other contaminants. | Dust plan, water suppression, LEV/RPE and monitoring. |
| Plant and debris | Select plant and manage drop zones, loading and waste. | Plant plan and waste route. |
| Emergency arrangements | Plan for collapse, fire, service strike and rescue. | Emergency plan and briefings. |
How should excavation work be controlled?
Excavation work should prevent collapse, falls, service strikes, water ingress, hazardous atmospheres and undermining of nearby structures.
Excavations can kill without warning. HSE reminds dutyholders that no ground can be relied upon to stand unsupported in all circumstances, and a cubic metre of soil can weigh more than a tonne. Short duration is not a defence if people enter unsupported ground or plant is parked close to an edge.
The design should consider trenchless methods where possible. Where digging is needed, planning should include ground conditions, underground structures, water courses, buried services, temporary support, battering, spoil placement, edge protection, access and inspection by a competent person.
| Hazard | Control | Evidence |
|---|---|---|
| Collapse | Support, trench boxes, battering or benching designed for conditions. | Temporary works design and inspection. |
| Falling material | Keep spoil, plant and materials away from edges. | Edge management and site checks. |
| Falls into excavation | Use barriers, covers and protected routes. | Inspection and layout plan. |
| Buried services | Use plans, CAT and Genny, trial holes and safe digging. | Permit to dig and service drawings. |
| Water or fumes | Control inflow and avoid exhaust accumulation. | Pumping, ventilation and atmosphere checks where needed. |
| Inspection | Competent inspection at required times. | Excavation inspection records and action close-out. |
How do excavation controls protect nearby structures and other construction work?
Use the cutaway to examine foundations, water, loading and temporary works together. A trench box shields its intended working space but does not automatically support nearby ground or buildings.
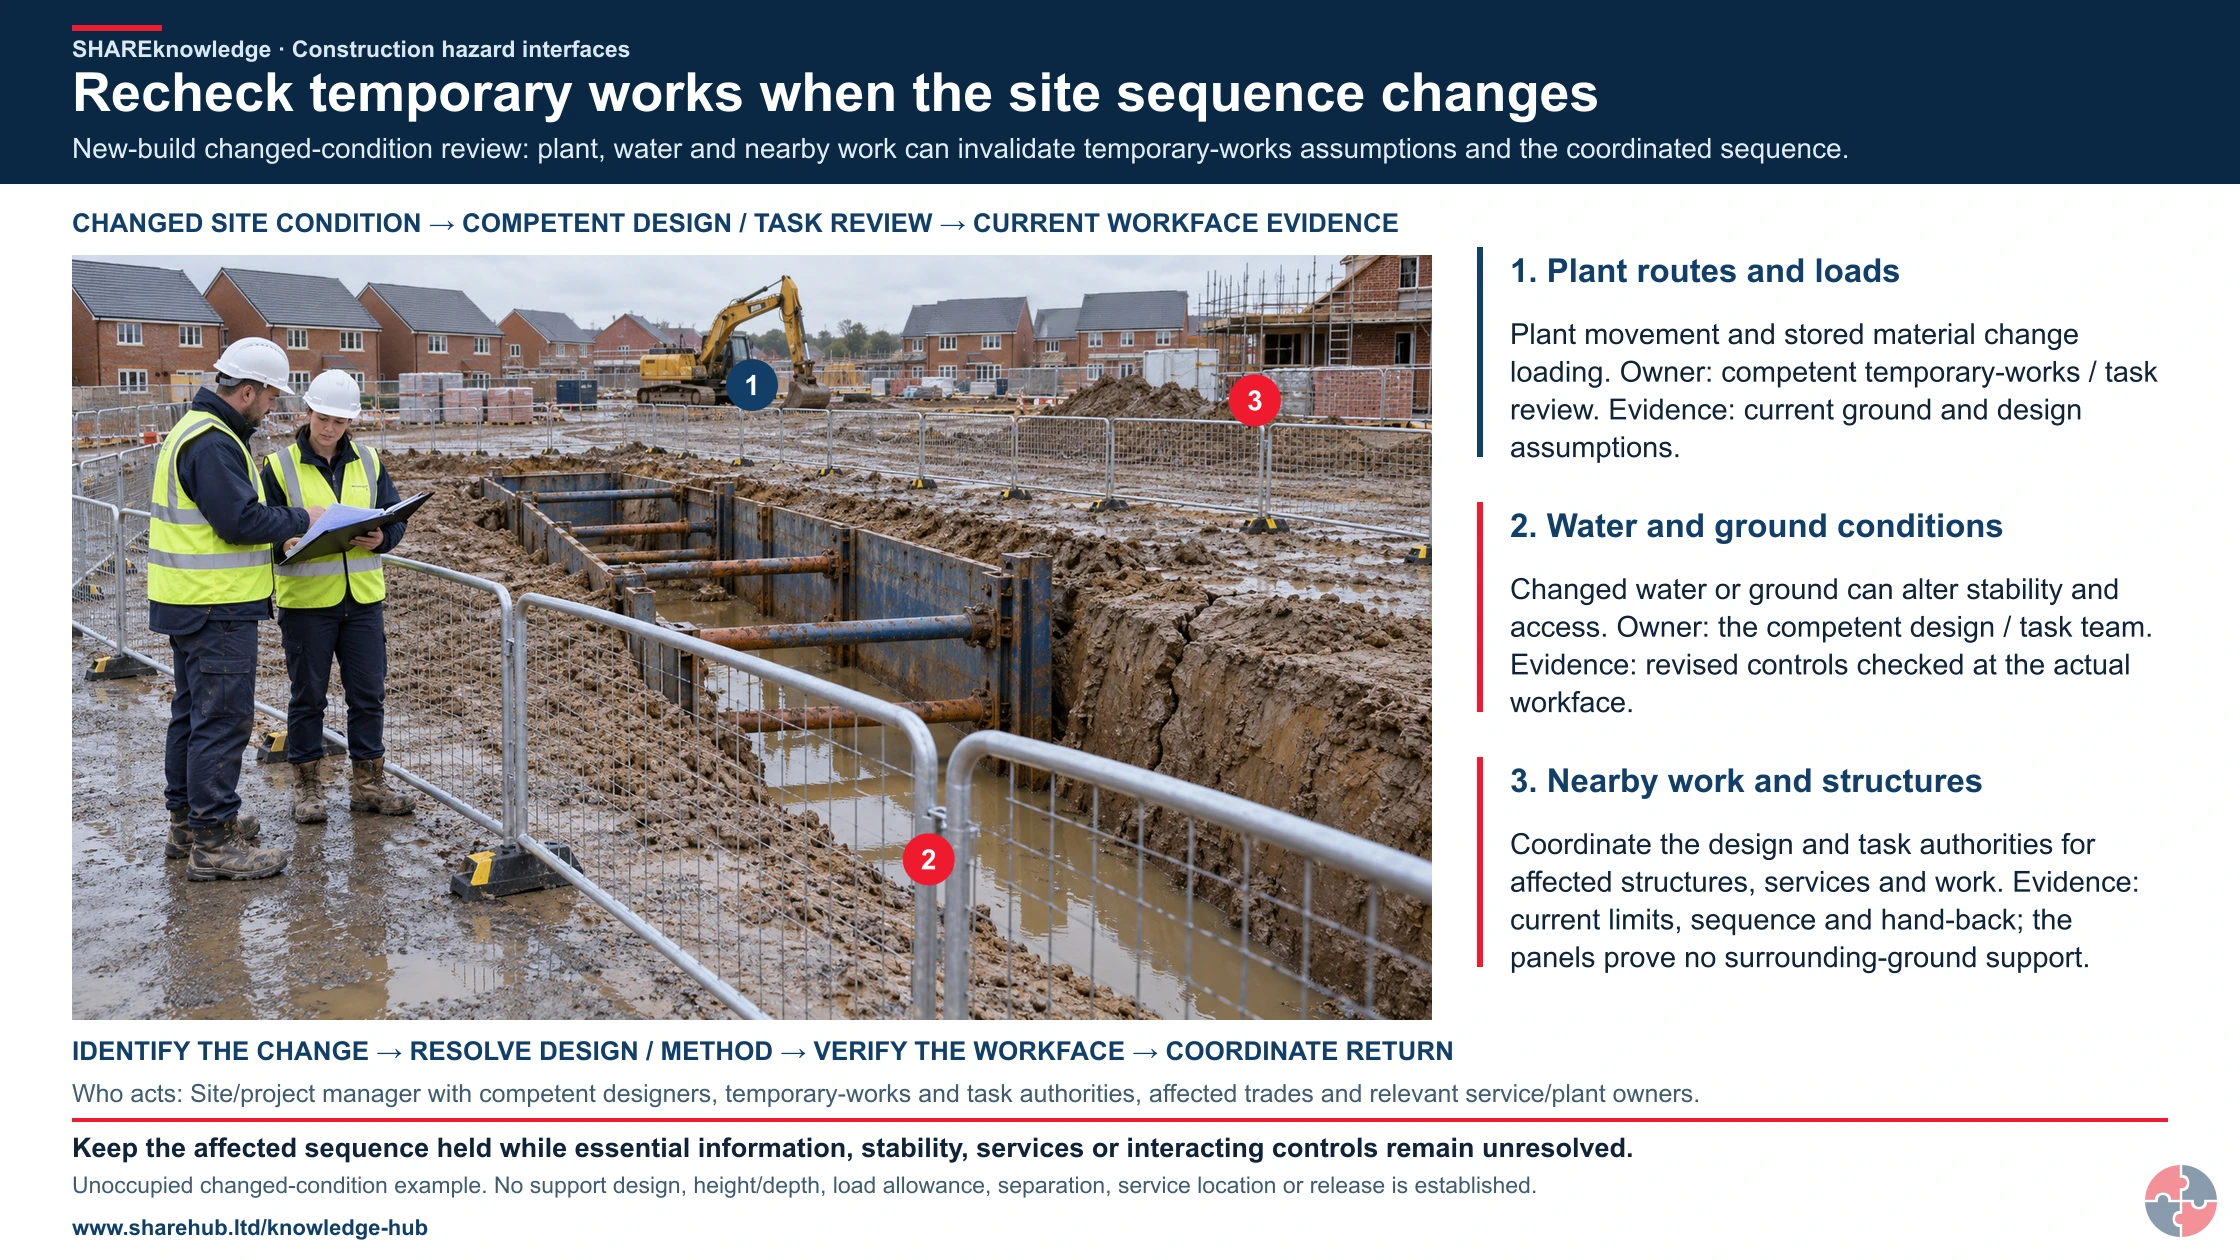
Recheck temporary works when the site sequence changes
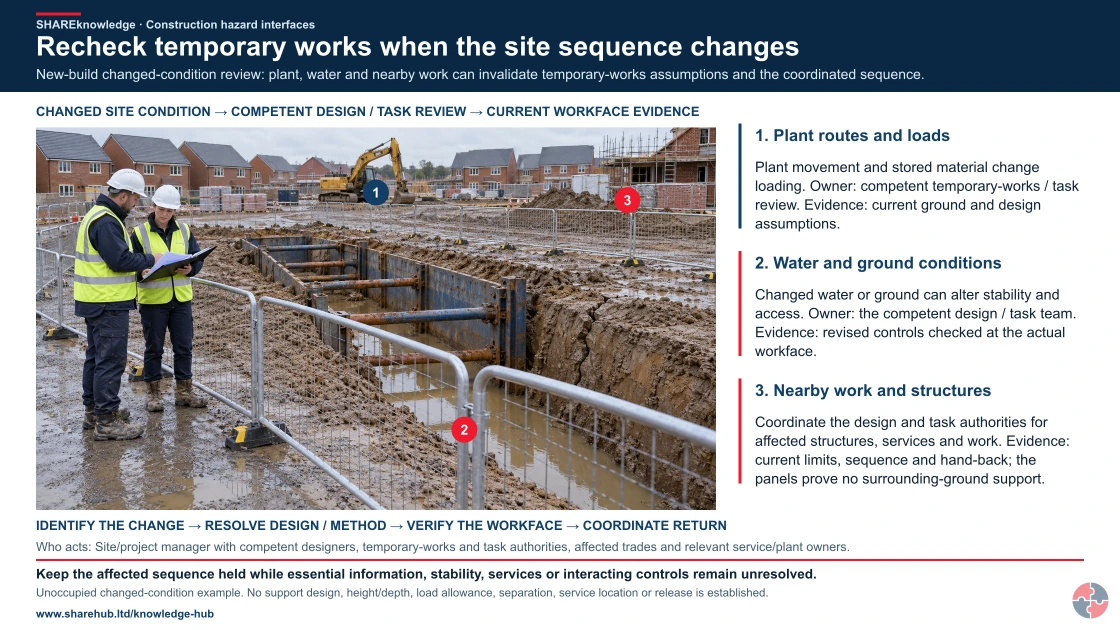
Full written explanation
A realistic UK new-build scene makes the changed temporary-works interfaces visible together: an empty waterlogged excavation with steel panels and struts, wet ground, parked excavator, stored materials, nearby homes under construction and two reviewers remaining outside a barrier. Three numbered native markers link plant/loading, water/ground and nearby structures to the actual competent review and current evidence required. The existing three-row changed-condition, owner/review and evidence comparison is retained in full; the new annotated physical relationships support it rather than replace it with a decorative image. A complete native route connects identification of a change, design/method review, actual workface verification and coordinated return. It gives no excavation, demolition or access procedure. Steel panels in the picture do not identify a particular support system or prove its adequacy, nor do they establish support for surrounding ground or buildings. Barrier position, plant position, ground, water and building foundations are illustrative, not surveyed design dimensions or accepted arrangements. Nobody is inside the excavation or operating plant. The original focused excavation cutaway, interactive controls, structural/service information, work-at-height and demolition requirements, inspection, change and hold conditions remain unchanged. No safe height or depth, loading limit, separation distance, service location or permission is introduced.
New-build changed-condition review: plant, water and nearby work can invalidate temporary-works assumptions and the coordinated sequence.
- Identify the changed interface. Review plant routes, loads, ground/water, nearby structures, services and other work affected by the new sequence.
- Resolve the design and method. Competent designers and task leads address current information, support, protected access and separation needs.
- Verify the actual workface. Check the relevant installed arrangements against the current plan; distinguish shielding from support of surrounding ground.
- Record and coordinate return. Keep unresolved work held, communicate the accepted limits and reassess further changes through the responsible route.
When the evidence does not fit: Keep opening-up or excavation held while essential information or interacting controls are unresolved. A different sequence requires coordinated competent review, not a generic permit or assumed safe height/depth.
Who acts: Site/project manager with competent designers, temporary-works and task authorities, affected trades and relevant service/plant owners.
Changed workplace
Refurbishment overlap: Structural opening, roof access and service work need their interacting controls coordinated.
New-build sequence: Review plant and temporary-works assumptions when loads, ground or nearby activity changes.
| CHANGED SITE CONDITION | CONTROL / OWNER TO REVIEW | EVIDENCE BEFORE THE NEW SEQUENCE |
|---|---|---|
| Plant route or stored loads change | Competent temporary-works / task review | Check current ground and design assumptions |
| Water or ground conditions change | Reassess stability and protected access | Verify the revised controls at the workface |
| Nearby structures or work are affected | Coordinate the design and task authorities | Record current limits, sequence and hand-back |
Evidence check: Interface overview, not an excavation, scaffold or demolition design. The existing focused cutaway and native controls are retained; no safe height, depth or separation is supplied.
Existing focused excavation cutaway and its design limits
Primary references: HSE: temporary works and sequence (GB) · HSE: excavation precautions and nearby structures (GB) · HSE: demolition planning (GB)
Open the complete HD image (new tab)Download image
Existing focused excavation cutaway and its design limits
Primary references: HSE: temporary works and sequence (GB) · HSE: excavation precautions and nearby structures (GB) · HSE: demolition planning (GB)
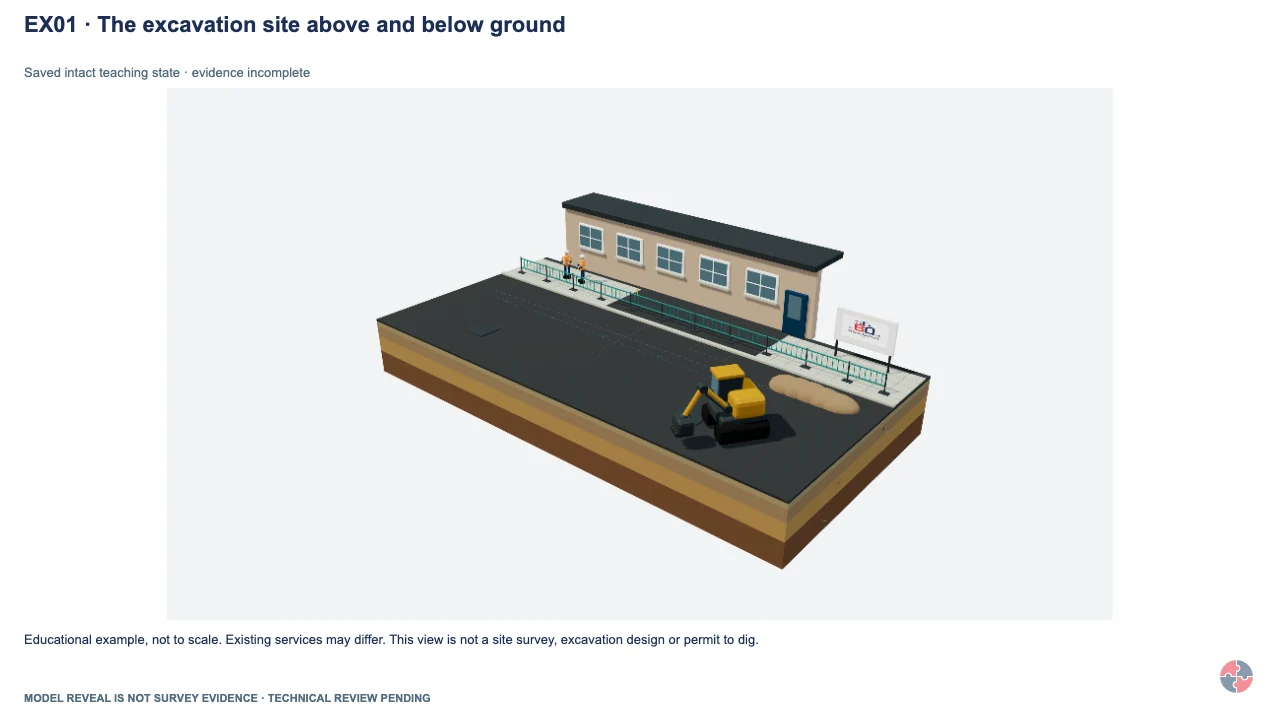
Breaking ground and underground services
Build Out UK is planning a drainage connection beside an occupied building. Follow the crew from the first drawing to handover. Decide what they can verify before anyone breaks ground.
Read the nine-step walkthrough
Plan the ground disturbance
What you can see At street level you can see a parked excavator, a building and a pedestrian route. There are no visible signs of every service crossing the proposed work.
How someone could be hurt A person drilling or driving a stake can strike a shallow service even when no trench is planned.
What the team does Could the connection be rerouted or completed without disturbing the ground? Define the work area and who could be affected, including building users. Agree responsibilities before bringing plant into position.
Read the records against the site
What you can see Compare the recorded route with building entries, chambers and the present kerb. A new surface can hide an old branch or make a recorded depth misleading.
How someone could be hurt A branch missing from the drawing can cross the tool path and expose the crew to electric shock, burns or a gas release.
What the team does Obtain current plans from service owners, including private supplies. Mark uncertainties on the working plan. A drawing alone does not establish where to dig.
Locate and mark the indications
What you can see The operator and receiver cross the search area. A mark records an indication; an unmarked strip may still contain a service. A plastic pipe can give no direct signal.
How someone could be hurt A missed or misinterpreted signal can leave a live cable inside the area the crew believes has been checked.
What the team does Use trained operators and suitable, checked locating equipment. Compare the findings with the plans, mark the ground and repeat locating as the work advances.
Stop at the unexplained crossing
What you can see The cutaway shows several runs at a crossing. One is unidentified. Similar coverings and neighbouring signals can make separate services look like one.
How someone could be hurt Following the wrong line can put a tool into an unidentified live cable or pressurised pipe.
What the team does Hold the affected work. Check the discrepancy with the supervisor and asset owner and agree further investigation. Colour, apparent age and silence from a detector cannot establish identity or condition.
Verify the service at a trial hole
What you can see A small exposure shows where one service is at that point. The next section remains concealed and can change direction or level.
How someone could be hurt An exposed point can give false confidence further along the run. A service may rise or turn towards the next cut.
What the team does Under the agreed safe digging method, use carefully located trial holes and suitable tools. Record the observed position and limits. Keep the unverified continuation marked as uncertain.
Agree the limits and method of digging
What you can see The exposure view brings the tool, ground and service into the same space. The consequences of a strike depend on what is present; a cable can arc and a damaged gas pipe can release gas.
How someone could be hurt Cutting or crushing a cable can produce an arc. A gas release can ignite and harm people beyond the excavation.
What the team does Brief the team on the work limits, suitable tools, owner requirements and stop conditions. Use a permit to dig where the site system requires one. If conditions change, stop and reassess.
Protect the exposed service
What you can see The visible span and the impact protection serve different purposes. Plant, spoil or a falling object can damage a service even after it has been located.
How someone could be hurt An unsupported pipe can move or fracture. A bucket or dropped tool can also damage its exposed surface.
What the team does Agree support and protection with the asset owner, maintain segregation and inspect for change. For ground stability, trench entry and edge protection, use the separate excavation safety model.
Respond to a suspected strike
What you can see Work is stopped and the affected area is clear. A service can be damaged without visible leakage, sparks or an immediate interruption to supply.
How someone could be hurt A damaged cable may remain live. A gas release may spread away from the strike and endanger people outside the immediate work area.
What the team does Stop work, keep people away and follow the site emergency arrangements. Notify the asset owner and call emergency services where there is immediate danger. Keep work on hold pending competent direction.
Record and hand back
What you can see The final open view is the opportunity to record verified positions before they are covered. The drawing should distinguish observed points from the route still inferred between them.
How someone could be hurt A repair left unrecorded, or a service damaged during backfilling, can expose the next crew or the public to harm.
What the team does After any suspected strike, wait for the owner’s direction and release before reinstatement. Record the service owner’s checks, protection, photographs and reinstatement requirements. Brief the next shift on outstanding uncertainty and submit the updated record to the responsible parties.
Educational example, not to scale. Existing services may differ. This view is not a site survey, excavation design or permit to dig.
Focused excavation example only; this module does not cover demolition or all work at height.
Return to the main excavation lesson · Explore the planned Build Out excavation controls
How should construction health risks be managed?
Construction health risks should be assessed, controlled and reviewed with the same discipline as immediate safety hazards.
Construction health risks can be less visible than falls or collapse, but the consequences can be severe. Respirable crystalline silica, wood dust, asbestos fibres, cement, solvents, welding fumes, noise, vibration and manual handling can cause irreversible disease or long-term harm. Controls need to be built into the method, not added as an afterthought.
The HSE construction health-risk model is simple and useful: assess the risk, control exposure and review whether controls are working. For dust, this means planning the cut, reducing dust generation, using water suppression or on-tool extraction, selecting suitable respiratory protective equipment, maintaining controls and supervising use.
| Health risk | Where it appears | Control focus |
|---|---|---|
| Silica dust | Cutting, grinding, drilling concrete, stone, brick, mortar and tiles. | Eliminate, water suppression, on-tool extraction, RPE and health surveillance where needed. |
| Asbestos | Refurbishment, demolition and older building fabric. | Survey, manage, avoid disturbance and use licensed/non-licensed controls. |
| Cement | Wet cement, mortar and concrete. | Skin protection, washing, training and prompt first aid. |
| Noise | Breakers, saws, plant and demolition. | Reduce at source, hearing protection zones and health surveillance where needed. |
| Vibration | Hand-held breakers, drills and grinders. | Tool selection, exposure control, maintenance and health surveillance. |
| Manual handling | Blocks, boards, plant, materials and awkward work. | Mechanical handling, team lifts, design and task planning. |
How should plant, vehicles and public interfaces be controlled?
Plant, vehicle and public interfaces should be controlled through segregation, site layout, visibility, competent operators, supervision and clear communication.
Construction sites often operate in tight spaces with deliveries, pedestrians, mobile plant, public footpaths, occupied premises and changing routes. A good site layout separates people from vehicles wherever possible, avoids reversing, controls loading and unloading, maintains pedestrian routes and protects the public from work activity.
Public protection is not just hoarding. It includes falling objects, dust, noise, traffic, excavations, fire, service disruption, unauthorised access, children, vulnerable people and neighbouring businesses. The site should be planned as part of its surroundings.
| Interface | Control | Evidence |
|---|---|---|
| Pedestrian and vehicle routes | Segregate, sign, light and maintain routes. | Traffic management plan and inspections. |
| Reversing | Eliminate or reduce reversing and use banksmen only where needed. | Vehicle plan and supervision. |
| Deliveries | Plan loading, unloading, storage and access. | Delivery schedule and unloading method. |
| Public boundary | Use hoarding, barriers, covered walkways and information. | Boundary inspection and communication plan. |
| Security | Prevent unauthorised access, especially out of hours. | Fencing, locking and site checks. |
| Neighbouring operations | Coordinate with occupied premises or adjacent sites. | Interface meeting and contact route. |
How should temporary works and structural stability be managed?
Temporary works and structural stability should be designed, checked, installed, inspected and altered only under competent control.
Temporary works include scaffolds, excavation supports, falsework, formwork, propping, shoring, temporary platforms, edge protection, temporary roofs, hoardings and temporary stability measures during demolition or alteration. Failure can cause collapse, falls, struck-by incidents and public harm.
Temporary works need a clear management process: identify the need, appoint competent people, prepare a design brief, design the works, check the design where required, install to the design, inspect before use, control changes and dismantle safely. Informal site improvisation is one of the main warning signs.
| Stage | What should happen | Evidence |
|---|---|---|
| Identify | Recognise temporary works early in planning. | Temporary works register. |
| Design brief | Define loads, ground, sequence and constraints. | Design brief and assumptions. |
| Design and check | Use competent designers and suitable checking. | Design calculations and check certificate. |
| Install | Build to the approved design. | Inspection and hold-point sign-off. |
| Alter | Control changes through design review. | Change record and reinspection. |
| Dismantle | Plan removal without destabilising the works. | Dismantling sequence and supervision. |
The HSE temporary-works page identifies a formally appointed coordinator with authority to stop work as an effective arrangement. It does not prescribe that named role for every project. Define proportionate competent design/checking, installation acceptance, inspection, maintenance, change and safe dismantling. Follow the actual design and equipment instructions; do not assume an ordinary access scaffold restrains a building being demolished.
How can the hierarchy of controls reduce work-at-height, demolition and excavation risks?
Design out the trench first; then reduce depth/exposure, engineer collapse protection, enforce the safe method and use PPE only for residual hazards.
Consider installing a service under a road. Trenchless routing may avoid entry if feasible. A shallower or rerouted design may reduce exposure. Where excavation is needed, a competent temporary-works design specifies trench box, shoring or battered sides for ground and surcharge loads; locate services and separate plant. The supervisor checks supports, access and inspections before each shift and after rain or movement. The HSE excavation guide warns that no ground can be assumed stable unsupported. Stop for water ingress, unsupported change, damaged support or unknown service; an engineer authorises safe redesign and restart.
On a small screen, scroll this table sideways to read all columns.
How can the ERICPD hierarchy of controls reduce work-at-height, demolition and excavation risks?

| Five-level / ERICPD | Control and feasibility | Owner, check, failure and stop |
|---|---|---|
| Eliminate / eliminate | Use trenchless route if survey and engineering allow. | Designer records option; hold if service route unknown. |
| Substitute / reduce | Reroute shallower/away from traffic after checking new clashes. | Engineer approves design change; stop if new service or ground clashes are unresolved. |
| Engineering / isolate and control | Designed trench box/shoring or battered sides, service protection and plant barrier. | Temporary-works engineer verifies design/installation; stop on movement or damage. |
| Administrative / discipline | Permit, service drawings/scan, inspection, safe access and briefing. | Excavation supervisor checks each shift and after weather; stop on unverified change. |
| PPE / PPE | Task PPE for residual struck-by or contamination risk only. | Supervisor checks selection; stop work if engineered collapse control fails. |
How can the ISO 45001 hierarchy of controls reduce work-at-height, demolition and excavation risks?

| Five-level / ERICPD | Control and feasibility | Owner, check, failure and stop |
|---|---|---|
| Eliminate / eliminate | Use trenchless route if survey and engineering allow. | Designer records option; hold if service route unknown. |
| Substitute / reduce | Reroute shallower/away from traffic after checking new clashes. | Engineer approves design change; stop if new service or ground clashes are unresolved. |
| Engineering / isolate and control | Designed trench box/shoring or battered sides, service protection and plant barrier. | Temporary-works engineer verifies design/installation; stop on movement or damage. |
| Administrative / discipline | Permit, service drawings/scan, inspection, safe access and briefing. | Excavation supervisor checks each shift and after weather; stop on unverified change. |
| PPE / PPE | Task PPE for residual struck-by or contamination risk only. | Supervisor checks selection; stop work if engineered collapse control fails. |
HSE’s five-level hierarchy is the GB general framework: elimination, substitution, engineering, administrative controls and PPE. ERICPD is complementary. Apply it to the material hazard in the example, with physical acceptance checks separate from instruction, consultation or permit completion.
For the road-service trench, the designer specifies support and permitted loads for the actual ground, depth, groundwater, nearby foundations and plant/spoil surcharge. Before entry, a competent person accepts installation against that design and verifies protected access and the service/plant boundary. HSE excavation guidance requires competent inspections at the start of each shift and after events affecting stability or a fall of earth/rock. Maintain supports and record defects and corrections. Changed ground, inflow, movement, damage or unknown services holds work; competent reassessment, correction and reinspection precede the supervisor’s recorded restart. A permit cannot make unsupported ground safe.
What evidence shows construction hazards are controlled?
Evidence should show that hazards were planned, controls were implemented, workers understood them and supervisors checked them in the field.
Good evidence connects the construction phase plan to the workface. It includes risk registers, RAMS, permits, temporary works records, scaffold inspections, excavation inspections, dust-control checks, plant inspection, training, briefings, contractor monitoring, photographs, action close-out and worker feedback.
Evidence should also show review. If weather changes, ground conditions differ, design changes arise or a near miss occurs, the project should reassess the work and update the plan. A site with many inspections but no actions may not be learning; it may simply be recording.
| Evidence | What it proves | Weakness to avoid |
|---|---|---|
| CPP and risk register | Project risks and controls are identified. | Generic plan not updated. |
| RAMS and briefings | Task controls are communicated. | Workers cannot explain controls. |
| Inspection records | Scaffolds, excavations, plant and site conditions are checked. | Defects not closed out. |
| Permit records | High-risk work is authorised and coordinated. | Copied permits with no field check. |
| Temporary works register | Temporary stability risks are controlled. | Unregistered changes. |
| Health-control evidence | Dust, noise, vibration and substances are managed. | RPE issued without exposure control. |
Which construction duties apply by location?
GB CDM 2015/Work at Height 2005 and NI CDM 2016/Work at Height (NI) 2005 are distinct; demolition and excavation need competent project and task controls.
In GB, HSE CDM 2015 and work-at-height guidance are starting points. In NI, HSENI CDM 2016 and the Work at Height (NI) 2005 rule provide the local route. HSE GB guidance on demolition and excavation can inform technical controls but must not be cited as NI statute. A live structural alteration, deep excavation or fragile-roof job needs project-specific competent design, survey, inspection and emergency arrangements.
On a small screen, scroll this table sideways to read all columns.
| Location | Legal route | Key evidence |
|---|---|---|
| Great Britain | CDM 2015; Work at Height Regulations 2005. | Project roles, surveys, sequence, engineered support and checks. |
| Northern Ireland | CDM (NI) 2016; Work at Height (NI) 2005. | NI project roles, site and task-specific fall/collapse controls. |
How could BuildOut Ltd manage construction, work at height, demolition and excavation?

BuildOut Ltd would plan work at height, demolition and excavation as connected activities, using competent design and work sequencing before selecting the equipment.
BuildOut Ltd · practical example
Choose the work method before booking access equipment
The key lesson Selecting equipment is one part of controlling the work; the work-at-height hierarchy and surrounding activities come first.
The situation: A roof-edge refurbishment is proposed above a small demolition area beside a service trench. The cheapest access option would put workers over an uncontrolled work front. BuildOut would reconsider the method and sequence first.
Why this matters: Falling people or material can affect another crew even when each team believes it is working within its own area.
How BuildOut Ltd would manage it
- Question the need for exposure — Project Manager. Ask designers and contractors whether work can be done from ground level or assembled before installation. Consider changing the demolition and trench sequence to remove the overlap.
- Resolve the technical dependencies — Project Manager. Obtain competent decisions on structural stability, temporary works, ground conditions and services where relevant. Establish which activities depend on those decisions and what must remain restricted.
- Select suitable protection — Site Manager. With competent input, choose access and fall-prevention arrangements suitable for the task and surroundings. Give collective protection priority; do not start by assuming a harness solves the interface.
- Coordinate the work front — Trade Supervisor. Explain the agreed sequence, exclusion arrangements, access and emergency provisions to the actual crews. Check that each contractor understands the other team's boundaries and stop conditions.
- Review changed conditions — Site Manager. Recheck after altered work fronts, weather or unexpected ground or structural findings. Obtain the relevant technical reassessment and confirm revised controls before allowing dependent work.
When the conditions change
- Recognise the trigger
- The height, structure, ground or adjacent work differs from the plan.
- Make the immediate decision
- Keep the affected height work and dependent demolition or trench activity closed while stability, protection or separation is uncertain.
- Verify the next step
- The relevant designers resolve structural and ground dependencies; the Site Manager checks the approved access, fall protection, exclusions and sequence against the actual work front.
What good looks like
People can explain why the method was chosen and how it protects adjacent crews. Necessary design and ground questions are resolved, and the planned protection is present before exposure begins.
Evidence to look for: Design and method decisions, temporary-work or ground information, task plans, coordination briefings and relevant inspection findings.
Common mistake to avoid: Booking available equipment first and trying to fit the assessment around it.
Apply this to your work: Could changing the sequence remove a work-at-height or falling-material exposure?
Guidance behind the management approach: HSE: assessing all work at height. Use the topic's legal and technical guidance for the applicable work and location.
BuildOut Ltd
A construction and refurbishment contractor delivering fit-out, maintenance, civils, small demolition, plant operations, subcontracted specialist work and multi-site projects.
BuildOut starts each project by reviewing the client brief, pre-construction information, drawings, asbestos information, buried services, structural constraints, neighbouring activities and public interface. The project risk register identifies the main hazard groups: work at height, demolition, excavation, temporary works, dust, plant movement, fire, lifting and manual handling.
The construction phase plan turns that risk register into site arrangements. Work at height is designed out where possible; demolition methods are reviewed by competent people; excavations require service checks, support and inspection; dust-producing tasks need water suppression or extraction; temporary works are registered and checked; and plant routes are segregated from pedestrians.
BuildOut's supervisors verify the controls at the workface. They inspect scaffolds, excavations, edge protection, exclusion zones, dust controls and permits, then record actions in the project system. If a subcontractor changes the method, a buried service is discovered or weather affects stability, work stops until the plan and RAMS are reviewed. Lessons are shared across projects so repeated weaknesses lead to better templates, procurement and training.
| Management area | How BuildOut applies it | Evidence and improvement |
|---|---|---|
| Assess and plan | Uses PCI, surveys and project risk register before site mobilisation. | CPP, design risk review and risk register. |
| Implement controls | Uses RAMS, permits, temporary works checks, dust controls and traffic segregation. | Site control records and supervisor inspections. |
| Coordinate contractors | Plans interfaces between trades and high-risk activities. | Coordination meetings and package reviews. |
| Train and supervise | Briefs site rules, task controls and stop-work expectations. | Inductions, toolbox talks and observation records. |
| Audit and learn | Samples workfaces and closes actions from incidents, inspections and near misses. | Audit reports and verified close-out. |
| Improve | Updates CPP templates, procurement questions and supervisor training after recurring findings. | Management review and revised standards. |
What should each role learn and demonstrate?
Learning must match the decisions people make, from recognising danger to checking that controls work.
Briefings should tell people how to act, but attendance alone does not show competence. Assess the real decision or task, record who assessed it and revisit after a material change, failed control or incident. A local authorisation is task-specific; no universal external certificate is implied.
On a small screen, scroll this table sideways to read all columns.
| Role and learning | Demonstration and assessor | Record and reassessment trigger |
|---|---|---|
| Site supervisor | Verify collective fall prevention, structural/excavation hold points; temporary-works lead assesses. | Inspection record; reassess after weather or sequence change. |
| Demolition lead | Demonstrate designed sequence and unexpected-movement stop; engineer assesses. | Method and sign-off; repeat after structural change. |
| Excavation lead | Demonstrate support/service checks and public barrier; engineer assesses. | Daily inspection; repeat after rain or ground change. |
How does this topic support NEBOSH Diploma and construction study?
This topic supports construction and Diploma study by connecting construction hazard mechanisms to planning, control selection, competence and evidence.
A strong exam or professional answer should not list hazards in isolation. It should explain why construction risk changes, who controls the work, what the credible harm pathway is, how hierarchy controls reduce risk, what supervision is needed and what evidence proves implementation.
For broad construction scenarios, learners should organise their answer by hazard group: work at height, demolition, excavation, temporary works, plant/public interface, fire/electricity, health risks and emergency arrangements. Then they should apply CDM: client information, design risk reduction, principal contractor planning, contractor cooperation and worker communication.
| Study area | What to know | How to apply it |
|---|---|---|
| Construction planning | CDM, CPP, PCI, dutyholders and coordination. | Explain who should act before work starts. |
| Work at height | Avoid, prevent, arrest and rescue. | Choose controls before PPE. |
| Demolition | Structural stability, asbestos, services, dust and public protection. | Require competent method and exclusion. |
| Excavation | Collapse, services, water, falls and inspection. | Specify support, service checks and competent inspection. |
| Health risks | Dust, silica, asbestos, noise, vibration and manual handling. | Use assess-control-review and health surveillance where needed. |
| Evidence | Inspections, permits, briefings, registers and action close-out. | Show how controls are proved. |
How can a management system sustain effective decisions?
Give each hazard or support route an owner, a control, a check and a response to failure.
Link surveys, design assumptions, temporary works, people/plant separation, inspections and stop authority to named project roles. An owner should sample actual work and corrective actions, not accept a policy or certificate as evidence that the controls work.
The free GB regulator guide HSE Managing for health and safety (HSG65) explains a plan–do–check–act approach: assign controls and owners, involve workers, check work as done, and correct failures. For Northern Ireland, use HSENI risk assessment guidance for the local duty. A certificate alone does not demonstrate that a control works.
What warning signs show construction hazards are not being controlled?
Warning signs include generic RAMS, poor segregation, unsupported excavations, unprotected edges, uncontrolled dust, unstable demolition and actions that are repeatedly overdue.
Weak construction control often looks like drift. Barriers move, edge protection is removed, traffic routes change, permits are copied, dust controls are bypassed, temporary works are altered and subcontractors start new tasks without coordination. Supervisors should treat these as signals that the management system is weakening.
| Warning sign | What it suggests | Response |
|---|---|---|
| Unprotected edges or openings | Fall-prevention control has failed. | Stop work, protect edge and review supervision. |
| Unsupported excavation | Collapse risk is uncontrolled. | Keep people out and install suitable support or battering. |
| Dust clouds visible | Health controls are ineffective. | Stop, reassess and improve suppression/extraction. |
| Demolition sequence unclear | Structural stability may be at risk. | Get competent review before work continues. |
| Plant and pedestrians mixing | Traffic segregation is failing. | Redesign routes and enforce exclusion. |
| Temporary works altered informally | Design control has failed. | Stop use, review design and reinspect. |
Hop-up, podium and mobile tower: parts and pre-use checks
A guarded podium and a basic unguarded hop-up provide different protection. Select equipment for the task, reach, force, support and fall route. Use the actual model instructions; these illustrations identify parts and do not approve a setup.
Printable pre-use checklists
Download a check sheet with a labelled parts reference. Any No or Unsure means hold use and resolve the concern through the responsible workplace route. These are user aids, not competent-person inspection reports or permission to work.
- Hop-up and podium pre-use checklist (PDF, 2 pages)
- Mobile scaffold tower pre-use checklist (PDF, 2 pages)
Low-level platform: eight visible parts
View labelled parts and enlarge image
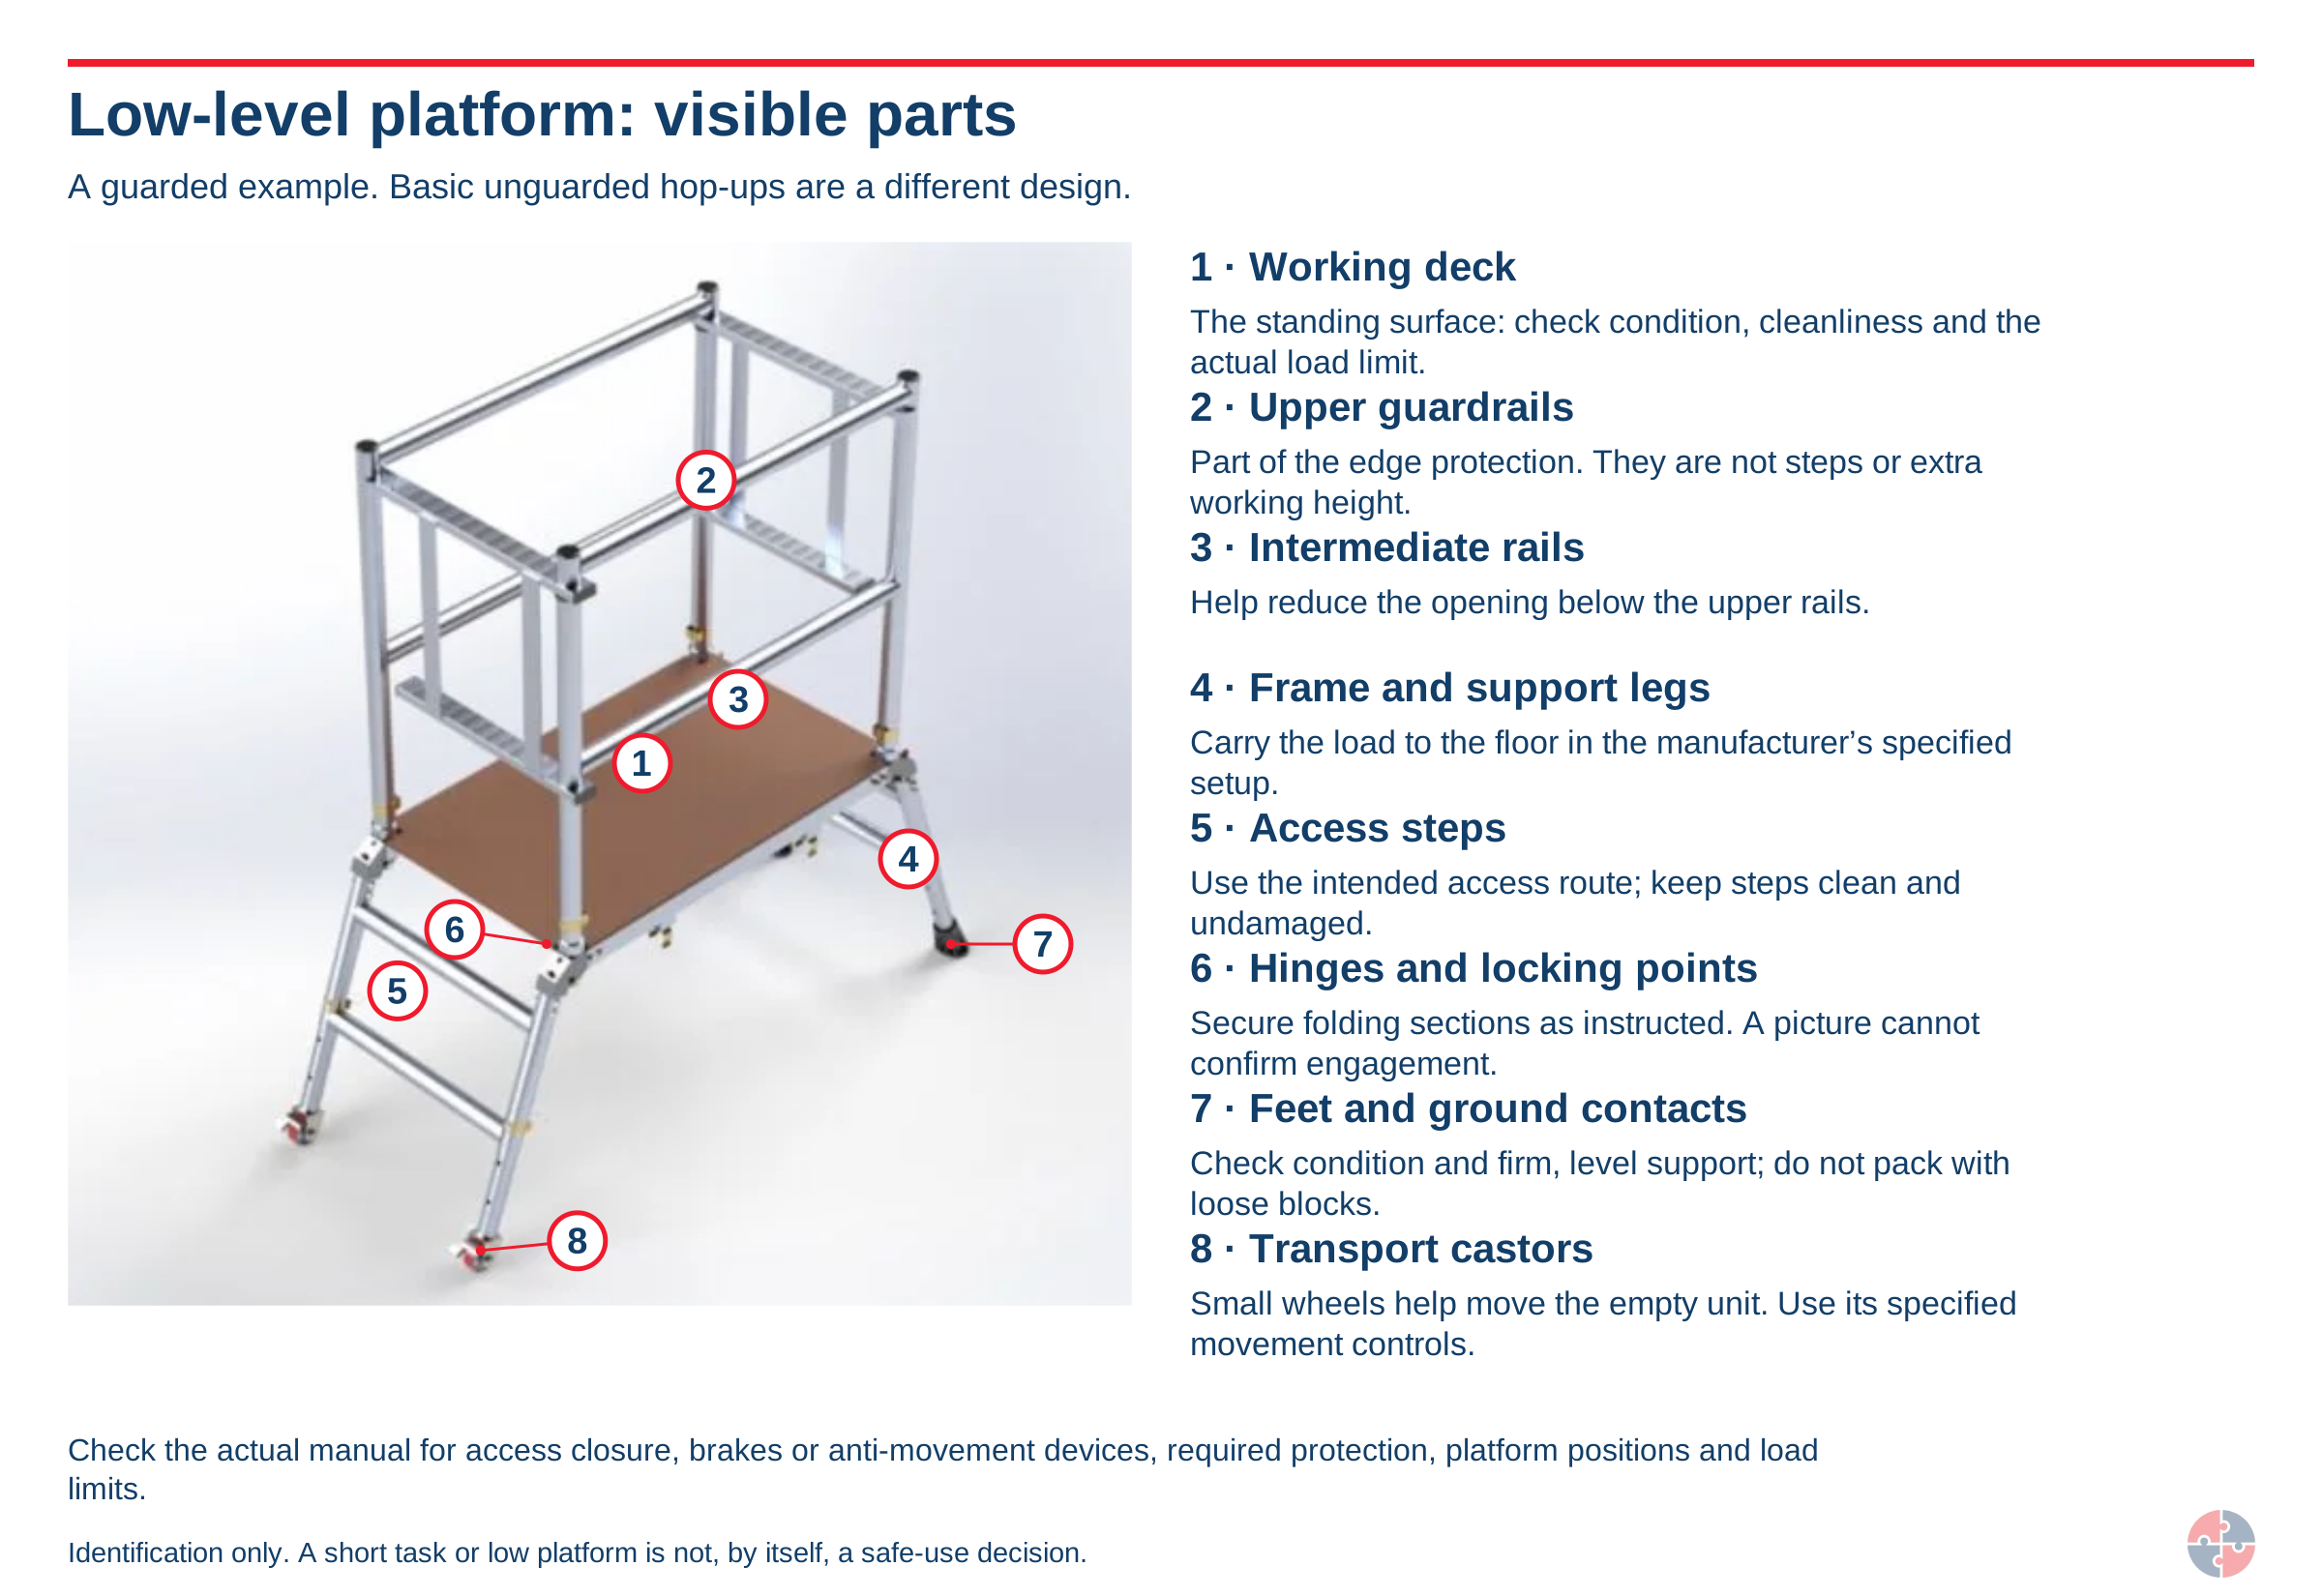
Read the numbered parts explanations
- Working deck. The standing surface: check condition, cleanliness and the actual load limit.
- Upper guardrails. Part of the edge protection. They are not steps or extra working height.
- Intermediate rails. Help reduce the opening below the upper rails.
- Frame and support legs. Carry the load to the floor in the manufacturer’s specified setup.
- Access steps. Use the intended access route; keep steps clean and undamaged.
- Hinges and locking points. Secure folding sections as instructed. A picture cannot confirm engagement.
- Feet and ground contacts. Check condition and firm, level support; do not pack with loose blocks.
- Transport castors. Small wheels help move the empty unit. Use its specified movement controls.
Check the actual manual for access closure, brakes or anti-movement devices, required protection, platform positions and load limits.
Mobile tower: eleven component groups
View labelled parts and enlarge image
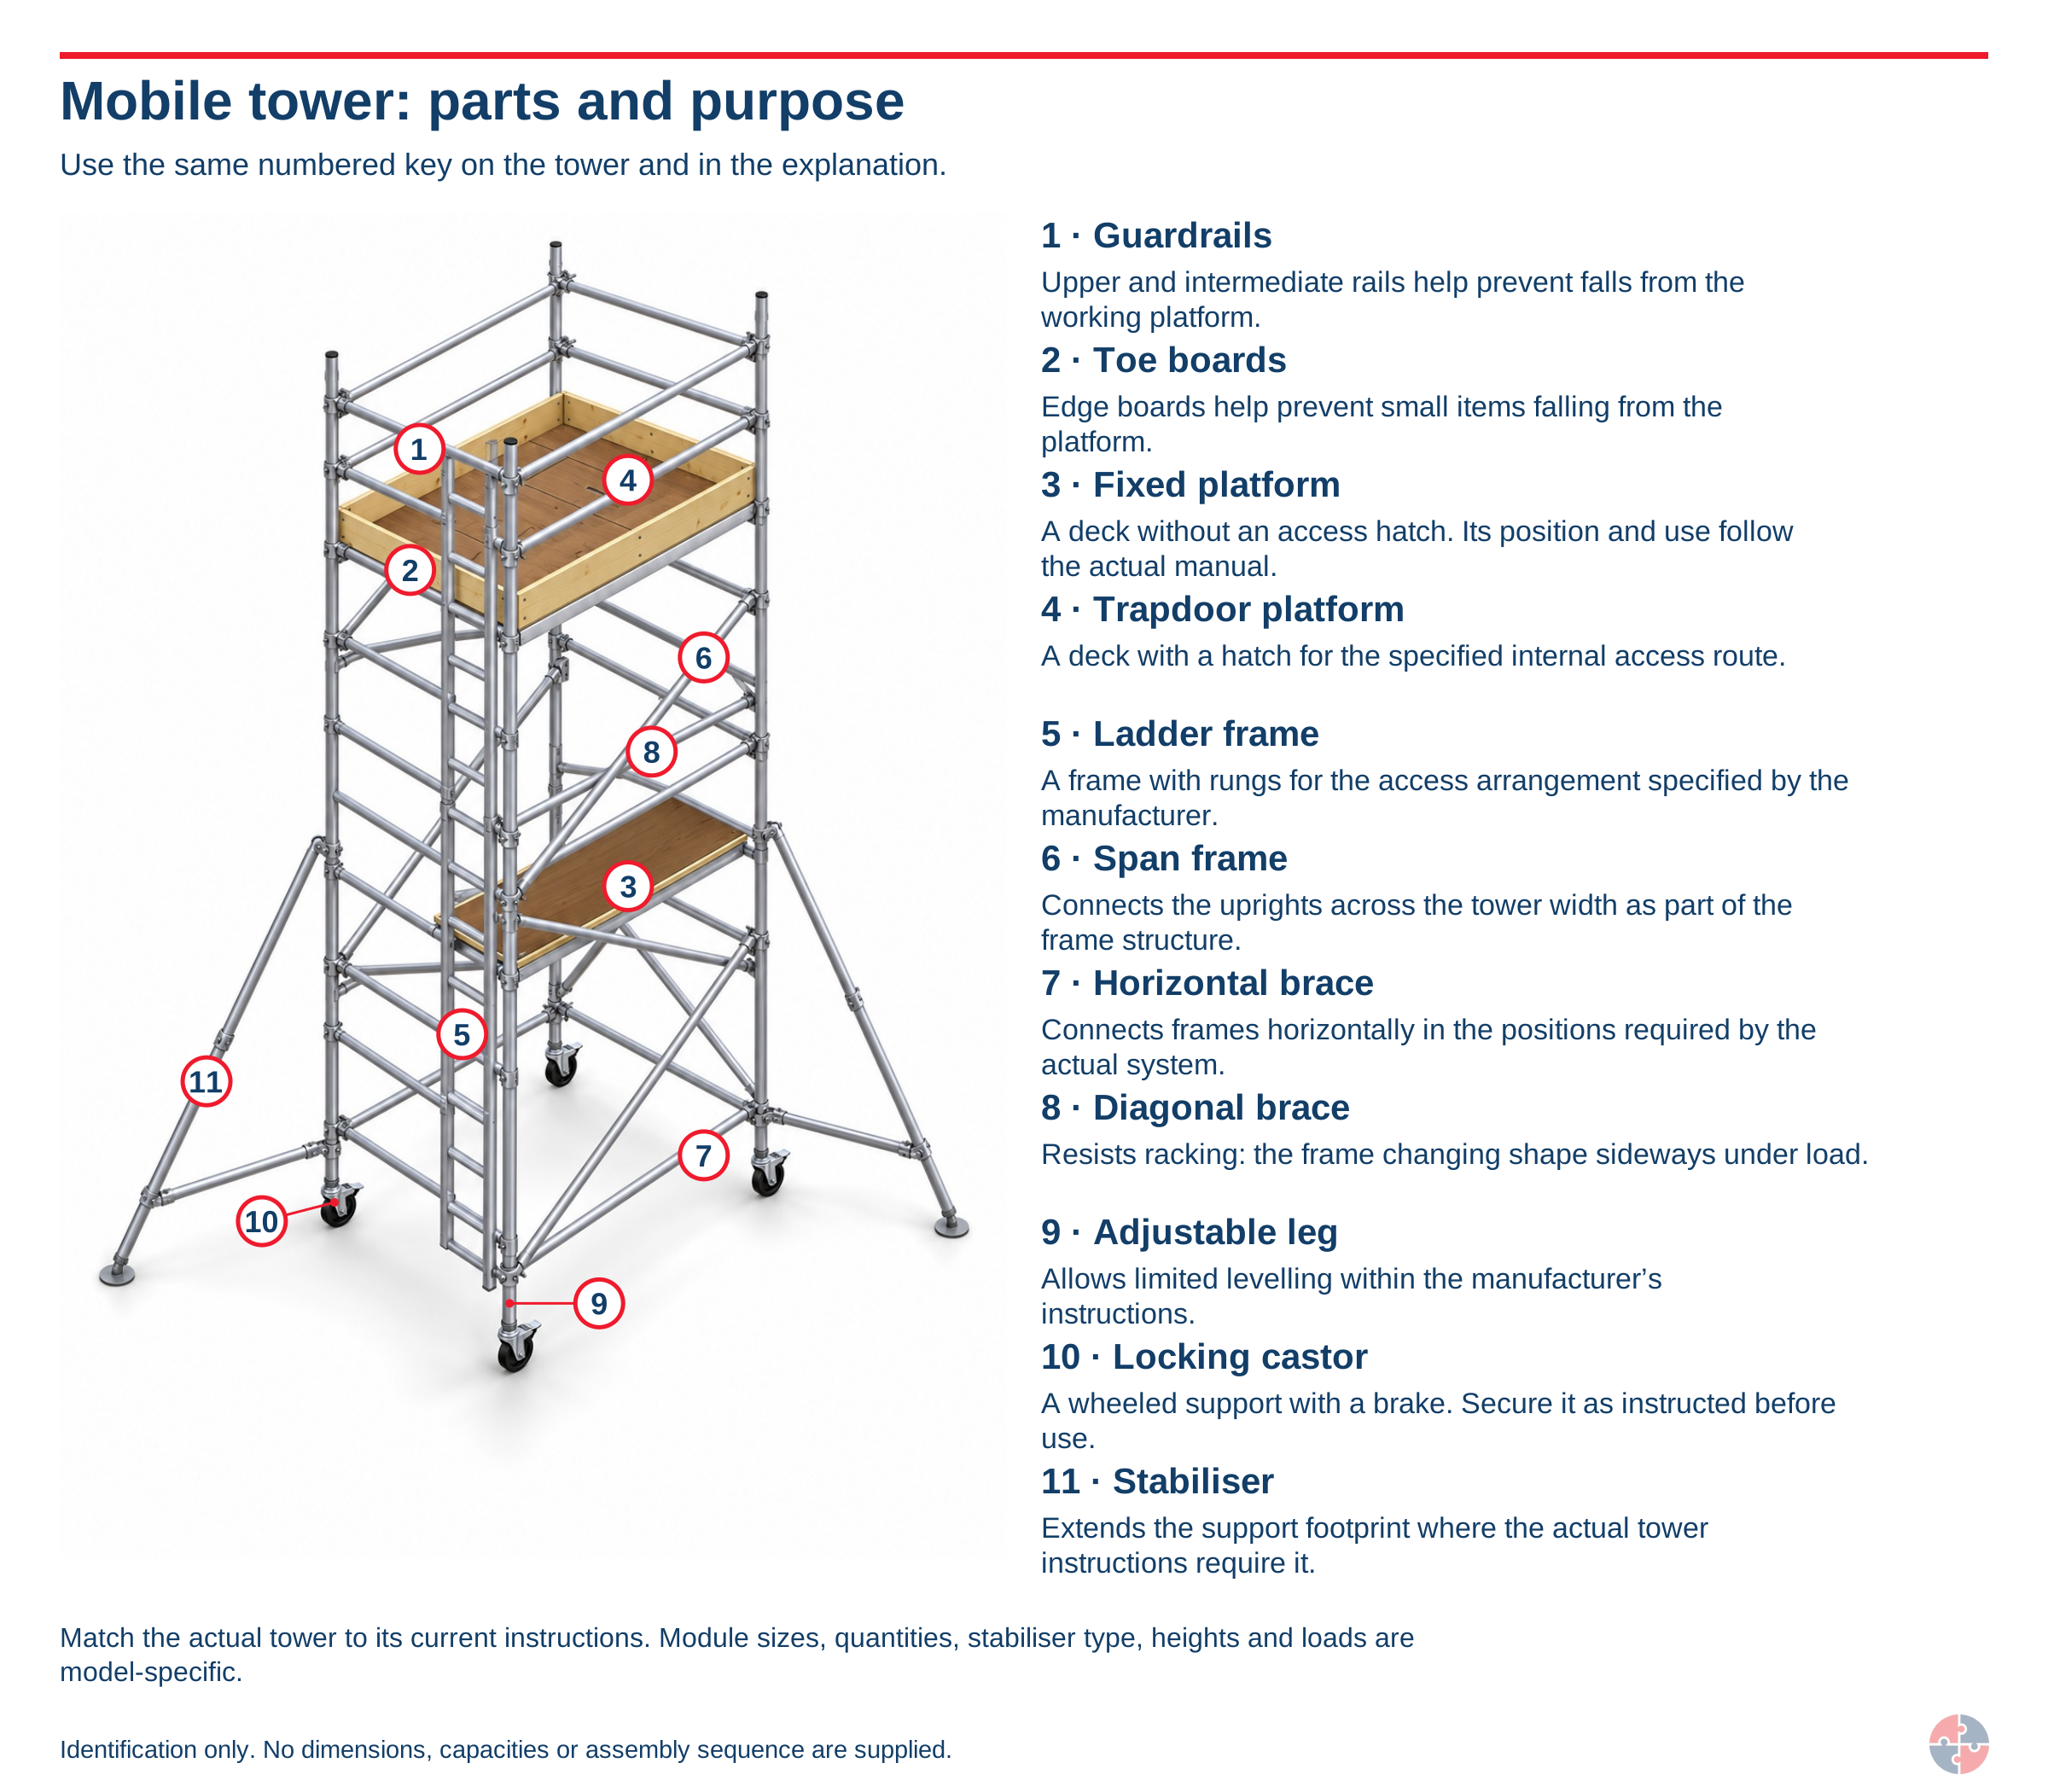
Read the numbered parts explanations
- Guardrails. Upper and intermediate rails help prevent falls from the working platform.
- Toe boards. Edge boards help prevent small items falling from the platform.
- Fixed platform. A deck without an access hatch. Its position and use follow the actual manual.
- Trapdoor platform. A deck with a hatch for the specified internal access route.
- Ladder frame. A frame with rungs for the access arrangement specified by the manufacturer.
- Span frame. Connects the uprights across the tower width as part of the frame structure.
- Horizontal brace. Connects frames horizontally in the positions required by the actual system.
- Diagonal brace. Resists racking: the frame changing shape sideways under load.
- Adjustable leg. Allows limited levelling within the manufacturer’s instructions.
- Locking castor. A wheeled support with a brake. Secure it as instructed before use.
- Stabiliser. Extends the support footprint where the actual tower instructions require it.
Match the actual tower to its current instructions. Module sizes, quantities, stabiliser type, heights and loads are model-specific.
After a defect, impact, alteration or move, verify the checks, any competent inspection and the handback required for the actual equipment and conditions. Never move a tower with people or materials aboard. Workplace competence and authorisation remain separate from reading a diagram or ticking a checklist.
Scaffold and mobile tower awareness course · HSE tower guidance · PASMA low-level guidance
Checklist and parts section reviewed 1 November 2026. HSE guidance concerns Great Britain; apply the relevant country rules and exact-system instructions.
What acronyms are used on this construction hazards page?
Acronyms should be explained so construction hazard controls remain accessible.
| Acronym | Meaning | Why it matters |
|---|---|---|
| CDM | Construction (Design and Management) | Main construction health and safety regime. |
| CPP | Construction phase plan | Project plan for managing construction health, safety and welfare. |
| COSHH | Control of Substances Hazardous to Health | Applies to dust, silica, cement, chemicals and fumes. |
| LEV | Local exhaust ventilation | Engineering control for dust and fumes. |
| MEWP | Mobile elevating work platform | Common access equipment for work at height. |
| PCI | Pre-construction information | Information needed to plan construction safely. |
| PPE | Personal protective equipment | Last-line personal protection where risks remain. |
| RAMS | Risk assessment and method statement | Task-level planning documents. |
| RCS | Respirable crystalline silica | Fine silica dust that can cause serious lung disease. |
| RPE | Respiratory protective equipment | Personal protection against inhaled contaminants. |