SHARE Knowledge Hub
Plasterboard and Drywall Dust
Dry sanding plasterboard joints can generate high gypsum dust, especially overhead or indoors. Avoid sanding where feasible; otherwise use task-matched on-tool extraction and verify it. Identify the board and compound, because mixed silica, wood or legacy dust needs a different assessment.
Understanding Plasterboard and Drywall Dust
Dry sanding plasterboard joints can generate high gypsum dust, especially overhead or indoors. Avoid sanding where feasible; otherwise use task-matched on-tool extraction and verify it. Identify the board and compound, because mixed silica, wood or legacy dust needs a different assessment.
Why this matters at work
Secure the area, identify the material and cause, repair or replace equipment, clean contamination and verify capture under real operating conditions. Reassess who was exposed, whether health or incident follow-up is needed and whether other rooms or shifts used the same faulty unit. Record why work was restarted and who authorised it. Repeated faults point to a design or maintenance problem, not just unlucky filters. A past low sampling result does not validate today's failed system.
A visible cloud at the breathing zone, low-flow alarm, detached hose, torn hood, damaged filter, open collector, unknown coating or dust crossing containment is evidence that the method is not performing as expected. Stop the affected dusty work and protect people. Do not simply issue extra masks to nearby trades while the source continues uncontrolled. An operator should be able to raise a fault without being penalised for programme delay.
How organisations manage this in practice
HSE puts avoiding sanding ahead of controlling its dust. Select board dimensions and details that minimise cuts and overfilled joints. Good fixing, taping and compound application can reduce later rework. Prevention is a design, procurement and workmanship decision, not a last-minute instruction to a finisher. If the specification creates many awkward joints or a deadline forces premature rework, the dust burden is partly made upstream.
Agree finish quality and sequence before work starts, including drying time, inspection and correction. A trial area can establish how much sanding remains for the chosen compound and tool. Do not trade dust reduction for an unacceptable fall, handling or chemical exposure; compare the whole job. Record what was eliminated and what still needs capture. When repeated overfilling or damage increases sanding hours, feed that finding back to the installation process rather than only issuing more masks.
Worked hire check: obtain the unit’s examination report and due date, intended performance information and use/maintenance instructions; confirm compatibility with the sander and material. Arrange replacement or retesting before expiry during a long hire. Observe capture in the intended configuration and log defects, owner and verification. After repair, a competent person verifies effective control before removing a failed status and permitting reuse. The examiner’s record, equipment ownership and the employer’s safe-use decisions must all remain visible.
What is plasterboard and drywall dust?
Plasterboard dust is mainly gypsum and jointing-compound dust generated during cutting, sanding, breaking out and cleaning. See Health and Safety Executive (HSE) guidance.
Best-practice guide: Plasterboard and Drywall Dust
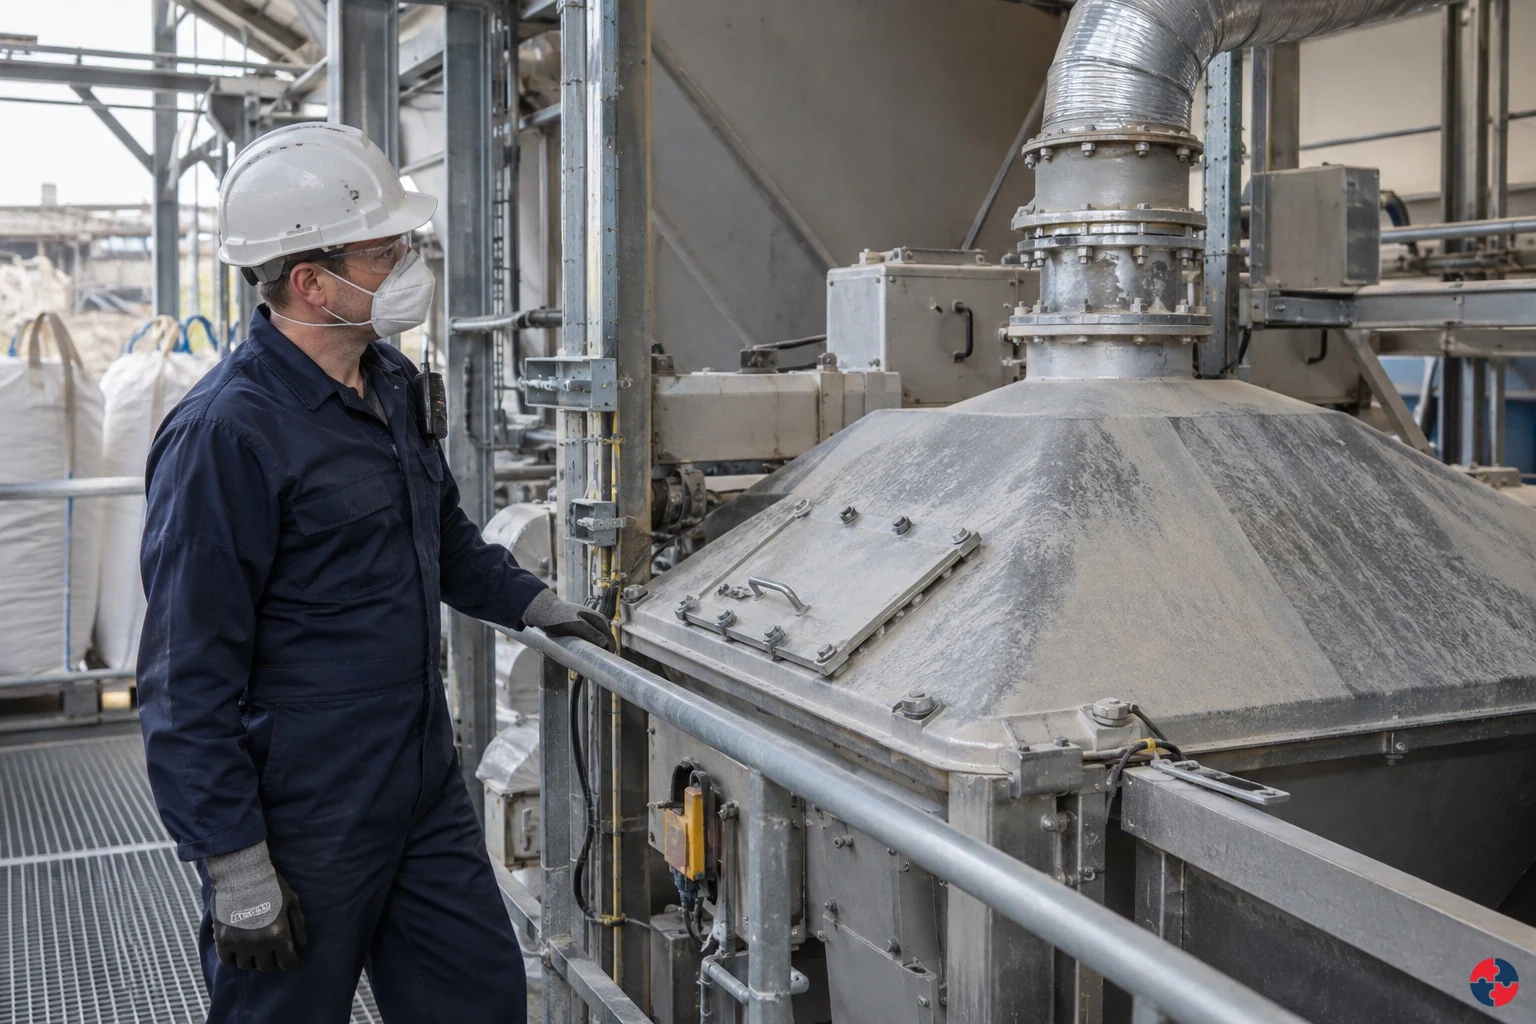
What is plasterboard and drywall dust?
Plasterboard dust is mainly gypsum and jointing-compound dust generated during cutting, sanding, breaking out and cleaning. See Health and Safety Executive (HSE) guidance. Dry sanding plasterboard joints can generate high gypsum dust, especially overhead or indoors.
Turn plasterboard and drywall dust knowledge into a decision
Dry sanding plasterboard joints can generate high gypsum dust, especially overhead or indoors. Avoid sanding where feasible; otherwise use task-matched on-tool extraction and verify it. Finish trial, product information, COSHH assessment, pre-use check, extraction examination, field observation and defect closure.
Operational example and hold points
Check hood, hose, airflow, exclusion and suitable vacuum cleanup; watch for dust escaping the tool. Clean the zone without dry sweeping, inspect surfaces and release nearby trades only after controls and cleanup are verified.
Cutting and sanding put dust into the breathing zone
Cutting, sanding and poor clean-up release fine material. Workers and nearby trades may inhale dust or get it in eyes and on skin. Board, coating and contamination determine additional hazards; confirm the material before work. Use the full topic for the detailed mechanism, task limits and source scope.
Choose controls for plasterboard and drywall dust
Eliminate: Eliminate, Reduce, Isolate, Control, personal protective equipment (PPE) and Discipline (ERICPD) are prompts for choosing and checking controls. Eliminate: Eliminate: the designer and finisher test a specification and jointing technique that achieves the required finish without sanding. Reduce: Substitute and reduce: if sanding remains necessary, use the least dusty suitable finishing method and minimise rework by controlling the initial compound application. Isolate: Isolate and engineer: fit a matched on-tool extraction sander with an H, M or L class unit selected for the task, adequate flow and secure leak-free hose connections. Control: Control, PPE and Discipline: schedule the work away from other trades, brief the work zone and clean/dirty route, and inspect controls during use. Read the full control table for qualifications, ownership and verification. Use the actual task and applicable jurisdiction; existing technical approval remains unchanged.
Use the full plasterboard and drywall dust lesson
Use the full topic for the decision points, practical examples, detailed control tables and source scope. HSE guidance applies to Great Britain; use HSENI for the Northern Ireland route and the source’s stated jurisdiction. A simplified guide does not change the page’s technical-review or approval status.

Read all six steps as text
1. What is plasterboard and drywall dust?
Plasterboard dust is mainly gypsum and jointing-compound dust generated during cutting, sanding, breaking out and cleaning.
- Avoid / redesign: Eliminate, Reduce, Isolate, Control, personal protective equipment (PPE) and Discipline (ERICPD) are prompts for choosing and checking controls.
- Control the task: Substitute and reduce: if sanding remains necessary, use the least dusty suitable finishing method and minimise rework by controlling the initial compound application.
- Verify before release: Read the full task example, checks and stop points on this page. gypsum and jointing-compound dust · HSE CIS69 on-tool extraction · HSE CIS36 construction dust · HSE hierarchy of controls
Plasterboard dust is mainly gypsum and jointing-compound dust generated during cutting, sanding, breaking out and cleaning. See Health and Safety Executive (HSE) guidance. Dry sanding plasterboard joints can generate high gypsum dust, especially overhead or indoors.
Apply it: Which part of this plan would you check at the workface before authorising the task?
2. Turn plasterboard and drywall dust knowledge into a decision
Use the evidence to improve the actual work arrangement.
- Change at source: Eliminate, Reduce, Isolate, Control, personal protective equipment (PPE) and Discipline (ERICPD) are prompts for choosing and checking controls.
- Make it observable: Read the full task example, checks and stop points on this page. gypsum and jointing-compound dust · HSE CIS69 on-tool extraction · HSE CIS36 construction dust · HSE hierarchy of controls
- Keep useful evidence: Finish trial, product information, COSHH assessment, pre-use check, extraction examination, field observation and defect closure.
Dry sanding plasterboard joints can generate high gypsum dust, especially overhead or indoors. Avoid sanding where feasible; otherwise use task-matched on-tool extraction and verify it. Finish trial, product information, COSHH assessment, pre-use check, extraction examination, field observation and defect closure.
Apply it: What evidence would show that the change improves this task, rather than only completing a record?
3. Operational example and hold points
Example: a practical application of the existing topic lesson.
- Setting: Ceiling-joint sanding during interior fit-out; verify the board, filler and nearby work.
- Act: Test a no-sanding finish; if sanding remains, fit matched on-tool extraction and establish the work zone.
- Hold / review: Visible dust plume, failed extraction, unknown material or mixed silica, wood or legacy coating dust.
Check hood, hose, airflow, exclusion and suitable vacuum cleanup; watch for dust escaping the tool. Clean the zone without dry sweeping, inspect surfaces and release nearby trades only after controls and cleanup are verified.
Apply it: At which point would you hold this example, and what evidence would allow it to proceed?
4. Cutting and sanding put dust into the breathing zone
Connect the task, the route to the person and the control that can fail.
- Generation: Cutting, sanding and poor clean-up release fine material.
- Route: Workers and nearby trades may inhale dust or get it in eyes and on skin.
- Uncertainty: Board, coating and contamination determine additional hazards; confirm the material before work.
Cutting, sanding and poor clean-up release fine material. Workers and nearby trades may inhale dust or get it in eyes and on skin. Board, coating and contamination determine additional hazards; confirm the material before work. Use the full topic for the detailed mechanism, task limits and source scope.
Apply it: Where is this harm route present in the actual work, and which control breaks it before anyone is exposed?
5. Choose controls for plasterboard and drywall dust
Start with the stronger practicable options and verify their effect.
- Eliminate: Eliminate, Reduce, Isolate, Control, personal protective equipment (PPE) and Discipline (ERICPD) are prompts for choosing and checking controls.
- Eliminate: Eliminate: the designer and finisher test a specification and jointing technique that achieves the required finish without sanding.
- Reduce: Substitute and reduce: if sanding remains necessary, use the least dusty suitable finishing method and minimise rework by controlling the initial compound application.
- Isolate: Isolate and engineer: fit a matched on-tool extraction sander with an H, M or L class unit selected for the task, adequate flow and secure leak-free hose connections.
- Control: Control, PPE and Discipline: schedule the work away from other trades, brief the work zone and clean/dirty route, and inspect controls during use.
Eliminate: Eliminate, Reduce, Isolate, Control, personal protective equipment (PPE) and Discipline (ERICPD) are prompts for choosing and checking controls. Eliminate: Eliminate: the designer and finisher test a specification and jointing technique that achieves the required finish without sanding. Reduce: Substitute and reduce: if sanding remains necessary, use the least dusty suitable finishing method and minimise rework by controlling the initial compound application. Isolate: Isolate and engineer: fit a matched on-tool extraction sander with an H, M or L class unit selected for the task, adequate flow and secure leak-free hose connections. Control: Control, PPE and Discipline: schedule the work away from other trades, brief the work zone and clean/dirty route, and inspect controls during use. Read the full control table for qualifications, ownership and verification. Use the actual task and applicable jurisdiction; existing technical approval remains unchanged.
Apply it: Which stronger option can be used here, and who will verify it before accepting the remaining risk?
6. Use the full plasterboard and drywall dust lesson
Follow the official sources below and retain the task-specific evidence.
- Official guidance: Health and Safety Executive (HSE) guidance
- Official guidance: HSE CIS69 on-tool extraction
- Task decision: Finish trial, product information, COSHH assessment, pre-use check, extraction examination, field observation and defect closure.
Use the full topic for the decision points, practical examples, detailed control tables and source scope. HSE guidance applies to Great Britain; use HSENI for the Northern Ireland route and the source’s stated jurisdiction. A simplified guide does not change the page’s technical-review or approval status.
Apply it: Which official source and full-topic section will you use to resolve the next decision?
Plasterboard is widely used and can feel like a low-risk material compared with asbestos, silica or lead. That can lead to complacency. Dry sanding taped and covered joints can create a visible dust cloud and high airborne dust levels, particularly indoors, in small rooms and during ceiling work where dust falls directly through the breathing zone.
The dust may include gypsum, paper fibres, additives, jointing compound, fillers and whatever contamination is present in the building or work area. It may also be mixed with silica, wood dust, cement dust, insulation fibres or historic contamination during refurbishment. A good assessment checks the whole task and environment, not just the word 'plasterboard'.
| Aspect | What it means | Management implication |
|---|---|---|
| Main dust source | Cutting boards, sanding joints, breaking out partitions and dry sweeping. | Plan low-dust methods before work starts. |
| Dust type | Usually gypsum and jointing-compound dust, but mixed dust is common on refurbishment sites. | Check surrounding materials and contamination. |
| Health effects | Eye, nose, throat and airway irritation; contribution to respirable/inhalable dust exposure. | Use COSHH assessment and exposure control. |
| High-risk task | Dry sanding taped and covered plasterboard joints indoors or overhead. | Use on-tool extraction and avoid uncontrolled dry sanding. |
| Control focus | Avoid sanding, extract at source, clean safely, ventilate and exclude others. | Do not rely on ordinary dust masks or sweeping. |
How can the hierarchy of controls reduce plasterboard and drywall dust exposure?
Eliminate, Reduce, Isolate, Control, personal protective equipment (PPE) and Discipline (ERICPD) are prompts for choosing and checking controls. For an interior fit-out crew sanding taped ceiling joints, gypsum and jointing-compound dust falls through the breathing zone and spreads to nearby trades and cleaners. The material must be confirmed first: an old finish, silica-bearing filler or adjacent cutting task changes the assessment. HSE’s five levels are elimination, substitution, engineering, administrative controls and PPE. ERICPD uses Eliminate, Reduce, Isolate, Control, PPE and Discipline to check the same task; neither is a substitute for COSHH.
Eliminate: the designer and finisher test a specification and jointing technique that achieves the required finish without sanding. The site manager checks the sample finish and downstream work before approving it. If suitable, cancel the sanding step and record the method; do not create a new exposure through extra cutting or rework.
Substitute and reduce: if sanding remains necessary, use the least dusty suitable finishing method and minimise rework by controlling the initial compound application. The competent supervisor verifies the actual product and trial finish. A change in compound is not automatically safer if it introduces silica or another hazardous ingredient.
Isolate and engineer: fit a matched on-tool extraction sander with an H, M or L class unit selected for the task, adequate flow and secure leak-free hose connections. Keep others out of the dust area and use suitable vacuum cleaning, not dry sweeping. The operator checks hood, hose, airflow and warning devices before use; the competent owner arranges examination and testing at least every 14 months where required. Visible dust escaping from the tool or failed extraction stops sanding.
Control, PPE and Discipline: schedule the work away from other trades, brief the work zone and clean/dirty route, and inspect controls during use. Assess whether respiratory protection is needed for the actual residual exposure and mixed dust; HSE’s controlled gypsum-sanding example does not make RPE automatically necessary when extraction works. Where RPE is selected, check face fit, compatibility, maintenance and replacement. Stop if the material is uncertain, an uncontrolled dust cloud appears or a different hazardous dust is disturbed.
Direct source: HSE plasterboard sanding task guidance
Direct source: HSE CIS69 on-tool extraction
Direct source: HSE CIS36 construction dust
Direct source: HSE hierarchy of controls
How can the ERICPD hierarchy of controls reduce plasterboard and drywall dust exposure?

| ERICPD control level | Topic-specific example | Source and full task context |
|---|---|---|
| Eliminate | Trial a finish/jointing specification that achieves the required result without sanding. | Read the full task example, checks and stop points on this page. gypsum and jointing-compound dust · HSE CIS69 on-tool extraction · HSE CIS36 construction dust · HSE hierarchy of controls |
| Reduce | Assess a demonstrably less hazardous finishing product/process; better technique or less rework alone is reduction. | Read the full task example, checks and stop points on this page. gypsum and jointing-compound dust · HSE CIS69 on-tool extraction · HSE CIS36 construction dust · HSE hierarchy of controls |
| Isolate | Use matched on-tool extraction, a task-selected suitable extractor, adequate flow and sound hose/hood connections. | Read the full task example, checks and stop points on this page. gypsum and jointing-compound dust · HSE CIS69 on-tool extraction · HSE CIS36 construction dust · HSE hierarchy of controls |
| Control | Sequence work, exclude adjacent trades, brief clean/dirty routes and check extraction/cleaning performance. | Read the full task example, checks and stop points on this page. gypsum and jointing-compound dust · HSE CIS69 on-tool extraction · HSE CIS36 construction dust · HSE hierarchy of controls |
| PPE | Assess residual RPE and eye/skin protection for the actual material; well-controlled gypsum tasks are not all identical. | Read the full task example, checks and stop points on this page. gypsum and jointing-compound dust · HSE CIS69 on-tool extraction · HSE CIS36 construction dust · HSE hierarchy of controls |
| Discipline | Stop on unknown material, failed flow or uncontrolled dust and verify the control before restart. | Read the full task example, checks and stop points on this page. gypsum and jointing-compound dust · HSE CIS69 on-tool extraction · HSE CIS36 construction dust · HSE hierarchy of controls |
How can the ISO 45001 hierarchy of controls reduce plasterboard and drywall dust exposure?

| ESEAP control level | Topic-specific example | Source and full task context |
|---|---|---|
| Elimination | Trial a finish/jointing specification that achieves the required result without sanding. | Read the full task example, checks and stop points on this page. gypsum and jointing-compound dust · HSE CIS69 on-tool extraction · HSE CIS36 construction dust · HSE hierarchy of controls |
| Substitution | Assess a demonstrably less hazardous finishing product/process; better technique or less rework alone is reduction. | Read the full task example, checks and stop points on this page. gypsum and jointing-compound dust · HSE CIS69 on-tool extraction · HSE CIS36 construction dust · HSE hierarchy of controls |
| Engineering controls | Use matched on-tool extraction, a task-selected suitable extractor, adequate flow and sound hose/hood connections. | Read the full task example, checks and stop points on this page. gypsum and jointing-compound dust · HSE CIS69 on-tool extraction · HSE CIS36 construction dust · HSE hierarchy of controls |
| Administrative controls | Sequence work, exclude adjacent trades, brief clean/dirty routes and check extraction/cleaning performance. | Read the full task example, checks and stop points on this page. gypsum and jointing-compound dust · HSE CIS69 on-tool extraction · HSE CIS36 construction dust · HSE hierarchy of controls |
| PPE | Assess residual RPE and eye/skin protection for the actual material; well-controlled gypsum tasks are not all identical. | Read the full task example, checks and stop points on this page. gypsum and jointing-compound dust · HSE CIS69 on-tool extraction · HSE CIS36 construction dust · HSE hierarchy of controls |
What does HSE say about sanding plasterboard joints?
HSE states that sanding taped and covered plasterboard joints can produce high levels of gypsum dust and needs effective control. See HSE plasterboard sanding task guidance.
HSE's task guidance for sanding plasterboard joints follows the Assess, Control and Review model. It highlights that dry sanding indoors and in small enclosed spaces can generate high airborne dust, and that ceiling work puts dust directly into the worker's breathing zone. It also notes the respirable dust WEL of 4 mg/m3 averaged over 8 hours and shows that uncontrolled sanding can produce high peak exposures.
The control message is clear: prevent the need for sanding where possible, and where sanding is needed, use adapted sanding equipment with on-tool extraction. HSE says to select an H, M or L class extraction unit, make sure the flow rate is right, and check hood, hose, filter, extraction rate and warning devices. Dust extraction equipment should be thoroughly examined and tested at least once every 14 months.
| Learning point | Why it matters | Site action |
|---|---|---|
| Dry sanding can create high gypsum dust | Visible dust clouds can affect the worker and others nearby. | Avoid sanding or use effective extraction. |
| Indoor and enclosed work increases risk | Dust builds up where ventilation is poor. | Use extraction, ventilation and exclusion. |
| Ceiling work affects the breathing zone | Dust falls directly into the worker's face and airways. | Plan tool position, extraction and eye/face protection. |
| Extraction class and flow matter | A poor vacuum or leaking hose gives false confidence. | Select suitable H/M/L class unit and check flow/connection. |
| TExT at least every 14 months | Extraction can deteriorate without obvious signs. | Keep LEV/extraction examination and defect close-out records. Source: HSE plasterboard sanding task guidance |
| RPE may not be needed if exposure is well controlled | Effective extraction can reduce dust significantly, but do not assume. | Use risk assessment and monitoring/competent advice where uncertain. |
How can plasterboard dust harm people?
Dust can irritate eyes and airways, increase total respirable dust exposure and contaminate welfare, vehicles and adjacent work areas.
Dust released above head height can fall straight into the finisher’s breathing zone, while sweeping and other trades can resuspend it later. Trace each route to the exposed person and choose a control at the point of release, then check cleaning before handover.
| Route | How exposure happens | Control focus |
|---|---|---|
| Inhalation | Sanding, cutting, breaking, sweeping or nearby trades breathing airborne dust. | Avoid dust, extract at source, ventilate and exclude others. |
| Eye contact | Overhead sanding or dusty work causes particles to fall into eyes. | Use extraction, eye protection and work positioning. |
| Skin/clothing contamination | Dust collects on skin, hair, clothing and PPE. | Welfare, washing, changing and cleaning. |
| Ingestion | Dust transfers from hands, gloves, phones or cigarettes to mouth. | Handwashing and no eating/drinking in dusty areas. |
| Secondary exposure | Dust spreads to other trades, occupants, vehicles or welfare. | Segregation, cleaning and clean/dirty routes. |
| Mixed-dust exposure | Refurbishment dust includes silica, cement, wood, mould or historic contamination. | Survey, sample or escalate if material identity is uncertain. |
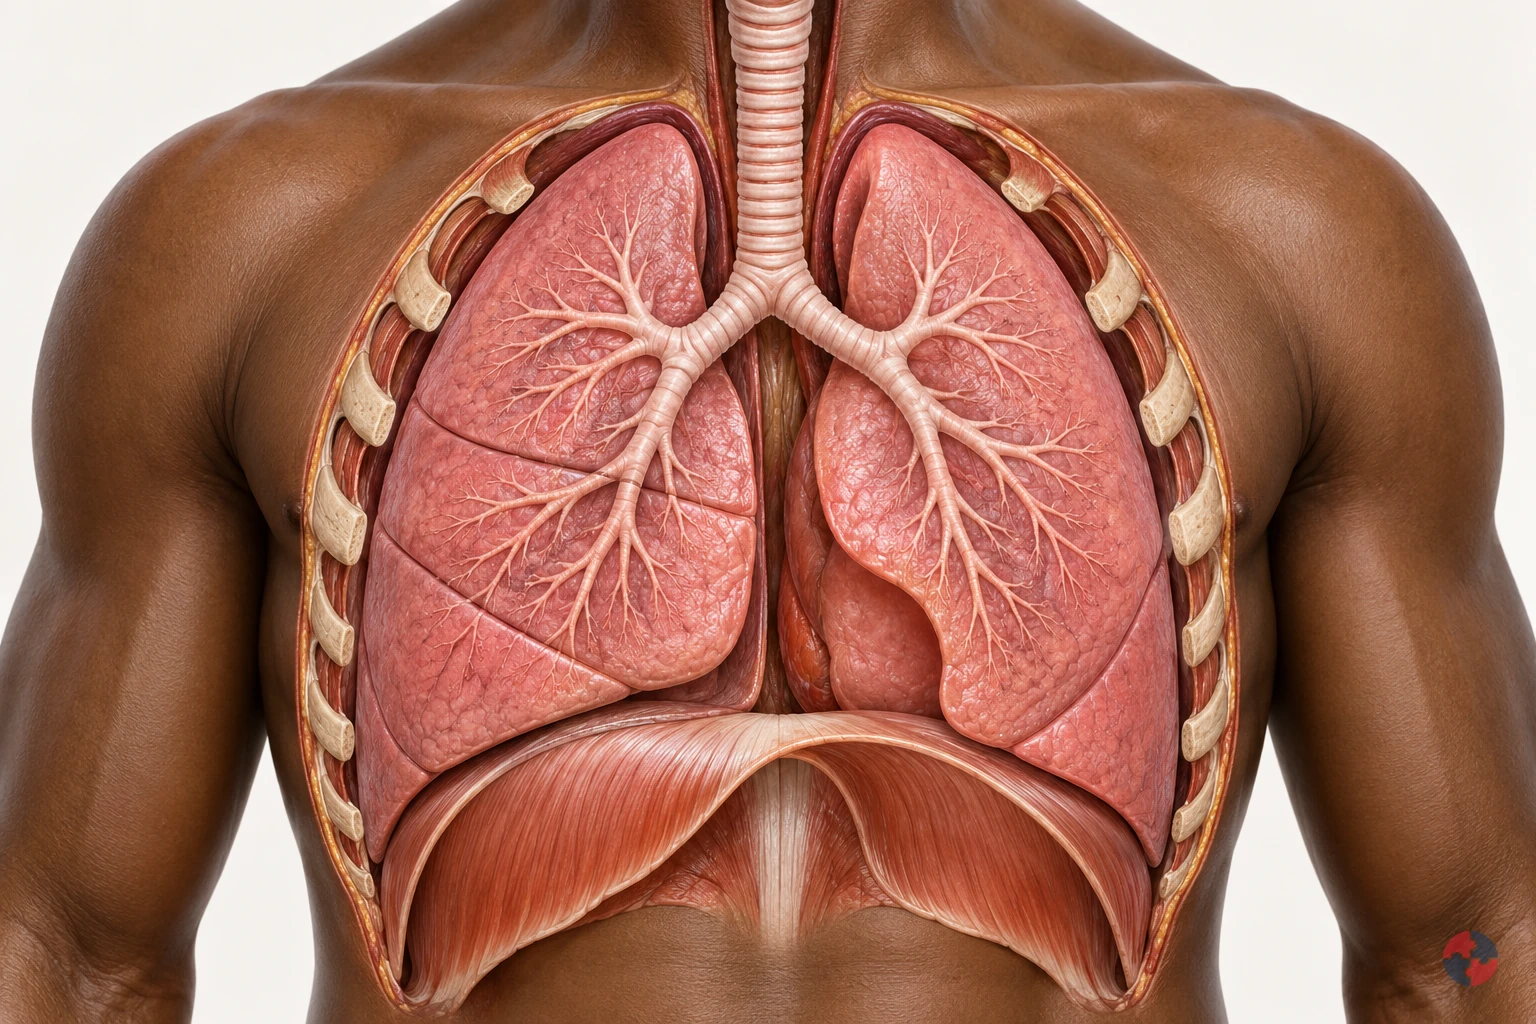

How do the lungs work, and how can workplace exposures affect breathing?
Interactive anatomy · Respiratory tract and lungs · Updated 2026-10-23
Read all anatomy and process explanations without the viewer
Simplified education, not diagnosis, a lung-function or oxygen-saturation test, an exposure calculator or a fitness-to-work assessment. No breath-holding challenge, breathing-rate score or personal health-data collection. Ordinary particle filters do not protect against every gas or oxygen deficiency. COPD and coal-dust topics may reuse normal anatomy only until separate mechanisms are reviewed.
Nose and mouth
Air enters and leaves here. The nose and mouth connect the outside air with the respiratory passages. Air moves through these openings on both the inward and outward breath. Follow the route towards the windpipe before looking at the smaller branches. The illustrated flow is air, a mixture of gases, rather than pure oxygen passing directly into blood. Frimley Health NHS Foundation Trust: How your lungs work · Central and North West London NHS Foundation Trust: How do we breathe?
Trachea
The windpipe carries air into the chest. The trachea, commonly called the windpipe, carries air down towards the chest. It divides into the two main bronchi that supply the lungs. Locate this shared passage before following either branch. Its role is to conduct air towards the gas-exchange regions and provide an outward route for the next exhalation. Frimley Health NHS Foundation Trust: How your lungs work
Bronchi
A main branch carries air into each lung. The two main bronchi take air from the windpipe into the right and left lungs. They divide into progressively smaller branches, distributing the breath through the lungs. Use the split as a landmark before following one highlighted route. These are air passages, distinct from the blood vessels that run through the same organs. Frimley Health NHS Foundation Trust: How your lungs work · University Hospitals of North Midlands NHS Trust: My lung surgery: about your lungs
Bronchioles
Smaller branches distribute air. Bronchioles are smaller branches of the airway system inside the lungs. Their branching routes lead towards clusters of alveoli, where the breath reaches the gas-exchange surface. Follow one branch to its end, using the others as context. This simplified route represents part of a much larger network supplying the lungs together. Frimley Health NHS Foundation Trust: How your lungs work
Alveoli
Tiny air sacs provide a gas-exchange surface. Alveoli are tiny air sacs at the ends of the small airway routes. Their close relationship with surrounding capillaries allows oxygen to pass towards blood and carbon dioxide towards alveolar air. Connect the highlighted cluster with the enlarged gas-exchange view. The enlargement changes the scale so the air space and neighbouring blood vessel can be distinguished. Frimley Health NHS Foundation Trust: How your lungs work · Central and North West London NHS Foundation Trust: How do we breathe?
Air–blood barrier
A thin boundary separates air from blood. The thin alveolar and capillary walls separate air in the sac from blood in its neighbouring vessel. Oxygen and carbon dioxide cross this boundary in opposite directions. Locate the tissue between the two spaces in the enlarged view. Blood cells remain in the vessel; the model does not represent an open connection through which air and blood mix. Central and North West London NHS Foundation Trust: How do we breathe?
Pulmonary capillaries
Small blood vessels pass beside the air sacs. Pulmonary capillaries are small blood vessels beside the alveoli. Blood moving through them receives oxygen and releases carbon dioxide across the thin exchange boundary, then continues through the circulation. Follow the labelled gas routes separately from the blood cells. These cells stay inside the capillary rather than moving into the air sac. Central and North West London NHS Foundation Trust: How do we breathe?
Diaphragm
This muscle helps make room for a breath. The diaphragm is a broad, dome-shaped breathing muscle beneath the lungs. It contracts and flattens downwards during inhalation, helping increase the space in the chest. During a quiet exhalation it relaxes towards its dome shape. Compare it with the rib cage: their changing positions help move air without the lung tissue acting as a contracting muscle. Cambridge University Hospitals NHS Foundation Trust: Breathing techniques to ease breathlessness: muscles involved
Rib cage and breathing muscles
Chest movement changes the space around the lungs. The rib cage protects the chest organs and moves with the breathing muscles. Expansion upwards and outwards helps increase chest space during inhalation; relaxation reduces that space during a quiet exhalation. Compare this movement with the diaphragm below the lungs. Together these structures provide the mechanics that allow air to move through the airways. Central and North West London NHS Foundation Trust: How do we breathe? · Cambridge University Hospitals NHS Foundation Trust: Breathing techniques to ease breathlessness: muscles involved
Pleura
Two thin layers surround the lungs and line the chest. The pleura has two thin layers around the lungs and inside the chest wall. A small amount of fluid between them allows the surfaces to slide with less friction as breathing changes the chest space. Locate this outer covering separately from the internal air sacs; it is not the thin air–blood exchange boundary. Blackpool Teaching Hospitals NHS Foundation Trust: Pleural clinic
Open the complete process transcript
The process, step by step
1 · Make space
Breathing in begins with a change in the space inside the chest. The diaphragm, a dome-shaped muscle beneath the lungs, contracts and moves downwards. Muscles around the ribs help lift the chest upwards and outwards. As the lungs expand with this changing space, air can enter through the airways. Locate the diaphragm and rib cage together rather than treating the lungs as muscles that pull themselves open. The model separates the movement into a teaching step so you can follow its purpose. In the body, chest movement, airflow and blood circulation are connected parts of a continuing process. Central and North West London NHS Foundation Trust: How do we breathe? · Cambridge University Hospitals NHS Foundation Trust: Breathing techniques to ease breathlessness: muscles involved
What to watch: Locate the diaphragm beneath the lungs and the rib cage around them; compare their positions with the space occupied by the lungs.
Why it matters: Changing the chest space draws air into the lung passages. The breathing muscles supply the movement, while the lungs expand with the chest to receive the next breath.
Explore this step: Select the diaphragm and rib cage in turn, then explain how their movement helps air enter without the lungs contracting like muscles.
2 · Move air
Air entering through the nose or mouth travels down the trachea, or windpipe, towards the chest. The trachea divides into the two main bronchi, with one route supplying each lung. Follow this continuous passage in the whole-chest view before moving into the smaller branches. The moving air is a mixture of gases, including oxygen; it is not a stream of pure oxygen travelling straight into the blood. These larger airways carry the breath towards the places where gas exchange happens. The same connected passages also provide the outward route when air is breathed out. Frimley Health NHS Foundation Trust: How your lungs work
What to watch: Start at the nose and mouth, follow the trachea downwards and find the split into the right and left main bronchi.
Why it matters: The larger passages distribute air to both lungs and connect the outside air with the smaller branches inside. Gas exchange takes place further along the route, rather than within the windpipe.
Explore this step: Trace the route to each lung and distinguish the tubes carrying air from the separate vessels carrying blood.
3 · Reach the air sacs
Inside each lung, the bronchi divide into smaller branches called bronchioles. These passages distribute air towards clusters of tiny air sacs, the alveoli. Follow one branch in the close-up and connect its end with an air-sac cluster, using the other branches as surrounding context. These routes distribute the breath throughout the lungs rather than supplying only one working air sac. A real lung contains many branching routes and air sacs operating together. This distribution brings air close to a large network of small blood vessels, preparing for the exchange shown in the next view. Frimley Health NHS Foundation Trust: How your lungs work
What to watch: Follow one smaller airway to the cluster of air sacs at its end, keeping the other branches as surrounding context.
Why it matters: Branching delivers air throughout the lungs instead of to one large chamber. The many air sacs bring the inhaled gases close to blood vessels where oxygen and carbon dioxide can cross.
Explore this step: Trace one complete branch to its air sacs, then explain how the many branches distribute air throughout the lungs.
4 · Change scale
The lesson now changes from a branching airway to an enlarged air–blood interface. An alveolus contains air; beside it runs a capillary containing blood. Their very thin walls form the boundary across which gases can move. Locate the air space, the separating tissue and the inside of the vessel before following any gas symbols. The magnified view represents a tiny part of the same lung, not a separate organ or a hole that joins air and blood into one space. The enlargement helps explain how the two systems can exchange gases while keeping their contents separate. Central and North West London NHS Foundation Trust: How do we breathe?
What to watch: Find the air inside the enlarged alveolus, the thin separating boundary and the neighbouring capillary with blood cells inside it.
Why it matters: A close boundary allows gases to cross between alveolar air and capillary blood. Keeping the two spaces separate lets ventilation and circulation cooperate without blood cells entering the air sac.
Explore this step: Identify the air space and blood-vessel space, then point to the boundary each gas must cross between them.
5 · Exchange gases
At the air–blood boundary, oxygen moves from the alveolar air into the capillary blood. At the same time, carbon dioxide carried back from the body moves from the blood into the air sac. The two gases cross in opposite directions; blood cells stay within the vessel. Follow each labelled symbol separately so that exchanging gases is not confused with mixing the air and blood together. Blood then carries oxygen onwards towards the heart and the body’s tissues. The teaching symbols simplify continuous gas movement, and their size, colour and speed do not represent a measurement. Central and North West London NHS Foundation Trust: How do we breathe?
What to watch: Follow the O₂ symbol towards the capillary and the CO₂ symbol towards the air sac, while locating the blood cells within the vessel.
Why it matters: Oxygen can be carried onwards for use by the body, while carbon dioxide returns to the airways for removal. Both transfers connect the breath with the continuing circulation of blood.
Explore this step: Trace the two gas routes in opposite directions and explain why a blood cell should remain inside the capillary.
6 · Breathe out
During a quiet breath out, the diaphragm and other breathing muscles relax. The diaphragm returns towards its dome shape, chest space decreases and air moves back along the airways to the nose or mouth. This outgoing air carries carbon dioxide that crossed from the blood into the alveoli. Trace the route in reverse without reversing the direction of blood circulation: oxygen-carrying blood continues towards the heart while another breath prepares to enter. The model presents a single cycle to explain the relationship. It does not show breathing as a series of separate events in which circulation stops between steps. Central and North West London NHS Foundation Trust: How do we breathe? · Cambridge University Hospitals NHS Foundation Trust: Breathing techniques to ease breathlessness: muscles involved
What to watch: Compare the diaphragm and chest with the inhalation step, then follow the outward airway route from the lungs to the nose or mouth.
Why it matters: Exhalation removes air containing carbon dioxide from gas exchange. Meanwhile, blood circulation continues carrying oxygen onwards, linking this breathing cycle with the needs of the rest of the body.
Explore this step: Trace the outward air route and the onward blood route separately, then describe why they are connected processes with different pathways.
Read the practice situations and all answer explanations
Sources and how the model is made
The opening images are AI-generated anatomical illustrations. The interactive 3D models and labelled SVG diagrams use original procedural artwork. These teaching images are not medical scans or diagnostic tools. Source references support the learner explanations and do not grant artwork rights.
- Frimley Health NHS Foundation Trust: How your lungs work — Normal airway branching, air sacs and capillary gas exchange; factual text only.
- Central and North West London NHS Foundation Trust: How do we breathe? — Thin alveolar/capillary walls, opposing gas transfer, circulation and chest mechanics. No illustrations or exercises copied.
- Cambridge University Hospitals NHS Foundation Trust: Breathing techniques to ease breathlessness: muscles involved — Diaphragm movement and breathing-muscle context only; this module does not prescribe breathing exercises.
- HSE: Health risks from welding — Welding-related airway irritation, possible deeper injury and irritant asthma; not a universal pattern for every gas.
- HSE: Asthma: an overview — Sensitisation, later triggering and work aggravation. Legacy labelling language and statistics are not reused.
- HSE: Advice for employers: occupational asthma — Exposure prevention, controls and health surveillance only; legacy legislation wording is not reused.
- NHS: Silicosis — Silica-associated inflammation/fibrosis, varying latency, irreversible damage and possible progression after exposure stops.
- HSE: Why is asbestos dangerous? — Asbestosis, mesothelioma and pleural disease are distinct; long disease latency.
- HSE: Construction dust: cutting paving blocks, kerbs and flags — Task design, source suppression/extraction, suitable RPE and checking controls; not a generic dust safe-dose rule.
- NHS: Shortness of breath — Emergency recognition of severe breathing difficulty and 999; emergency advice is outside the activity.
- NHS: Asthma — Narrowed/swollen airways, symptoms and clinical diagnosis; no medication doses or treatment plan reproduced.
- University Hospitals of North Midlands NHS Trust: My lung surgery: about your lungs — Right/left lung lobe counts and airway anatomy; no source image copied.
- Blackpool Teaching Hospitals NHS Foundation Trust: Pleural clinic — Pleural layers and the small lubricating fluid layer outside lung tissue; no procedural teaching included.
- HSE: Asphyxiation hazards in welding and allied processes — Oxygen-deficient spaces and need for independent air supply; no unprotected entry or rescue.
- HSE: Respiratory protective equipment at work — RPE selection must match the contaminant and conditions; filtering protection is not a supply of oxygen.
- HSE: Flour dust and risks to bakers — Flour sensitisation and practical reduction of dusty handling; exposure-limit numbers are not reused.
- Health and Safety Executive: Asbestos essentials — Task planning, training and competent asbestos work arrangements for the maintenance exposure example; not permission to disturb unknown material or a licence/classification decision.
- Health and Safety Executive: Welding fume: protect your workers — Alternative joining, fume reduction, LEV, suitable RPE and maintained controls for the welding-fume example. No unprotected exposure or rescue procedure.
How should plasterboard dust risk be assessed?
Assessment should consider the material, task, tool, room, duration, nearby people, cleaning method and extraction reliability.
First confirm the board, joint compound and adjacent materials. The assessment then follows cutting, sanding, cleanup and waste, asks who else shares the area, and checks whether no-sanding or on-tool extraction is feasible before selecting residual protection.
| Assessment question | What to check | Evidence |
|---|---|---|
| What is being disturbed? | New board, jointing compound, old partition, mixed refurbishment materials or contaminated area. | Material information and refurbishment survey. |
| How is dust generated? | Cutting, rasping, sanding, breaking out, drilling or cleaning. | RAMS and task observation. |
| Where is the work? | Small room, ceiling, occupied building, corridor, welfare-adjacent or poorly ventilated area. | Site plan and exclusion arrangement. |
| Who is exposed? | Dryliners, finishers, other trades, cleaners, occupants and visitors. | Work-zone and communication plan. |
| What controls are used? | Avoid sanding, extraction, vacuum class, ventilation, wet methods and RPE. | Control checklist. |
| How will controls be checked? | Pre-use checks, extraction flow, filters, hoses, TExT, supervision and monitoring. | Inspection and maintenance records. |
How should plasterboard dust be controlled?
Control should reduce dust generation first, capture remaining dust at source and prevent dust spread.
This section turns legal language into workplace control. The examples show how broad duties become risk assessment, competent help, consultation, maintenance and review evidence.
| Control level | Practical control | Weak practice |
|---|---|---|
| Avoid sanding | Use better jointing technique, low-dust products or methods that reduce finishing. | Assume sanding is always necessary. |
| Low-dust cutting | Score-and-snap, board lifters, pre-cut boards and suitable cutting tools. | Use high-speed dusty cutting indoors. |
| On-tool extraction | Adapted sanders with suitable H/M/L class extraction and tight hose connections. | Domestic vacuum or leaking hose. |
| Ventilation/exclusion | Keep others out of dusty areas and ventilate where useful. | Let other trades work in dust cloud. |
| Cleaning | Use suitable vacuum or wet cleaning; avoid dry sweeping/compressed air. | Sweep dust into airborne cloud at end of shift. |
| RPE/PPE | Use suitable RPE/eye protection where risk remains or control is uncertain. | Use nuisance masks with no fit or assessment. |
| Maintenance | Check hoods, hoses, filters, warning devices and TExT. | Extraction used with blocked filters. |
What should a controlled sanding workflow look like?
A controlled workflow manages dust before, during and after sanding, not only when the sander is switched on.
A controlled sanding job starts with a finish trial and a matched extraction unit. Pre-use checks cover hood fit, hose seal, airflow and filter warning; during work, visible escape or a blocked hose calls for a stop and repair, not faster sanding.
| Stage | Good practice | Evidence |
|---|---|---|
| Plan | Avoid sanding where possible and coordinate with other trades. | Programme and RAMS. |
| Set up | Select extraction sander, suitable M-class vacuum as a common baseline where appropriate, or H-class where the risk assessment requires it, with correct hose, filter and power supply. | Pre-use check. |
| Exclude | Keep other trades/occupants out and protect clean areas. | Barriers/signage. |
| Sand | Keep hood in contact, avoid over-sanding and check dust escape. | Supervisor observation. |
| Clean | Vacuum or wet clean surfaces and avoid dry sweeping. | Cleaning record. |
| Maintain | Inspect filters, hoses, seals and warning devices. | Maintenance and TExT record. |
| Review | Use worker feedback, dust observations and monitoring where needed. | Action tracker. |
Selection branch: a confirmed gypsum-only sanding task follows the specific HSE plasterboard-sanding assessment, which allows the assessed H/M/L extraction choice. Silica, wood or unknown mixed dust requires its own specialist control standard. Do not let a shortcut M-class reference replace identifying the actual material and task.
How should gypsum, respirable and mixed construction dust be compared?
The control standard should recognise that plasterboard work may create lower-toxicity gypsum dust or a mixed refurbishment dust with higher-hazard contaminants.
Gypsum and jointing dust are not a licence to ignore exposure, but they also must not be conflated with silica, wood or asbestos. A mixed task or unknown legacy coating changes both the assessment and the specialist route before disturbing material.
| Dust situation | What it may contain | Control implication |
|---|---|---|
| Gypsum/plasterboard dust | Gypsum, paper fibres and jointing compound dust from new or known plasterboard. | Still control with low-dust methods, extraction, cleaning and COSHH review. |
| Respirable dust fraction | Fine particles small enough to reach deeper parts of the lungs. | Control airborne dust at source and consider competent monitoring where exposure is uncertain or high. |
| Inhalable dust fraction | Airborne material entering the nose or mouth, including the finer respirable fraction that can enter the nose and mouth. | Control visible dust clouds, eye/throat irritation and welfare contamination. |
| Silica-containing mixed dust | Concrete, mortar, brick, tile adhesive, skim, fillers or chasing dust mixed with plasterboard work. | Escalate control standard because respirable crystalline silica can cause serious lung disease. |
| Legacy/refurbishment dust | Unknown building dust, mould, insulation fibres, asbestos/lead risk or contamination from previous work. | Pause if material identity is uncertain and use survey, sampling or competent advice. |
| Cleaning dust | Settled dust re-suspended by sweeping, compressed air or poor vacuuming. | Use suitable vacuum or wet cleaning and protect welfare/clean routes. |
The respirable fraction is the part reaching the lung’s gas-exchange region; it sits within the inhalable fraction, rather than forming a mutually exclusive bin. Visible dust cannot measure invisible respirable exposure. GB gypsum limits are 10 mg/m³ inhalable and 4 mg/m³ respirable, both 8-hour TWAs. General COSHH dust concentration criteria are not universal safe limits for mixed dust; apply every relevant constituent limit. HSE EH40 gypsum and dust criteria
How should plasterboard dust be classified before work starts?
A simple decision flow stops teams treating all plasterboard work as either harmless gypsum dust or as an unknown construction dust problem.
Before cutting, sanding or breaking out plasterboard, supervisors should ask what material is known, what else is being disturbed and whether the surrounding dust is mixed or uncertain. New plasterboard finishing can usually be managed through low-dust methods, extraction, cleaning and RPE decisions. Refurbishment work may need a higher standard because the dust can be mixed with silica, cement, lead, mould, insulation fibres or asbestos-containing material risk.
The aim is not to overcomplicate routine drylining. It is to stop uncertainty being ignored. If the material identity or surrounding contamination is unclear, pause and use survey information, sampling or competent advice before making dust.
| Question | If yes | If no or uncertain |
|---|---|---|
| Is this new, known plasterboard and jointing compound? | Use planned low-dust cutting/sanding, extraction, cleaning and COSHH controls. | Check refurbishment survey, product information or sampling need. |
| Will sanding, especially overhead or indoors, create airborne dust? | Use extraction sander, suitable vacuum, exclusion and visible dust checks. | Still control cleaning and incidental dust; avoid creating unnecessary dust. |
| Could dust be mixed with concrete, mortar, brick, tile adhesive or chasing work? | Escalate to mixed construction dust and silica-control thinking. | Keep gypsum dust controls but monitor for change. |
| Could legacy contaminants be present? | Stop until asbestos, lead, mould or other contamination is ruled out or controlled. | Record the basis for assuming material is known. |
| Are other trades, occupants or welfare routes exposed? | Exclude, re-sequence and protect clean routes. | Verify barriers and cleaning still prevent spread. |
| Is extraction unavailable or visibly ineffective? | Stop dry sanding and repair, replace or redesign the method. | Continue only with pre-use checks and supervision. |
Where do plasterboard dust controls commonly fail?
Most plasterboard dust failures are predictable and visible if supervisors check the work as done rather than the RAMS alone.
A vacuum can be on but ineffective if the hood leaks, filter is blocked or hose is disconnected. Look for the dust plume and check the extraction indication during the real overhead task, not only on a clean bench.
| Failure | Why it matters | Corrective action |
|---|---|---|
| Dry sweeping | Settled dust is put back into the breathing zone and spreads to other trades. | Use suitable vacuum or wet cleaning and plan clean-up before work starts. |
| Poor extraction | A sander may have a vacuum attached but still leak dust through poor capture or flow. | Check hood contact, hose seals, filter condition, flow and warning devices. |
| Wrong vacuum | Domestic or unsuitable vacuums can give false confidence and spread fine dust. | Use a suitable class of extraction unit for the risk and keep TExT/maintenance records. |
| No RPE face fit | Tight-fitting RPE may not protect the wearer if it does not seal. | Fit test, train and check compatibility with eye protection and facial hair. |
| Dusty welfare or clean routes | Dust moves from the workface into eating, washing, changing or vehicle areas. | Separate clean/dirty routes, improve cleaning and supervise welfare standards. |
| Poor sequencing | Other trades work nearby or finishing begins before extraction is available. | Re-sequence, exclude others and treat dust control as a programme requirement. |
| Overhead sanding treated as routine | Dust falls directly into the breathing zone and eyes. | Review extraction, eye protection, posture, breaks and respiratory protection. |
When should plasterboard work be stopped or escalated?
Clear escalation triggers stop dusty work becoming normalised and protect other trades as well as the person doing the task.
Stop when dust is visibly escaping, extraction fails or the material cannot be confirmed. Separate a suspected silica, wood, lead or asbestos source from gypsum finishing and obtain the appropriate assessment before work resumes.
| Trigger | Why it matters | Action |
|---|---|---|
| Visible dust cloud | Dust is not being captured or contained. | Stop, check extraction, clean safely and review method. |
| Failed or missing extraction | The main engineering control is unavailable. | Do not continue dry sanding until repaired or an alternative control is approved. |
| Wrong or untested RPE | Residual exposure control may be ineffective. | Confirm selection, face fit, training and clean storage. |
| Uncontrolled nearby workers or occupants | Secondary exposure is being created. | Exclude, re-sequence or provide temporary containment. |
| Unknown refurbishment material | Dust may contain silica, asbestos, lead, mould or other contaminants. | Pause and seek survey/sampling or competent advice. |
| Dust in welfare, corridors or occupied areas | Contamination control has failed. | Clean using suitable methods and review barriers/routes. |
| Repeated extraction defects | Maintenance and supervision system is failing. | Escalate to management, quarantine equipment and review procurement. |
What would a good fit-out evidence pack contain?
A credible evidence pack shows that plasterboard dust was controlled from planning through cleaning and handover.
A useful evidence pack proves the control worked at this workface: it connects product identification, finish trial, extraction selection, pre-use check, competent examination and field observation to closed defects and safe handover.
| Evidence item | What it should show | Who owns it |
|---|---|---|
| COSHH/RAMS | Dust source, task, controls, exclusion, cleaning, RPE and review triggers. | Project manager / HSE adviser |
| Sequencing plan | Sanding planned away from other trades and occupied routes. | Site manager |
| Extraction register | Sander, vacuum class, hose/filter checks and TExT status. | Supervisor / plant owner |
| RPE records | Selection, face fit, training, maintenance and storage where RPE is required. | HSE adviser / supervisor |
| Pre-use checks | Hood, hose, filter, flow, power supply and visible dust checked before work. | Worker / supervisor |
| Cleaning record | Suitable vacuum/wet clean method and clean/dirty route protection. | Supervisor / cleaning lead |
| Inspection photos | Work area, extraction setup, exclusion and housekeeping captured during work. | Supervisor |
| Defect close-out | Blocked filter, leaks, missing fit test or dust spread actions closed and verified. | Site manager |
When are monitoring and health surveillance needed?
Monitoring and surveillance should be risk-based and used to check whether controls are adequate, not to excuse dusty work.
For well-controlled plasterboard sanding with effective extraction, the residual risk may be low. However, high-volume work, enclosed areas, mixed dusts, visible dust escape, worker symptoms or uncertainty about exposure may justify competent occupational hygiene advice or monitoring. Health surveillance may be needed where the risk assessment shows a credible risk of work-related respiratory or skin effects.
| Trigger | What it may mean | Response |
|---|---|---|
| Visible dust cloud | Controls are not capturing dust effectively. | Stop, check extraction and review method. |
| Enclosed or overhead work | Breathing-zone exposure may be higher. | Strengthen extraction/exclusion and consider monitoring. |
| Mixed refurbishment dust | Dust may include silica, asbestos, mould, cement or wood. | Identify material and escalate if uncertain. |
| Symptoms | Eye, nose, throat, cough or breathing issues may indicate exposure. | Review controls and consider OH/medical advice. |
| Extraction defects | Dust control barrier is degraded. | Repair, retest and close out defects. |
| Long-duration sanding | Dose may build up even if task seems routine. | Plan exposure, rotate, monitor and review. |
How could plasterboard dust controls fail during fit-out?
A fit-out scenario shows why dust control needs planning, sequencing and supervision.
A finishing team sands joints in several small rooms while decorators and electricians work nearby. The sander has a vacuum attached, but the filter is blocked and the hose connection leaks. Workers dry sweep at the end of the shift, dust spreads into the corridor and people eat in a dusty welfare route. The weak response is to tell finishers to wear masks. The better response is to stop uncontrolled sanding, repair extraction, exclude other trades, clean safely, improve welfare routes and review the RAMS.
| Issue | Weak response | Better response |
|---|---|---|
| Blocked extraction | Carry on because vacuum still makes noise. | Stop, clean/replace filter and verify suction/flow. |
| Other trades nearby | Assume short exposure is acceptable. | Exclude or sequence work to prevent secondary exposure. |
| Dry sweeping | Clean faster at end of shift. | Use suitable vacuum or wet cleaning. |
| Ceiling sanding | Same controls as wall sanding. | Review breathing-zone dust, eye protection and extraction. |
| Learning | Toolbox talk only. | Update procurement, maintenance, supervision and inspection. |
Operational example and hold points
Task material and setting: Ceiling-joint sanding during interior fit-out; verify the board, filler and nearby work.
People and prerequisites: Finisher, nearby trades, cleaner, supervisor and extraction owner; material information and a trial finish are available.
Before: Test a no-sanding finish; if sanding remains, fit matched on-tool extraction and establish the work zone.
During: Check hood, hose, airflow, exclusion and suitable vacuum cleanup; watch for dust escaping the tool.
Hold or stop: Visible dust plume, failed extraction, unknown material or mixed silica, wood or legacy coating dust.
Completion and hand back: Clean the zone without dry sweeping, inspect surfaces and release nearby trades only after controls and cleanup are verified.
Evidence: Finish trial, product information, COSHH assessment, pre-use check, extraction examination, field observation and defect closure.
What evidence shows plasterboard dust is controlled?
Evidence should show that dust was planned out, captured, cleaned safely and reviewed.
Evidence should be read as a chain rather than a filing exercise. A single record rarely proves good management on its own; stronger assurance comes from matching records, observations, interviews, trends and verified action closure.
| Evidence | What it should show | Weakness to challenge |
|---|---|---|
| COSHH assessment | Material, task, exposure routes, WELs, controls and review triggers. | Generic dust assessment. |
| RAMS and sequencing | Sanding avoided/reduced and other trades protected. | Dusty work planned alongside other trades. |
| Extraction checks | Vacuum class, hose, filter, flow and TExT managed. | Equipment present but not effective. |
| Cleaning records | No dry sweeping/compressed air; safe cleaning planned. | Dust re-suspended during clean-up. |
| Training | Workers understand dust harm, controls and defects. | Workers only told to wear masks. |
| Inspection/action tracker | Dust defects closed and lessons shared. | Same dust findings repeat. |
Which legal duties apply to plasterboard dust?
Plasterboard dust is managed mainly through COSHH, construction planning and general health and safety duties.
The rows distinguish Great Britain and Northern Ireland. Select the instrument in force for the work location and the actual dust, substance or policy decision; a guidance page or voluntary standard does not replace the legal text.
| Duty or regulation | What it requires | How to apply it |
|---|---|---|
| COSHH Regulations 2002 | Requires dust exposure to be prevented or adequately controlled where it can harm health or exceeds dust trigger levels. | Assess plasterboard cutting, sanding, demolition and cleaning; control dust at source and review controls. |
| EH40 Workplace Exposure Limits | Sets GB workplace exposure limits including gypsum-specific WELs and separate general-dust COSHH criteria where relevant. | Use WELs for inhalable and respirable dust interpretation and competent monitoring decisions. |
| Health and Safety at Work etc. Act 1974 | Requires safe systems, information, training and supervision. | Plan low-dust methods, welfare, exclusion, supervision and competent control. |
| Management of Health and Safety at Work Regulations 1999 | Requires risk assessment, preventive arrangements, competence and review. | Coordinate trades, contractors, cleaning and changes in site conditions. |
| CDM Regulations 2015 | Requires construction work to be planned, managed, monitored and coordinated. | Build plasterboard dust controls into construction phase plans, RAMS, welfare and sequencing. |
| PPE at Work Regulations 1992 | General PPE duties, as amended, apply within their scope; hazardous-substance protective equipment is governed through COSHH. | Select suitable substance-specific gloves, eye protection and RPE through COSHH; retain the general PPE route for other applicable risks. |
| Control of Substances Hazardous to Health Regulations (Northern Ireland) 2003 | Assess and prevent or adequately control harmful dust exposure. | Use the NI instrument for the actual board, compound and mixed-dust work. |
| Construction (Design and Management) Regulations (Northern Ireland) 2016 | Plan, manage and coordinate NI construction work. | Coordinate sanding, nearby trades and cleanup. |
| Health and Safety at Work (Northern Ireland) Order 1978 | Protect workers and others from work risks. | Provide a safe dust-control system and supervision. |
| Management of Health and Safety at Work Regulations (Northern Ireland) 2000 | Assess work risk and arrange preventive controls. | Review changes in materials, location and work sequence. |
How should the control be managed and reviewed?
For a GB workplace, HSE guidance supports identifying the actual risk, taking practical protective steps and reviewing whether they work. Name the decision owner, check the control during the real task and correct a failed arrangement. Apply the separate Northern Ireland duties and guidance where the work is in NI.
GB management guidance: HSE managing health and safety
What training and awareness helps?
Training should show workers how dust is created, why extraction matters and when to stop work.
Training should be role-based. General awareness creates a baseline, but supervisors, managers, advisers and senior leaders need different levels of decision-making, verification and escalation competence.
| Role | Demonstration | Assessor | Record and reassessment |
|---|---|---|---|
| Board cutters and finishers | Identify board and filler; demonstrate low-dust cut/sand method, extraction pre-use check, cleanup and stop point. | Supervisor observes the actual tool and material. | Task sign-off; repeat when compound, tool or location changes. |
| Supervisors and contractors | Sequence dusty tasks, inspect extraction and exclusion, act on visible emissions and mixed-dust uncertainty. | Construction health lead checks a live workface. | Daily field check and defect closure; reassess after failed control. |
| Plant and maintenance | Match extraction unit and filter, inspect hose/hood, arrange thorough examination and repair. | Competent extraction examiner or maintenance lead. | Service/test record and return-to-use check. |
| Managers and advisers | Review product information, COSHH, monitoring need, RPE decision and contractor interfaces. | Competent occupational hygiene/safety reviewer. | Assessment and action record; revisit on product or exposure change. |
How could BuildOut Ltd manage this in practice?

BuildOut would manage plasterboard dust through design, sequencing, extraction sanding, safe cleaning, welfare and assurance.
A fit-out contractor controls drywall dust through procurement of low-dust methods, extraction sanders, vacuum maintenance, trade coordination, supervisor checks, worker training and health-risk review.
| Management element | How the business would manage it | Evidence to review |
|---|---|---|
| Plan | Avoid or minimise sanding and coordinate trades. | Programme and RAMS. |
| Equip | Use adapted sanders and suitable extraction. | Equipment register. |
| Check | Inspect hoods, hoses, filters and flow. | Pre-use and TExT records. |
| Clean | Use vacuum/wet cleaning and clean/dirty routes. | Cleaning record. |
| Improve | Use observations, symptoms and monitoring to improve controls. | Action tracker. |
Chemical hazard symbols: what do they mean?
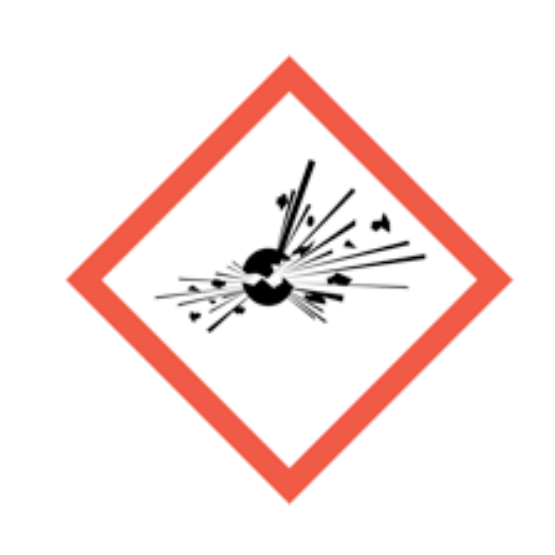
Exploding bomb
Explosive, self-reactive or organic peroxide hazards.
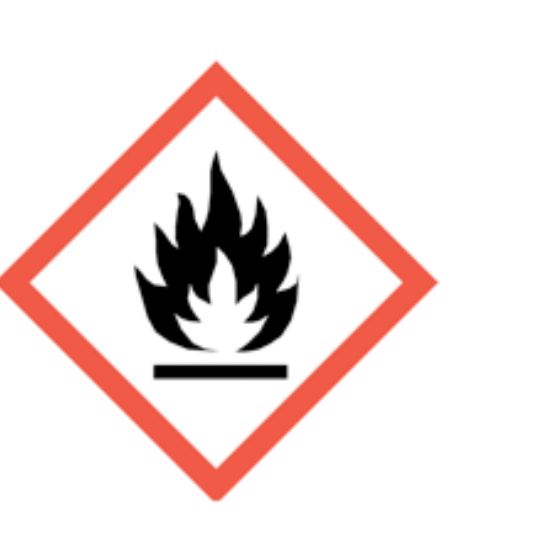
Flame
Flammable, self-heating or pyrophoric substances.
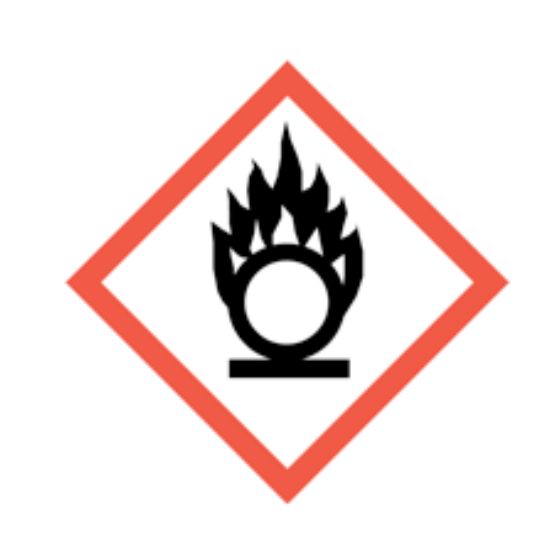
Flame over circle
Oxidising substances that can intensify fire.

Gas cylinder
Gas under pressure.
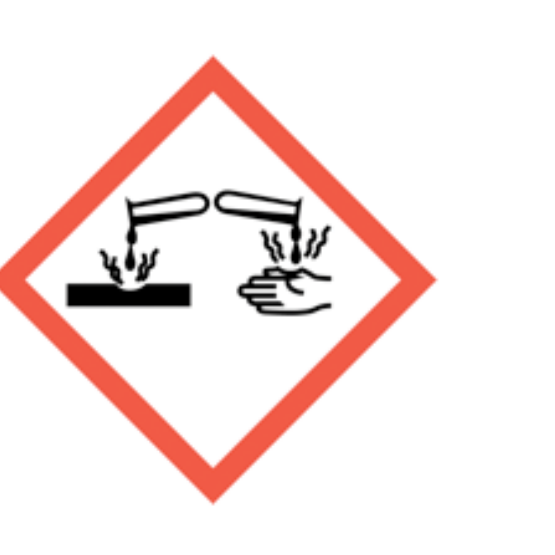
Corrosion
Skin burns, eye damage or corrosive to metals.
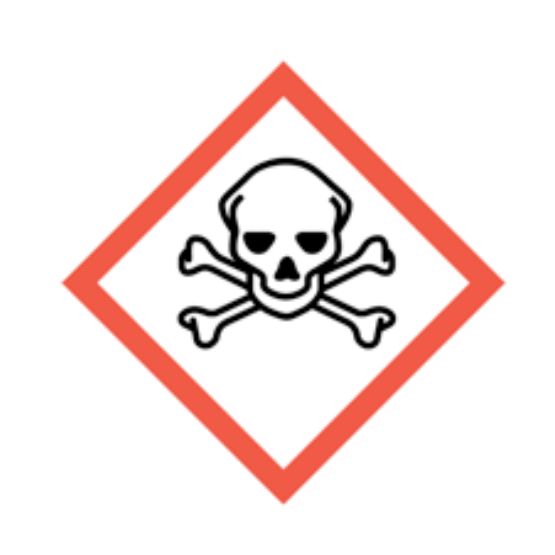
Skull and crossbones
Acute toxicity.

Exclamation mark
Irritation, harmful effects or skin sensitisation; some classifications cover drowsiness, dizziness or ozone-layer hazard. Read the actual hazard statements. Skin sensitisation differs from respiratory sensitisation.
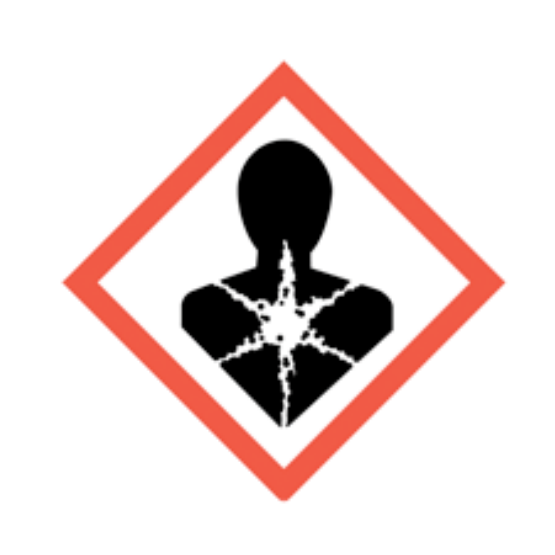
Health hazard
Serious health hazards, including organ damage, aspiration hazard, respiratory sensitisation, cancer and reproductive effects; some can follow a single exposure.
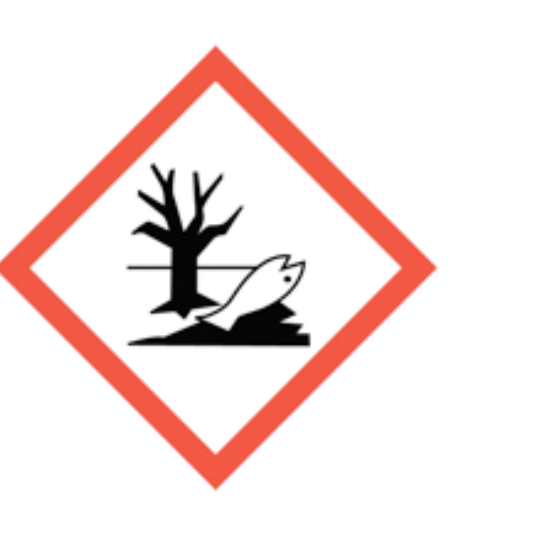
Environment
Hazardous to the aquatic environment.
What do the acronyms and key terms mean?
Acronyms should be understood before they are used in assessments, briefings, audits or learning answers.
Acronyms can exclude newer readers if they are not explained. This section keeps the main terms available at the end of the page so the article stays readable while still supporting learners and audit users.
| Acronym | Meaning | Plain-English use |
|---|---|---|
| COSHH | Control of Substances Hazardous to Health | UK hazardous substance regulations. |
| WEL | Workplace Exposure Limit | Legal airborne exposure limit where set. |
| LEV | Local Exhaust Ventilation | Engineering control for airborne contaminants. |
| TExT | Thorough Examination and Test | Formal examination/testing of LEV or extraction control. |
| RPE | Respiratory Protective Equipment | Equipment used to reduce inhalation exposure. |
| PPE | Personal Protective Equipment | Equipment worn to protect against hazards. |