SHARE Knowledge Hub
Abrasion
Abrasion occurs when friction or scraping damages the surface of skin or equipment. At work, contact with rough materials, moving surfaces or repeated rubbing can cause skin injuries and wear through protective components. Control the contact at source and check the condition of the task, guarding and material before damage leads to injury or equipment failure.
Understanding Abrasion
Abrasion is damage to the surface of the skin caused by rubbing, scraping or friction against a rough or moving surface. In workplace language it is often grouped with cuts, grazes, friction burns, puncture wounds and minor traumatic skin injuries, but the risk should not be dismissed because the immediate wound may look small. Abrasions can become infected, can be contaminated with chemicals, biological material or dirt, and can be an early warning of poor task design or inadequate guarding, housekeeping or personal protective equipment.
Why this matters at work
Record the injury and establish its potential, mechanism and outcome. A small abrasion caused by an accessible moving belt may indicate a much more serious machinery failure. Note the surface, motion, body part, contamination, task, guard condition, handling arrangement, PPE, lighting and workload. Compare previous injuries and near misses before concluding that this was an isolated event.
The same contact can have very different consequences. A scrape on clean cardboard is unlike contact with moving abrasive cloth, contaminated broken glass or a rough surface beside a rotating shaft. Controls therefore combine elimination, physical design, work organisation, compatible PPE and recovery.
How organisations manage this in practice
Where elimination is not possible, reduce exposure by substitution, engineering and work design. Use smoother materials, edge protection, barriers, handles, clamps, tool balancers, conveyors, lifting aids, work platforms, lighting, non-slip flooring and designated waste containers. Administrative controls then define the safe method, inspection regime, housekeeping standard, supervision and reporting route.
Residual risk must be judged after controls are selected, not before. If the remaining risk is still significant, the duty holder should revisit elimination, substitution, engineering controls, isolation, procedural controls and PPE in that order. The record should show why the selected controls are reasonably practicable and how their effectiveness will be checked.
Inspection and assurance are the bridge between written controls and real control of abrasion. A well-written document has little value if the organisation never checks whether equipment is suitable, guards are fitted, first aid is available, reporting is happening, or workers understand what to do. Assurance should combine planned inspections, supervisor observations, maintenance records, training checks, incident review, worker consultation and management review.
What is the scope and authority of this abrasion page?
Abrasion means damaging friction or scraping of skin or equipment. Apply the actual task, material and machine instructions alongside the correct Great Britain or Northern Ireland duties; this overview does not set product-specific wear or treatment limits.
Set the boundary before choosing controls. A skin graze is led through task design, skin protection and first-aid arrangements; dust or contaminated debris needs the substance and exposure-control route; rubbing, thinning or fraying of a safety-critical part needs isolation and a competent equipment decision. Where more than one route applies, keep the task stopped until the relevant owners agree the controls and evidence for restart.
Great Britain
For England, Scotland and Wales, use the GB route: the Health and Safety at Work etc. Act 1974, the Management Regulations 1999, PUWER 1998, COSHH 2002, the PPE Regulations and HSE guidance.
Northern Ireland
For Northern Ireland, use the HSENI route and the NI equivalents, including the Health and Safety at Work (Northern Ireland) Order 1978, the Management Regulations (NI) 2000 and PUWER (NI) 1999.
When to recheck
Reassess the controls after a new material, tool, work method, repeated injury or damaged guard. Use the current manufacturer instructions and the applicable GB or NI legal route for the task.
If the surface, material, contamination, jurisdiction or injury severity is unclear, stop the affected task and obtain the relevant competent or medical advice before deciding how to continue.
Choose the injury, exposure or equipment route
A rough edge, airborne debris and a worn cable need different decisions. Identify what is rubbing, who or what can be harmed, and whether contact has already occurred. Use the injury route for care, the substance route for generated dust or contamination, and the equipment route for deterioration.
Best-practice guide: Abrasion
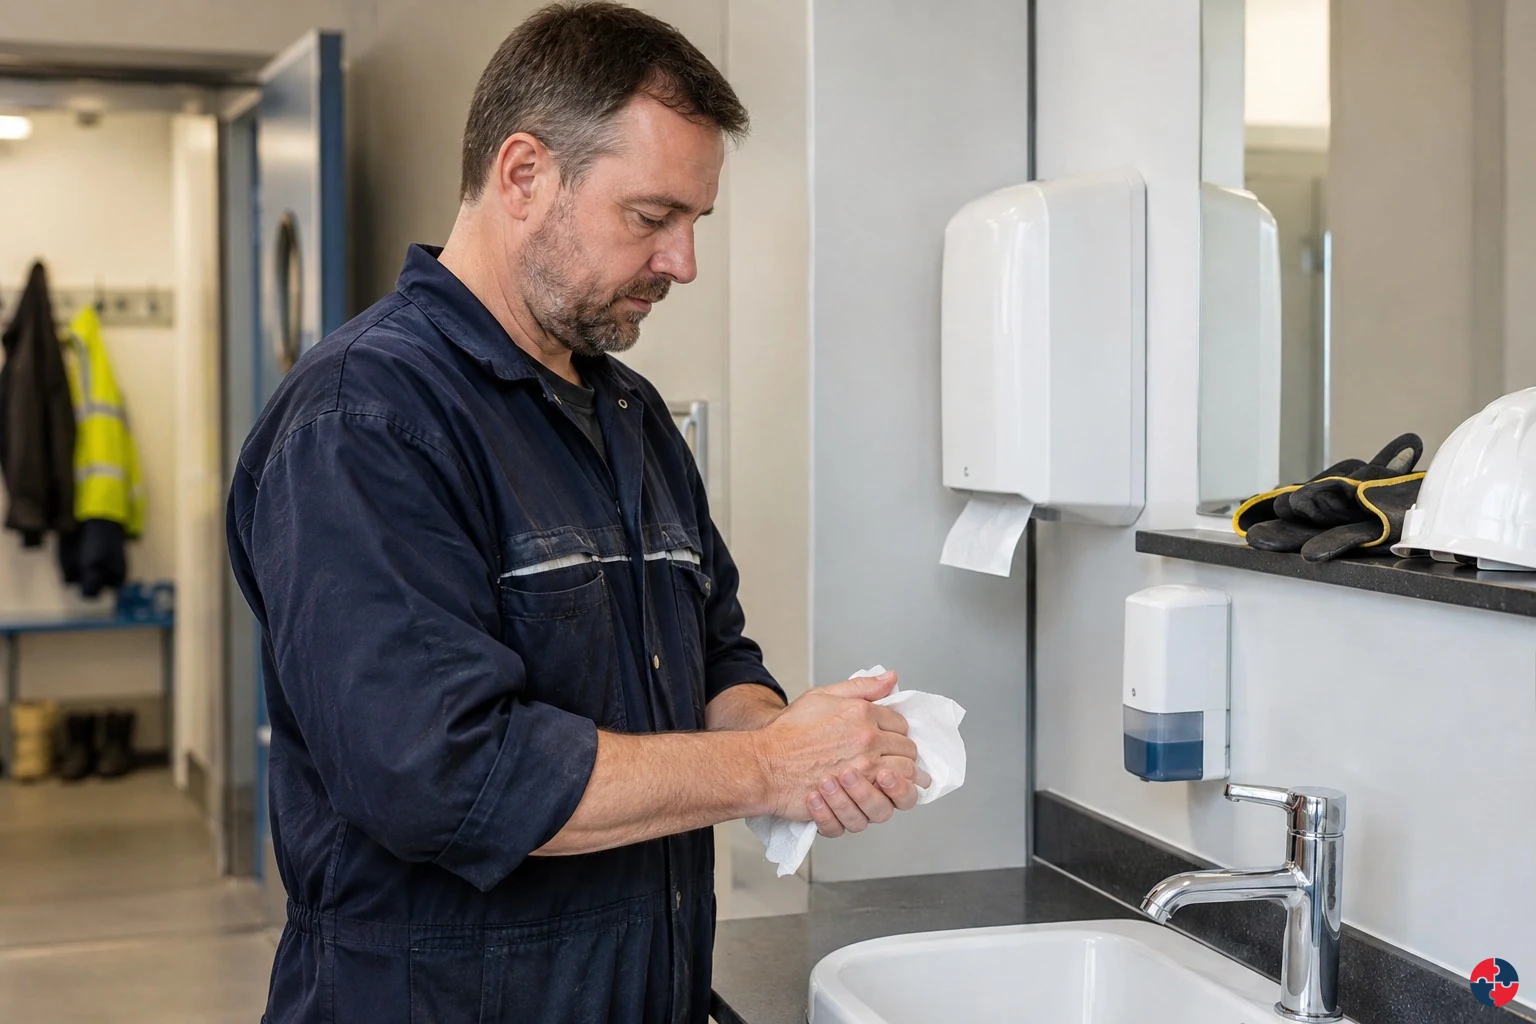
Choose the injury, exposure or equipment route
A rough edge, airborne debris and a worn cable need different decisions. Identify what is rubbing, who or what can be harmed, and whether contact has already occurred. Abrasion occurs when friction or scraping damages the surface of skin or equipment.
Turn abrasion knowledge into a decision
Abrasion occurs when friction or scraping damages the surface of skin or equipment. At work, contact with rough materials, moving surfaces or repeated rubbing can cause skin injuries and wear through protective components. Keep the defect or supplier record, PPE replacement note, first aid entry where relevant and evidence that the recurring cause was addressed.
Handling rough pallets in a busy warehouse
Keep hands away from rough timber and tensioned strapping, control the load and watch for glove damage or shifting stock. Do not make a worker finish handling a defective pallet. Segregate the damaged pallet, check the route and any injured person, and return only sound stock to use.
How abrasion can harm people
Skin grazes and scrapes: The outer skin layer is rubbed away by rough surfaces, edges, packaging, flooring, tools or materials. Friction burns: Fast or repeated rubbing from ropes, belts, moving items, rotating surfaces or manual handling can produce heat and a burn-like injury. Deeper wounds and infection: Abrasions contaminated with dust, soil, chemicals, metal particles or biological material can become infected or worsen if ignored.
Choose controls for abrasion
Eliminate: Remove the rough contact, abrasive material, manual contact point or friction-generating task where reasonably practicable. Reduce: Reduce friction, contact force, repetition, speed, roughness, dustiness or exposure time. Isolate: Separate people from abrasive surfaces, particles and moving friction points. Control: Use engineering and management controls to keep abrasion at a safe level during normal work. PPE: Use personal protective equipment for remaining skin, eye, foot and breathing risks. Read the full control table for qualifications, ownership and verification. Use the actual task and applicable jurisdiction; existing technical approval remains unchanged.
Use the full abrasion lesson
Use the full topic for the decision points, practical examples, detailed control tables and source scope. HSE guidance applies to Great Britain; use HSENI for the Northern Ireland route and the source’s stated jurisdiction. A simplified guide does not change the page’s technical-review or approval status.

Read all six steps as text
1. Choose the injury, exposure or equipment route
A rough edge, airborne debris and a worn cable need different decisions.
- Avoid / redesign: Remove the rough contact, abrasive material, manual contact point or friction-generating task where reasonably practicable.
- Control the task: Separate people from abrasive surfaces, particles and moving friction points.
- Verify before release: Buy pre-finished materials, design out sharp edges, use pre-cut components, avoid manual dragging, automate abrasive handling or remove unnecessary contact with moving belts.
A rough edge, airborne debris and a worn cable need different decisions. Identify what is rubbing, who or what can be harmed, and whether contact has already occurred. Abrasion occurs when friction or scraping damages the surface of skin or equipment.
Apply it: Which part of this plan would you check at the workface before authorising the task?
2. Turn abrasion knowledge into a decision
Use the evidence to improve the actual work arrangement.
- Change at source: Remove the rough contact, abrasive material, manual contact point or friction-generating task where reasonably practicable.
- Make it observable: Buy pre-finished materials, design out sharp edges, use pre-cut components, avoid manual dragging, automate abrasive handling or remove unnecessary contact with moving belts.
- Keep useful evidence: Keep the defect or supplier record, PPE replacement note, first aid entry where relevant and evidence that the recurring cause was addressed.
Abrasion occurs when friction or scraping damages the surface of skin or equipment. At work, contact with rough materials, moving surfaces or repeated rubbing can cause skin injuries and wear through protective components. Keep the defect or supplier record, PPE replacement note, first aid entry where relevant and evidence that the recurring cause was addressed.
Apply it: What evidence would show that the change improves this task, rather than only completing a record?
3. Handling rough pallets in a busy warehouse
Example: a practical application of the existing topic lesson.
- Setting: Move stock from timber pallets in a shared loading bay without hand injury, splinters or unstable loads.
- Act: Inspect the pallet and route.
- Hold / review: Stop for splinters, an unstable load, torn gloves or unknown contamination.
Keep hands away from rough timber and tensioned strapping, control the load and watch for glove damage or shifting stock. Do not make a worker finish handling a defective pallet. Segregate the damaged pallet, check the route and any injured person, and return only sound stock to use.
Apply it: At which point would you hold this example, and what evidence would allow it to proceed?
4. How abrasion can harm people
Connect the task, the route to the person and the control that can fail.
- Skin grazes and scrapes: The outer skin layer is rubbed away by rough surfaces, edges, packaging, flooring, tools or materials.
- Friction burns: Fast or repeated rubbing from ropes, belts, moving items, rotating surfaces or manual handling can produce heat and a burn-like injury.
- Deeper wounds and infection: Abrasions contaminated with dust, soil, chemicals, metal particles or biological material can become infected or worsen if ignored.
Skin grazes and scrapes: The outer skin layer is rubbed away by rough surfaces, edges, packaging, flooring, tools or materials. Friction burns: Fast or repeated rubbing from ropes, belts, moving items, rotating surfaces or manual handling can produce heat and a burn-like injury. Deeper wounds and infection: Abrasions contaminated with dust, soil, chemicals, metal particles or biological material can become infected or worsen if ignored.
Apply it: Who could be exposed, including other trades, cleaners, maintainers and people nearby?
5. Choose controls for abrasion
Start with the stronger practicable options and verify their effect.
- Eliminate: Remove the rough contact, abrasive material, manual contact point or friction-generating task where reasonably practicable.
- Reduce: Reduce friction, contact force, repetition, speed, roughness, dustiness or exposure time.
- Isolate: Separate people from abrasive surfaces, particles and moving friction points.
- Control: Use engineering and management controls to keep abrasion at a safe level during normal work.
- PPE: Use personal protective equipment for remaining skin, eye, foot and breathing risks.
Eliminate: Remove the rough contact, abrasive material, manual contact point or friction-generating task where reasonably practicable. Reduce: Reduce friction, contact force, repetition, speed, roughness, dustiness or exposure time. Isolate: Separate people from abrasive surfaces, particles and moving friction points. Control: Use engineering and management controls to keep abrasion at a safe level during normal work. PPE: Use personal protective equipment for remaining skin, eye, foot and breathing risks. Read the full control table for qualifications, ownership and verification. Use the actual task and applicable jurisdiction; existing technical approval remains unchanged.
Apply it: Which stronger option can be used here, and who will verify it before accepting the remaining risk?
6. Use the full abrasion lesson
Follow the official sources below and retain the task-specific evidence.
- Official guidance: NHS cuts and grazes
- Official guidance: NHS eye injuries
- Task decision: Keep the defect or supplier record, PPE replacement note, first aid entry where relevant and evidence that the recurring cause was addressed.
Use the full topic for the decision points, practical examples, detailed control tables and source scope. HSE guidance applies to Great Britain; use HSENI for the Northern Ireland route and the source’s stated jurisdiction. A simplified guide does not change the page’s technical-review or approval status.
Apply it: Which official source and full-topic section will you use to resolve the next decision?
Make the defect record useful for the person fixing it: show the contact point, the affected task and the condition that prevents reuse. A repaired surface is not a complete close-out until the task has been checked for repeated rubbing or a new sharp edge.
A rubbing mark that changes the maintenance decision
Illustrative example. A conveyor cable is repeatedly touching a sharp bracket; the outer surface is visibly worn during a pallet-handling check.
Decision. Stop the affected equipment through the agreed isolation route and ask maintenance to assess the cable and routing, rather than cover the mark and continue.
Evidence to check. Photograph from a safe position; retain equipment identity, contact point, competent inspection findings and the revised support detail.
Hold or escalation point. No reuse while cable integrity or safe routing is uncertain; an operator cannot set a wear allowance.
Follow-up. The equipment owner verifies repair and observes a representative operating cycle for renewed contact.
What does abrasion mean in workplace health and safety?
Abrasion means material is being worn away by friction, whether that material is skin, clothing, a glove, a belt, a hose, a floor coating or a machine component.
The word is often used in two connected ways. For people, abrasion usually means a graze, scrape, friction burn or eye injury caused by contact with rough surfaces or particles. For equipment and materials, abrasion means wear that removes protective layers, thins parts, exposes sharp edges or eventually causes failure. A good workplace assessment considers both, because worn equipment can injure people and repeated minor skin injuries can reveal poor design, maintenance or supervision.
Abrasion is easy to underestimate because the first signs often look small: a torn glove, a scratched hand, a worn cable, a dusty surface, a rubbing mark on a guard or a belt beginning to fray. Those early signs are useful. They show where energy, contact or contamination is acting on people or equipment and where controls need to be improved.
Use a simple decision lens before choosing controls: what is rubbing against what, how fast or often is it happening, what material or body part will fail first, and what else changes if the surface becomes dusty, wet, contaminated, sharp, hot, moving or worn? That lens keeps the page practical: a rough pallet, a concrete kneeling task, a sanding job and a rubbing conveyor belt are all abrasion problems, but they need different controls and different evidence.
Where can abrasion occur in workplaces?
Abrasion can occur anywhere rough surfaces, particles, moving parts or repeated contact rub against people, equipment or materials.
Abrasion source triage
Two linked parts · 5 questions. Open Part 2 to complete the route.

Continue to questions 4–5 · Part 2 of 2


Read this visual as text
- Start: Use this route for the specific task described in the heading.
- Question 1: Can anyone contact the rough or moving surface? Decision owner: Supervisor / first aider.
- YES — STOP / REFER: Stop the contact and check skin, eyes, dust and contamination routes. Protect people before continuing. STOP / REFER → APPROPRIATE RESPONSE.
- NO: No such warning is identified; continue the remaining checks. CONTINUE → QUESTION 2.
- UNKNOWN — PROTECT FIRST: Protect people and hold the affected work. Obtain the responsible specialist’s assessment; do not assume the warning is absent. HOLD → OWNER RESOLVES BEFORE RESUMING.
- Question 2: Is equipment or PPE condition known? Decision owner: Supervisor and competent equipment owner.
- YES: The required evidence or condition is confirmed. CONTINUE → QUESTION 3.
- NO / UNKNOWN — HOLD: Inspect the contact source and item; keep uncertain safety-critical items out of use. HOLD → REPEAT QUESTION 2 AFTER CORRECTION.
- Question 3: What is being damaged? Decision owner: Supervisor and competent equipment owner.
- Person: Use first aid or clinical advice as needed, then remove the contact cause. CONTINUE → QUESTION 4.
- Equipment or PPE: Isolate or quarantine if failure could harm people; obtain competent assessment. CONTINUE → QUESTION 4.
- Both / uncertain: Control both routes and keep affected work on hold pending assessment. HOLD → OWNER RESOLVES BEFORE RESUMING.
- Question 4: Has the rubbing source been removed or controlled? Decision owner: Supervisor and competent equipment owner.
- YES: The required evidence or condition is confirmed. CONTINUE → QUESTION 5.
- NO / UNKNOWN — HOLD: Redesign, guard, isolate or separate the contact; do not rely on replacing gloves alone. HOLD → REPEAT QUESTION 4 AFTER CORRECTION.
- Question 5: Has the correction been checked in real work? Decision owner: Supervisor and competent equipment owner.
- YES: The required evidence or condition is confirmed. OUTCOME → RECORD AND HAND OVER.
- NO / UNKNOWN — HOLD: Keep the hold open and verify the actual control before a local restart. HOLD → REPEAT QUESTION 5 AFTER CORRECTION.
- Outcome: Controlled and recorded; first aid and task review; or isolated/quarantined for assessment.
The practical examples matter because abrasion controls are task-specific. A warehouse worker handling rough pallets needs different controls from a maintenance technician inspecting a worn hose, a construction worker cutting masonry, or a leisure worker inspecting a damaged play surface. The common thread is friction: identify where contact happens, what is wearing away, and what happens if that wear continues.
| Work setting or task | How abrasion is created | Why it matters |
|---|---|---|
| Construction and refurbishment | Hands, knees, forearms, clothing and tools rub against brick, block, concrete, rough timber, steel edges, scaffold boards, roof materials, debris and unfinished surfaces. | Minor grazes can become infected, damaged gloves reduce protection, and abrasive dust from cutting or grinding can create respiratory risk. |
| Warehousing and logistics | Workers handle rough pallets, cardboard, strapping, metal shelving, conveyor edges, rollers, totes and damaged packaging. | Repeated low-level contact can cause hand injuries, friction burns, torn gloves, poor grip and contamination of open skin. |
| Manufacturing and engineering | Grinding, sanding, deburring, polishing, shot blasting, conveyor transfer and contact with swarf or unfinished components create abrasive surfaces and particles. | People may suffer skin and eye injuries while equipment can wear, lose accuracy, expose sharp edges or fail unexpectedly. |
| Agriculture, forestry and grounds work | Soil, grit, bark, rope, chains, rough vegetation, fencing, machinery surfaces and animal-handling areas create friction and skin damage. | Open skin can be exposed to soil, biological material and contamination, increasing the importance of cleaning, covering and first aid. |
| Leisure, sport and public-facing premises | Poolside surfaces, ropes, climbing holds, artificial turf, play surfaces, mats and rough flooring can scrape skin during slips, falls or repeated contact. | Public users, children and staff may be affected, so inspection, surface condition, cleaning and first aid arrangements need to match the activity. |
| Transport, plant and maintenance | Tyres, belts, brake parts, hoses, guards, loading bays, ramps, chains, straps and moving components wear through repeated friction or contact with grit. | Abrasion can weaken safety-critical parts, create leaks, expose wires or cause secondary incidents if defects are missed. |
How can abrasion harm people?
Abrasion can harm people by damaging skin, creating friction burns, scratching the eyes, exposing open skin to contamination or releasing particles into the breathing zone. See HSE skin at work: prevention, HSE COSHH control for the applicable decision.
Three different abrasion pathways


Read this visual as text
- SKIN CONTACT: Rough edges and repeated rubbing damage the skin barrier. Remove or smooth the contact source.
- MOVING CONTACT: A moving belt or roller can abrade and entangle. Guard the interface and isolate before access.
- ITEM WEAR: A rubbed hose, cable or glove can lose its protective function. Assess the consequence of failure.
Choose the consequence first: skin damage needs first aid and source control; moving contact needs exclusion and safe isolation; worn equipment needs segregation and a competent condition check. These routes can occur together.
A skin abrasion removes part of the protective barrier that normally keeps contamination out of the body. That is why a small scrape should not be dismissed in dirty, wet, chemical, biological or dusty work. Eye abrasion can be more serious than it first appears because tiny particles can scratch the eye surface and continued rubbing can make the injury worse.
Where abrasion is linked to sanding, grinding, cutting or blasting, the risk is not only contact injury. Dust may be released from wood, silica-containing materials, cement, metals, coatings or other substances. In those cases the assessment should connect abrasion with hazardous substance controls, cleaning methods and respiratory protection.
| Harm route | What can happen | Controls that matter |
|---|---|---|
| Skin grazes and scrapes | The outer skin layer is rubbed away by rough surfaces, edges, packaging, flooring, tools or materials. The injury may look minor but can be painful, bleed and interrupt safe work. | Remove sharp edges, use mechanical aids, specify suitable gloves and sleeves, protect knees and elbows, improve housekeeping and encourage early reporting. |
| Friction burns | Fast or repeated rubbing from ropes, belts, moving items, rotating surfaces or manual handling can produce heat and a burn-like injury. | Guard moving parts, avoid contact with running conveyors, use suitable handling aids, train workers not to grab moving items, and isolate equipment before clearing jams. |
| Deeper wounds and infection | Abrasions contaminated with dust, soil, chemicals, metal particles or biological material can become infected or worsen if ignored. | Provide first aid, welfare and clean dressings, cover wounds before return to work, review tasks where contamination is likely and escalate signs of infection. |
| Eye abrasion or foreign body | Dust, grit, swarf or abrasive particles can scratch the eye surface or lodge under the eyelid, causing pain, watering, blurred vision or further damage if rubbed. | Use impact-rated eye protection, face shields where needed, extraction or wet methods, screens, eyewash provision and prompt first aid referral for eye injuries. |
| Respiratory exposure from abrasive dust | Sanding, grinding, cutting, blasting or handling dusty abrasive materials can create airborne particles that may affect the lungs depending on the material. | Eliminate or reduce dusty methods, use water suppression or local exhaust ventilation (LEV), clean without dry sweeping, and provide suitable respiratory protective equipment (RPE) where exposure remains. |
| Reduced protection from worn PPE | Gloves, sleeves, footwear and clothing can be worn through by abrasive contact, leaving the worker exposed without realising protection has failed. | Select abrasion-rated PPE, inspect it before use, replace it before failure, train users on limitations and avoid relying on PPE where design controls are possible. |
What rubbing damages: follow the contact path
Start with what made contact and what has been damaged. The three routes below lead to different actions; they are not a scale for judging the seriousness of an injury.
Rough material → skin contact
A splintered pallet edge rubs the hand during handling. The outer epidermis helps protect the body; rubbing can damage that barrier. Remove the contact source, use the first-aid arrangements and review how the load is handled. Replacing a glove alone leaves the rough edge in the task.
Moving surface → trapped or dragged contact
A belt, roller or rotating part can pull a person into a moving contact point. Keep people away and use the authorised safe-isolation procedure. Gloves must not be treated as protection against entanglement.
Repeated contact → worn protective item
A glove, cable covering or protective surface wears through. Mark and segregate the affected item where safe, identify what it protects, and have a competent person assess replacement or repair. Check the rubbing point so a new item is not damaged in the same way.
An eye injury, high-speed particle impact, serious bleeding or machinery injury follows the injury and emergency route. Do not use the skin illustration to assess those injuries.
Guidance: HSE skin structure and functions · HSE preventing skin problems · NHS cuts and grazes.
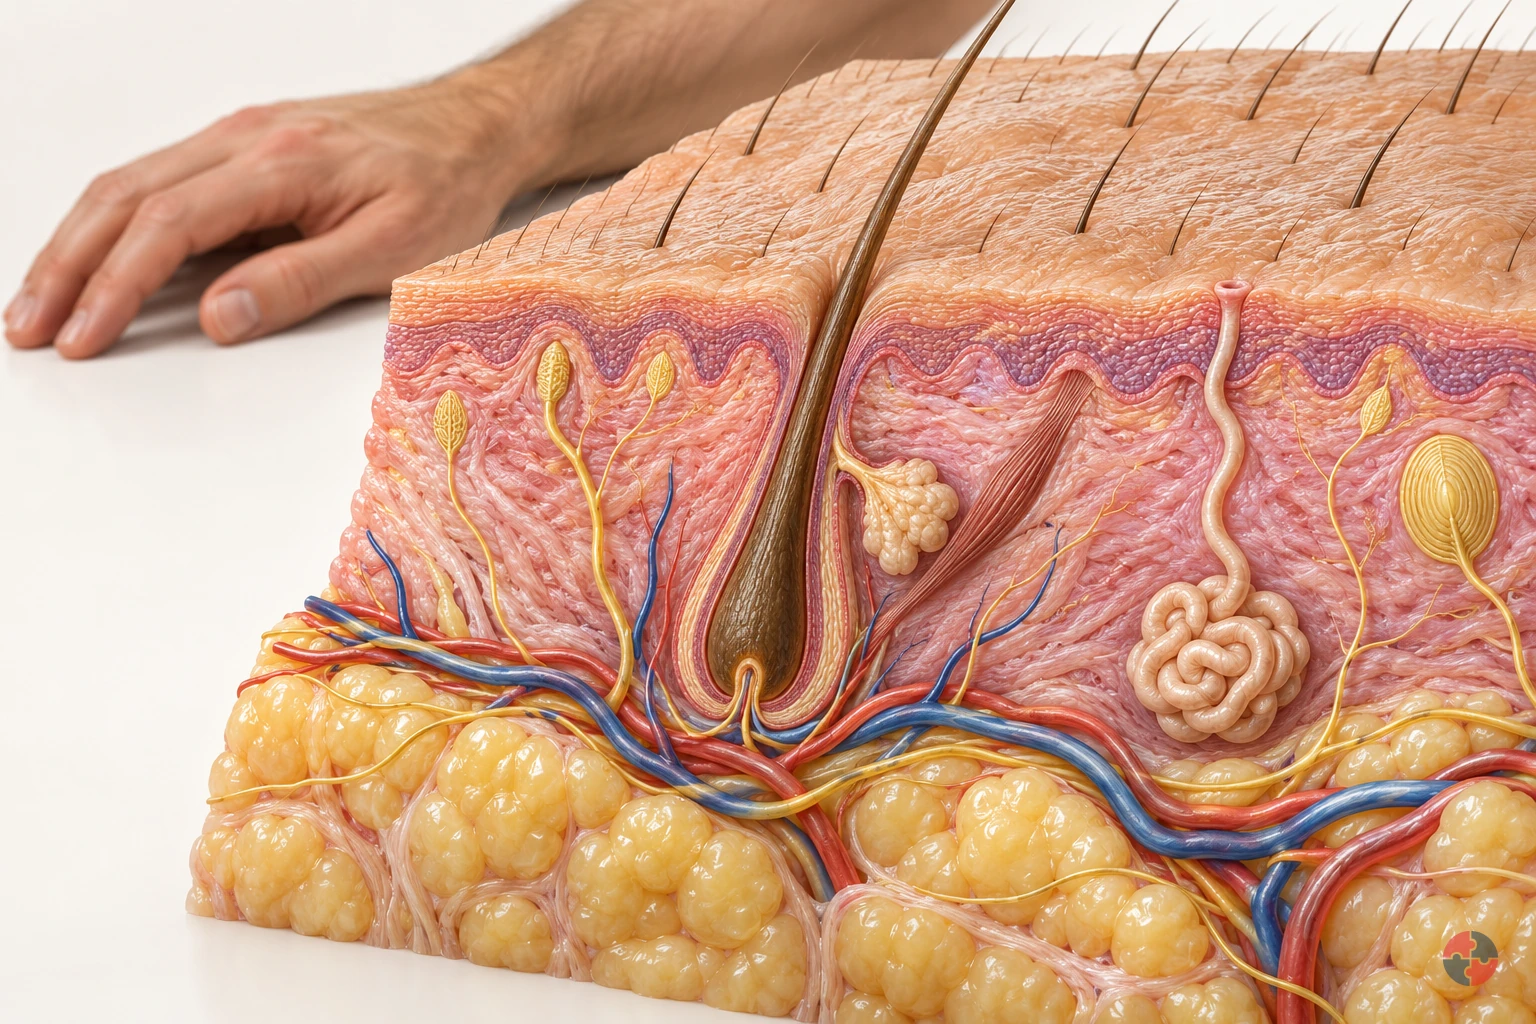

How does the skin barrier work, and how can workplace contact damage it?
Interactive anatomy · Skin barrier and injury · Updated 2026-10-23
Read all anatomy and process explanations without the viewer
General education about normal skin and example mechanisms; not diagnosis, treatment selection or a patient assessment. Hair-bearing forearm example. Vessels remain below the epidermis; the normal barrier has no large open holes. Image-based diagnosis or patch-testing simulation Treatment doses or guaranteed glove/barrier-cream protection Calculated injury depth, contact-dose thresholds or a number of safe washes Hydrofluoric-acid protocols and unreviewed named-substance injury overlays Immediate chemical-burn advice must remain readable outside the model and before any scenario answer.
Outer barrier
The outermost layer helps limit water loss and harmful contact. The outermost epidermal layer combines flattened cells with materials between them to help retain moisture and limit harmful contact. It is a selective protective barrier, rather than a waterproof coating. Use the magnified inset to locate its components. The model shows their relationship but cannot tell whether a particular substance will cross a person’s skin. Health and Safety Executive: Structure and functions of the skin
Barrier lipids
Lipids between surface cells help maintain the barrier. Repeated detergent contact can remove some of these fatty materials and overwhelm repair. Health and Safety Executive: Understanding the causes of skin disease
Epidermis
The outer skin layer continually renews. New cells form in the deeper epidermis and move towards the surface, becoming flattened as the outer layer is renewed and shed. The epidermis therefore contributes active renewal as well as surface protection. Follow its position above the dermis in the cutaway; the model enlarges a static structure rather than timing an individual’s cell renewal. Health and Safety Executive: Structure and functions of the skin
Dermis
Supporting tissue beneath the epidermis contains vessels, nerves and glands. The dermis is supporting tissue beneath the epidermis. It contains structures involved in supply, sensation and temperature regulation, including vessels, nerves and sweat glands. The cutaway enlarges selected components so their different functions can be followed. Their shared location does not mean that they form one open passage through the skin barrier. Oxford Health NHS Foundation Trust: The Skin — Community Tissue Viability Team
Subcutaneous tissue
Tissue and fat below the dermis help insulate and cushion. The lower layer supports the skin block; it is not part of the surface barrier. Health and Safety Executive: Structure and functions of the skin · Oxford Health NHS Foundation Trust: The Skin — Community Tissue Viability Team
Blood vessels
Vessels supply the deeper skin. These vessels supply the deeper skin tissues. They sit below the epidermal surface in the cutaway, alongside other supporting structures. Compare them with the nerve and sweat duct rather than interpreting every tube as the same pathway. The drawing explains location and function; its vessel size and colour are not measurements of circulation or skin temperature. Oxford Health NHS Foundation Trust: The Skin — Community Tissue Viability Team
Sensory nerves
Nerve endings help detect touch and temperature. The signalling symbol represents sensory information, not a visible electrical spark. Health and Safety Executive: Structure and functions of the skin · Oxford Health NHS Foundation Trust: The Skin — Community Tissue Viability Team
Sweat gland and duct
Sweat reaches the surface through a duct. A sweat gland produces sweat that reaches an opening at the surface through a duct. This contributes to the skin’s role in temperature regulation. Trace the coiled gland and its duct separately from the vessels and nerves. The enlarged path makes the connection visible; it does not measure sweating or represent every route by which a substance can enter skin. Health and Safety Executive: Structure and functions of the skin
Hair follicle
Hair grows from a follicle in hair-bearing skin. This forearm example includes a follicle. The palm has a different structure and must not use this site label. Health and Safety Executive: Structure and functions of the skin
Immune response inset
Skin participates in immune responses. In contact allergy, prior sensitisation can lead to an inflammatory response after later contact. Health and Safety Executive: Understanding the causes of skin disease · NHS: Contact dermatitis — causes
Open the complete process transcript
The process, step by step
Find the surface
Start with the forearm locator to establish where this sample of skin belongs. The enlarged block represents hair-bearing skin, with the epidermis on the outside, the dermis beneath it and deeper subcutaneous tissue below. The surface is only one part of this living organ. New epidermal cells are formed deeper down and move towards the outside, where flattened cells contribute to the protective layer. Use the block to connect the familiar body surface with these layers; it is an enlarged teaching section, not a standard thickness shared by every body site. Health and Safety Executive: Structure and functions of the skin
What to watch: Use the forearm locator first, then follow the enlarged block from the outer epidermis down through the dermis to the deeper tissue.
Why it matters: Locating the body site prevents the sample from being mistaken for every kind of skin. The outer layer, supporting tissues and deeper structures contribute different functions within the same organ.
Explore this step: Identify the outermost layer and the hair follicle before changing to the magnified barrier view.
Magnify the barrier
The outer barrier depends on both flattened surface cells and the fatty materials, or lipids, between them. The cells provide one part of the structure; the surrounding lipids help control the passage of water and substances through it. Look at their arrangement together rather than treating the skin as a single waterproof sheet. This is a selective barrier, not a complete seal against every material. The enlargement helps explain why a change in the material between cells can affect protection even when there is no large cut through the skin. Health and Safety Executive: Understanding the causes of skin disease
What to watch: Compare the flattened surface cells with the lipids between them, using the enlarged barrier inset rather than the whole skin block.
Why it matters: The arrangement helps limit unwanted passage through the surface while retaining moisture. Understanding both components explains why skin protection depends on more than whether the surface looks visibly broken.
Explore this step: Point out one surface cell and the surrounding lipid region, then describe how they work together.
Limit water loss
Water retention is part of healthy barrier function. The outer cells and the materials between them help limit water leaving the skin, while some water can still pass through. The labelled arrows represent that background loss; they are not streams from a wound or measurements of an individual’s hydration. Moisture matters because the outer layer needs appropriate hydration to remain flexible and function well. Read the arrows alongside the cell-and-lipid arrangement, so the explanation connects a movement across the surface with the structure that helps regulate it. Health and Safety Executive: Understanding the causes of skin disease
What to watch: Look at the labelled water-loss arrows beside the outer cells and lipids, noting their direction across the barrier surface.
Why it matters: Limiting water loss helps the outer layer retain the moisture needed for normal function. A barrier can perform this role without being impermeable, and the model cannot assess somebody’s skin hydration.
Explore this step: Compare this step with the barrier enlargement and explain why “limits water loss” is more accurate than “waterproof”.
Explore deeper structures
The deeper skin contains structures with different jobs. Blood vessels supply the deeper tissues, sensory nerves help carry information such as touch and temperature, and sweat glands connect to the surface through ducts. Follow each labelled structure separately instead of reading the cutaway as one channel running down through the skin. The enlarged vessels, nerves and gland are learning features within the supporting tissue; their positions explain relationships, not the route or speed of an absorbed substance. Notice that surface barrier function and these deeper functions are connected parts of skin health. Health and Safety Executive: Structure and functions of the skin · Oxford Health NHS Foundation Trust: The Skin — Community Tissue Viability Team
What to watch: Locate the vessels, sensory nerves and coiled sweat gland below the surface, then trace the gland’s duct towards its opening.
Why it matters: Supply, sensation and temperature regulation require different structures. Recognising those roles avoids mistaking every visible line for a chemical entry route or assuming the outer barrier carries out all skin functions.
Explore this step: Select the gland, nerve and vessel labels in turn and name a different function for each.
Connect structure and function
Return to the whole section and connect the functions you have explored. The renewing outer layer helps form a protective barrier and limit moisture loss. Deeper supporting tissues contain sensory structures, vessels and glands, while subcutaneous tissue contributes cushioning and insulation. These functions operate together rather than as a single switch that makes skin either completely protected or unprotected. Use the separate mechanism examples to explore particular changes only after locating the healthy structures. The cutaway explains relationships; its colours and enlarged components do not diagnose a skin condition or identify a safe contact time. Health and Safety Executive: Structure and functions of the skin · Oxford Health NHS Foundation Trust: The Skin — Community Tissue Viability Team
What to watch: Review the complete skin section, connecting the outer barrier with the supporting dermis, sensory structures, sweat gland and deeper tissue.
Why it matters: Skin both separates the body from its surroundings and helps it respond to them. Connecting protection, sensation and temperature functions gives a more useful picture than viewing the surface as a passive covering.
Explore this step: Choose one structure from the surface and one from deeper tissue, and explain how their jobs differ.
Mechanisms and their limits
Abrasion Rubbing or scraping can wear away a small area of the protective surface. This illustrates mechanical disruption. The shallow example is not a deep cut and does not predict bleeding or severity. A later rash cannot be identified as allergy from its appearance. Oxford Health NHS Foundation Trust: The Skin — Community Tissue Viability Team · NHS: Cuts and grazes
HSE: reduce harmful skin contact
Abrasion — follow the anatomy
Look at: The scraped patch: an irregular missing surface, rough lifted edges and shallow parallel scrape marks.
What changes: Scraping removes part of the outer protective barrier. The cutaway shows the surface break above the deeper skin layers.
Why it matters: A damaged barrier can sting, bleed or allow contaminants into the tissue.
What to do: Remove sharp-contact hazards and use task-appropriate protection and wound care.
A rough stock edge scrapes the forearm
Stores handling: exposed forearm skin rubs against a rough pallet or package edge. An acute contact is followed by a magnified teaching view; the sequence does not measure wound depth, bleeding or healing time. This superficial abrasion example is separate from a deep cut, chemical burn or allergic rash.
Check the handling contact Rough edges are close to the worker’s skin. Remove or contain the contact hazard and review how stock is positioned before relying on clothing or gloves. Health and Safety Executive: How do I prevent skin problems in my business? · NHS: Cuts and grazes
Mechanical contact with the surface In the example, rubbing or scraping disrupts a small surface area. The contact is mechanical; no chemical absorption path or immune sensitisation is implied. Oxford Health NHS Foundation Trust: The Skin — Community Tissue Viability Team · NHS: Cuts and grazes
Abrasion: the protective surface is scraped away Follow the rough edges and shallow scrape marks into the missing surface patch. They show mechanical loss of the outer barrier, with deeper layers labelled underneath. This is an illustrative graze, not a measurement of a real wound. Oxford Health NHS Foundation Trust: The Skin — Community Tissue Viability Team · NHS: Cuts and grazes
Care for the wound and remove the cause Use the appropriate minor-wound advice when bleeding is controlled; seek help for serious, dirty or worsening wounds. Correct the stock edge and handling arrangement before repeating the activity. NHS: Cuts and grazes · Health and Safety Executive: How do I prevent skin problems in my business?
Read the practice situations and all answer explanations
SK-Q1: Which response addresses the work as well as the early skin changes?
Frequent wet work leaves a worker’s hands dry and sore.
Automatically diagnose an allergy. — Several causes are possible. A picture or short work history cannot establish an allergy; clinical assessment may be needed.
Report early changes and review harmful contact, suitable controls, cleaning and skin care. — Yes. Reduce harmful contact and review the work before problems worsen. Include suitable cleaning, drying, skin care and exposure controls.
Scrub the hands harder with solvent. — Solvents and harsh scrubbing can further damage the barrier. Use the suitable cleaning arrangements provided for the task.
NHS: Contact dermatitis — causes · Health and Safety Executive: How do I prevent skin problems in my business?SK-Q2: What takes priority now?
Wet cement is trapped inside a worker’s boot.
Stop exposure and obtain immediate first aid and medical help. — Correct. Wet cement can cause a serious chemical burn. The chemical-burn action panel is available immediately; do not wait for this lesson.
Wait to see whether it starts to hurt. — Do not wait for pain. Trapped wet cement can rapidly cause a serious burn. Stop exposure and obtain immediate help.
Neutralise the cement with an acidic household product. — Do not add another chemical or attempt neutralisation. Follow immediate chemical-burn first aid and obtain medical help.
Health and Safety Executive: Construction hazardous substances: Cement · NHS: Acid and chemical burnsSK-Q3: Which mechanism fits the example?
In this teaching example a sensitised worker reacts after later contact with the known allergen.
The skin must have worn through at that instant. — Allergic contact dermatitis does not require the surface to wear away at that moment. Mechanical injury and allergy are different mechanisms.
Any glove would have guaranteed protection. — Gloves must be selected for the substance and task, and used correctly. Any glove is not a guarantee.
A sensitised immune system can react after later contact. — Yes. Prior sensitisation and later contact are separate stages. Irritant and allergic mechanisms can occur together; this example does not diagnose a real person.
Health and Safety Executive: Understanding the causes of skin disease · Health and Safety Executive: How do I prevent skin problems in my business?Sources and how the model is made
The opening images are AI-generated anatomical illustrations. The interactive 3D models and labelled SVG diagrams use original procedural artwork. These teaching images are not medical scans or diagnostic tools. Source references support the learner explanations and do not grant artwork rights.
- Health and Safety Executive: Structure and functions of the skin — Three skin layers; renewal; sweat, hair, sensory, barrier and temperature functions. Factual reference only; no diagram copied.
- Oxford Health NHS Foundation Trust: The Skin — Community Tissue Viability Team — Layer and deeper vessel/nerve context, mechanical injury and skin-tone assessment considerations. No treatment regimen or illustration reused.
- Health and Safety Executive: Understanding the causes of skin disease — Barrier lipids and water retention; cumulative irritation; sensitisation, delayed contact allergy, small subsequent amounts and coexistence. Replaces the former separate dermatitis URL, which failed direct retrieval.
- NHS: Contact dermatitis — causes — Irritant versus allergic mechanisms and workplace wet work. Printed next-review date May 2026 is overdue; recheck at qualified clinical sign-off and corroborate with HSE.
- Health and Safety Executive: Construction hazardous substances: Cement — Alkaline burns from trapped cement; abrasive irritation; chromate sensitisation; task methods and suitable contact protection.
- Health and Safety Executive: How do I prevent skin problems in my business? — Avoid contact, suitable gloves, washing and drying, skin care, early checks/reporting and medical advice. No universal glove or cream claim.
- NHS: Acid and chemical burns — Immediate chemical skin-burn first aid: 999, avoid contamination, clothing and dry-chemical removal, copious water about one hour, no creams or other chemicals. Skin advice is not substituted for eye or thermal guidance.
- NHS: Cuts and grazes — General shallow-wound context and the need for professional help with serious wounds; not a visual diagnosis or full first-aid simulation.
- NHS: Contact dermatitis — symptoms — Dryness, cracking, inflammation and fluid-filled blisters can occur in contact dermatitis. Irritant and allergic appearances overlap. Original illustrative textures are not diagnostic photographs and no source artwork is copied.
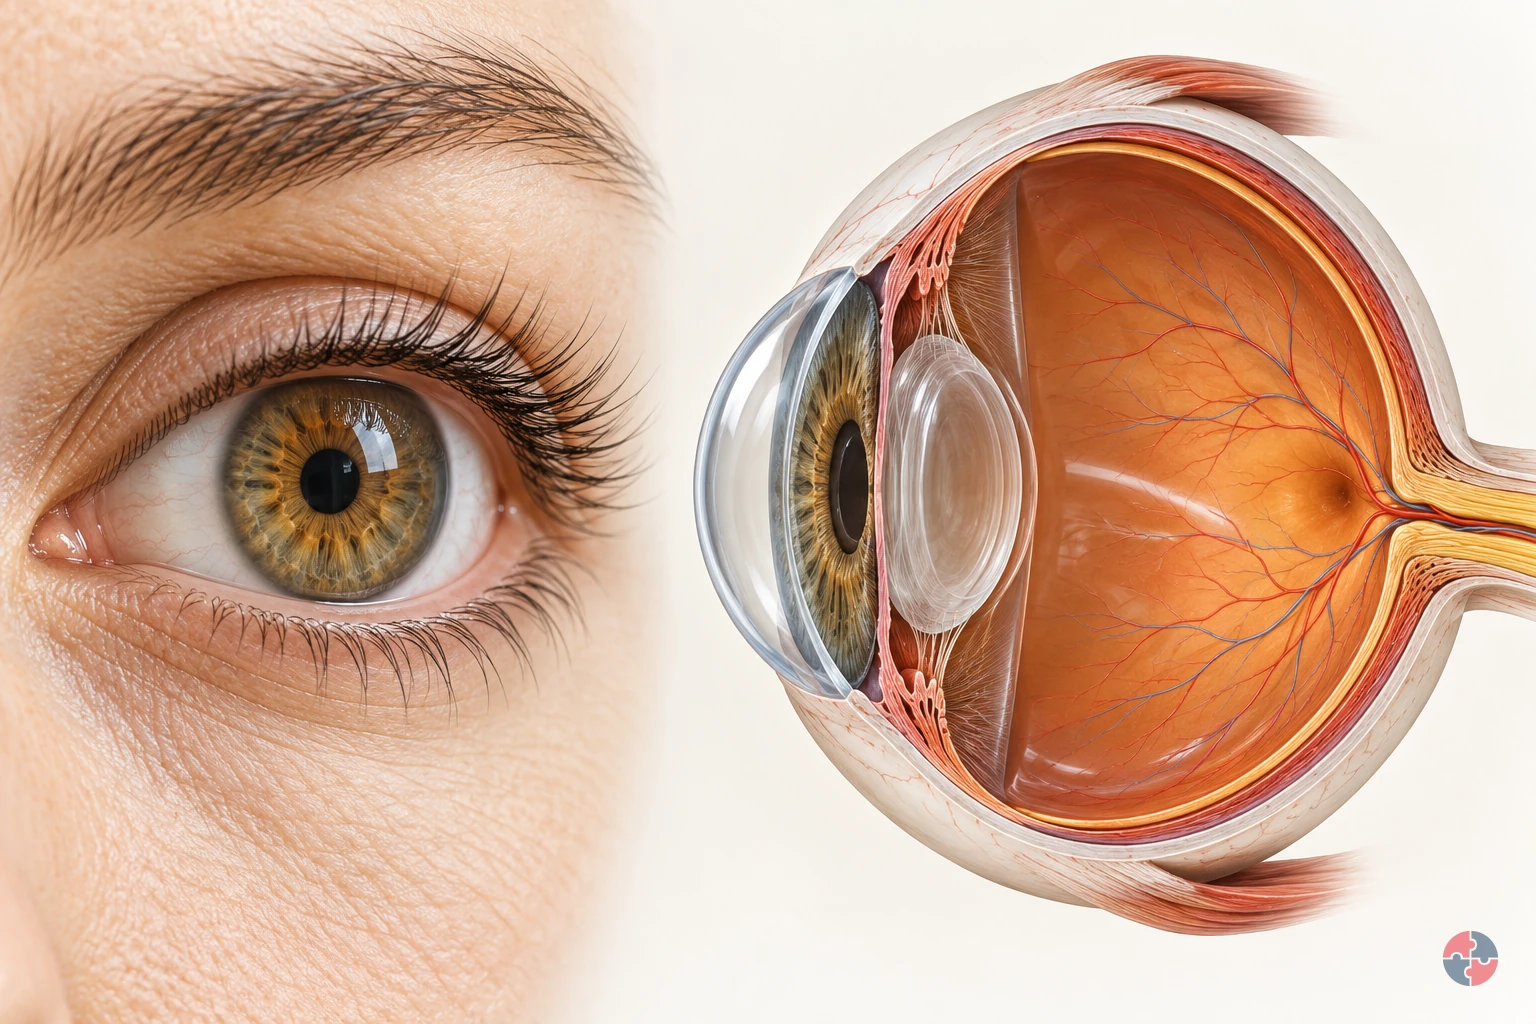
How does the eye turn light into vision, and how do workplace hazards injure it?
Interactive anatomy · Eye function and injury · Updated 2026-10-23
Read all anatomy and process explanations without the viewer
Educational illustration, not a diagnostic symptom checker or a reproduction of an individual’s vision. No acuity/brightness challenge, flashing screen, camera permission, eye-drop prescription, patching instruction, lens-removal manoeuvre or home-neutralisation exercise. Ordinary DSE comfort is separate from trauma; eyesight correction is separate from hazard protection.
Eyelids
Blinking spreads tears over the front of the eye. The eyelids pass over the exposed front of the eye when a person blinks. Their movement spreads the tear film, helping keep that surface moist and smooth. In the surface view, use the lid margins to locate the area they cover. This surface-maintenance role supports the optical pathway; the lid does not carry visual signals to the brain. Moorfields Eye Hospital NHS Foundation Trust: Dry eye: the tear film
Tear film
A thin tear layer keeps the surface moist and smooth. A thin film of tears covers the front of the eye. It lubricates the surface and contributes to a smooth boundary through which light passes. Blinking redistributes this film. Its thickness is enlarged in the teaching view so its position can be seen; it is a surface layer rather than a pool of liquid inside the eyeball. Moorfields Eye Hospital NHS Foundation Trust: Dry eye: the tear film
Cornea
The clear front surface bends incoming light. The transparent cornea forms the curved front of the eye, providing an outer protective boundary and bending incoming light. It works with the lens to focus the light towards the retina. Follow the rays through the front curve in the cutaway, then compare its location with the tear film lying over the surface. Moorfields Eye Hospital NHS Foundation Trust: What makes up your eye
Iris
The coloured ring controls the pupil opening. The iris is the coloured ring around the pupil. Its muscles change the size of the opening and so control how much light can enter the eye. Locate the ring separately from the transparent lens behind it. This light-entry role is different from the focusing work performed by the cornea and lens. Moorfields Eye Hospital NHS Foundation Trust: What makes up your eye
Pupil
An opening lets light enter the eye. The pupil is the central opening in the iris through which light passes. It looks dark when viewed from the front because it opens into the inside of the eye. It is not a solid black disc. In the cutaway, follow the route through this opening towards the transparent lens behind it. Moorfields Eye Hospital NHS Foundation Trust: What makes up your eye
Lens
The clear lens helps focus light on the retina. The transparent lens sits behind the iris and adds to the focusing action of the cornea. In a living eye its shape can change to help focus on objects at different distances. Use the cutaway to locate the lens between the pupil opening and the retina; the simplified ray diagram is not an eyesight test. Moorfields Eye Hospital NHS Foundation Trust: What makes up your eye
Retina
The light-sensitive layer lines the back of the eye. The retina is the light-sensitive tissue lining the inside of the back of the eye. Light focused by the cornea and lens reaches this layer, where specialised cells begin converting it into electrical information. Its position against the inner wall connects the whole-eye view with the separate enlarged photoreceptor inset. Moorfields Eye Hospital NHS Foundation Trust: What makes up your eye · Oxford University Hospitals NHS Foundation Trust: Tackling vision loss: normal signal pathway
Photoreceptors
Specialised retinal cells begin the light-to-signal conversion. Photoreceptors are specialised cells in the retina that respond to light and begin the conversion into electrical signals. Locate the retinal lining first, then connect it with the enlarged cell inset. That inset explains a change of process and scale; it does not represent a separate organ or every cell involved in retinal processing. Oxford University Hospitals NHS Foundation Trust: Tackling vision loss: normal signal pathway
Optic nerve
Visual signals travel from the eye towards the brain. The optic nerve carries electrical information from the retina towards the brain. In the model, the symbol changes from a light ray to a neural signal at the retina to distinguish these processes. Locate where the nerve leaves the back of the eye. Light itself does not travel along the nerve as a beam. Oxford University Hospitals NHS Foundation Trust: Tackling vision loss: normal signal pathway
Brain destination
The brain processes the incoming visual signals. The brain processes the visual information arriving from the eyes, helping us make sense of what we see. This marker shows a destination outside the eyeball rather than a structure within it. Follow the optic-nerve route to the marker after locating the retina; the detailed pathways inside the brain are not depicted here. Oxford University Hospitals NHS Foundation Trust: Tackling vision loss: normal signal pathway
Open the complete process transcript
The process, step by step
1 · Refresh the surface
A blink carries a thin layer of tears across the exposed front of the eye. This tear film keeps the surface moist and helps create a smooth first surface for incoming light. Look at the eyelids and the enlarged tear layer together: the lid spreads the film rather than pushing tears into the eyeball. The surface view separates these structures so their relationship is easier to see. This is the preparation for the optical pathway that follows; a clear view depends on the condition of the front surface as well as the structures deeper inside. Moorfields Eye Hospital NHS Foundation Trust: Dry eye: the tear film
What to watch: Locate the eyelid margins and the thin tear layer in front of the cornea, using the surface view to separate them.
Why it matters: The refreshed film lubricates the front of the eye and helps keep its surface smooth. It supports the passage of light before the cornea and lens focus that light deeper inside.
Explore this step: Select the eyelids, then the tear film, and describe which structure moves and which surface it covers.
2 · Bend incoming light
The cornea is the transparent, curved front of the eye. Incoming light changes direction as it passes through this surface, beginning the focusing process. In the whole-eye cutaway, trace the illustrative rays from outside the eye towards the lens. Their bend shows the cornea doing optical work rather than acting only as a window. The cornea also forms part of the protective outer boundary, so its clarity and shape matter to seeing. The rays simplify the route through a healthy eye; they are not a measurement of an individual person’s focus or vision. Moorfields Eye Hospital NHS Foundation Trust: What makes up your eye
What to watch: Find the clear curved front of the eye and follow where the incoming light rays change direction as they pass through it.
Why it matters: Beginning to direct the light here allows the cornea and lens to work together. A transparent front surface lets light enter while forming part of the eye’s protective boundary.
Explore this step: Trace one ray from outside the cornea to the lens and identify the first place its direction changes.
3 · Focus towards the back
After passing through the cornea, light enters through the pupil, the opening in the coloured iris. The iris changes the size of that opening to control how much light enters. Behind it, the transparent lens works with the cornea to bring light towards the retina at the back. Follow the model from front to back and distinguish the pupil opening from the solid lens. In a living eye the lens can change shape to help focus at different distances. This simplified view explains the route and the relationship between the structures, rather than testing accommodation or eyesight. Moorfields Eye Hospital NHS Foundation Trust: What makes up your eye
What to watch: Identify the iris around the pupil opening, the transparent lens behind it and the light-sensitive retina lining the back of the eye.
Why it matters: Controlling light entry and focusing it are different jobs. Together they allow light to reach the sensitive tissue at the back in a useful pattern for the next stage of vision.
Explore this step: Name the opening light passes through, then the transparent structure it reaches next; follow the route to the retina.
4 · Convert at the retina
The retina is the light-sensitive tissue lining the back of the eye. Its photoreceptor cells respond to light and begin converting it into electrical information. Locate the retinal lining, then use the enlarged cell inset to connect the whole-eye view with this smaller-scale event. The inset makes the conversion easier to discuss without suggesting that the cells are that large inside the eye. At this point the lesson changes from the path of light to the path of a nerve signal. The model does not show every retinal cell or all the processing that takes place between them. Oxford University Hospitals NHS Foundation Trust: Tackling vision loss: normal signal pathway
What to watch: Locate the retina on the inner back wall, then connect it with the enlarged photoreceptor inset outside the whole-eye cutaway.
Why it matters: This conversion connects the eye’s optical system with its nervous system. The focused light pattern can now be represented by signals that travel from the retina towards the brain.
Explore this step: Point to where the light pathway ends and explain why the enlarged cells are an inset rather than another organ.
5 · Carry and interpret the signal
Visual information leaves the retina through the optic nerve and travels towards the brain. The brain processes this incoming information so that we can recognise and make sense of what we see. Follow the model’s neural-signal symbol from the back of the eye to the external brain marker, and compare it with the earlier light rays. The symbols represent different processes: a nerve carries signals, not a beam of light or a miniature picture travelling through a tube. The brain marker identifies the destination outside the eyeball; the detailed visual pathways within the brain are beyond this simplified model. Oxford University Hospitals NHS Foundation Trust: Tackling vision loss: normal signal pathway
What to watch: Find where the optic nerve leaves the back of the eye and trace its route towards the separate brain destination marker.
Why it matters: The earlier stages deliver and convert light; this stage carries the resulting information onwards. Vision therefore depends on the retina, its nerve connection and the brain working with the eye’s optical structures.
Explore this step: Compare the light-ray and neural-signal symbols, then explain what travels through the pupil and what travels through the optic nerve.
Mechanisms and their limits
Surface abrasion A scratch affects the corneal surface. A superficial abrasion is different from a deeper or complicated injury, which may affect vision or leave scarring. The restrained line marks a surface example; the optional deeper-scar comparison is separately labelled. Not every dust contact penetrates the eye. The image does not promise a healing time or reproduce anyone’s vision. Guy’s and St Thomas’ NHS Foundation Trust: Corneal abrasion · NHS Organ Donation: About cornea donation
Match eye protection to particles and the task
Recognise when an injury needs medical help
Surface abrasion — follow the anatomy
Look at: The clear corneal surface at the front of the eye.
What changes: A particle or scratch can damage its outer layer.
Why it matters: The cornea has many nerves, so a small abrasion can feel very painful or gritty.
What to do: Prevent particles reaching the eye and follow the eye-injury guidance; do not rub it.
Dust at a stores task and a surface scratch
A worker clears a dusty stock shelf and a loose particle reaches the front of the eye. The sequence contrasts particle contact with a chosen surface abrasion; it does not measure injury depth or healing time. A gritty or painful eye cannot be diagnosed from this image. High-speed impact, sight change or severe pain needs the separate emergency route.
Eye contact is possible The task can release dust close to the face. Review how the shelf is cleaned and whether task-matched eye protection is needed. HSE: Using the right type of PPE
Contact with the front surface A loose particle contacts the tear-covered cornea. Do not rub the eye; this is different from an embedded high-speed fragment. NHS: Eye injuries · Guy’s and St Thomas’ NHS Foundation Trust: Corneal abrasion
A corneal-abrasion example The small labelled surface scratch illustrates an abrasion. It may feel painful or gritty and affect vision, but a clinician must examine the eye rather than infer depth from the model. Guy’s and St Thomas’ NHS Foundation Trust: Corneal abrasion
Use the appropriate help route For loose material, use the eye-washing advice; never try to remove an embedded object. Seek assessment for concerns and use emergency help for sight changes, severe pain or high-speed injury. NHS: Eye injuries · University Hospital Southampton NHS Foundation Trust: Eye emergency department
Read the practice situations and all answer explanations
EY-Q1: What should happen first?
A strong cleaning chemical splashes into an eye. Immediate help is displayed before the question.
Watch the demonstration before taking action. — Do not delay rinsing or medical help for this lesson.
Begin rinsing with plenty of clean, non-hot water and get emergency help. — Hold the eye open and use a gentle water flow for at least 20 minutes; keep rinsing while waiting for help.
Add a household chemical to neutralise it. — Use the water-rinsing route and medical help, not improvised chemical neutralisation.
NHS: Eye injuries · University Hospitals Dorset NHS Foundation Trust: Chemical injury to the eyeEY-Q2: What is the appropriate response?
A fragment strikes an eye during grinding.
Seek emergency assessment; leave any pierced object in place. — High-speed impact needs emergency assessment. Do not rub the eye or remove a pierced object.
Pull out anything that appears to be stuck. — Do not attempt removal. Get emergency help.
Return to work if vision seems unchanged. — Feeling able to see is not clearance after a high-speed injury.
NHS: Eye injuries · University Hospital Southampton NHS Foundation Trust: Eye emergency departmentEY-Q3: Which statement is correct?
A worker is close to welding without a task-specific eye-protection assessment.
No immediate pain proves the eyes are unharmed. — Arc-eye pain may start several hours later. Lack of immediate pain does not establish safety.
Ordinary spectacles protect against every welding hazard. — Corrective spectacles are not a complete hazard assessment. Impact, splash and radiation protection require suitable selection.
Protection must match the radiation hazard, and pain may be delayed. — Correct. Control exposure and select appropriate protection for the task and nearby people. The lesson provides no safe viewing time.
HSE: Health risks from welding: arc-eye · HSE: Using the right type of PPESources and how the model is made
The opening images are AI-generated anatomical illustrations. The interactive 3D models and labelled SVG diagrams use original procedural artwork. These teaching images are not medical scans or diagnostic tools. Source references support the learner explanations and do not grant artwork rights.
- Moorfields Eye Hospital NHS Foundation Trust: What makes up your eye — Normal cornea, iris, pupil, lens and posterior eye layout; use anatomy text selectively. No image copied.
- Moorfields Eye Hospital NHS Foundation Trust: Dry eye: the tear film — Blinking spreads the tear film, which lubricates the eye and supports a smooth surface. No treatment instructions copied.
- Guy’s and St Thomas’ NHS Foundation Trust: Corneal abrasion — A scratch/graze of the cornea and the distinction between a superficial injury and complications; no healing-time promise or eye treatment prescribed.
- NHS: Eye injuries — March 2026 guidance: immediate chemical irrigation and emergency help; high-speed/penetrating injury; severe pain or sight changes. Minimum rinsing time is not a clearance test.
- University Hospitals Dorset NHS Foundation Trust: Chemical injury to the eye — Possible surface/anterior-segment damage only. Printed review date November 2023 is overdue; current emergency actions rely on EY-S4, not this leaflet alone.
- HSE: Health risks from welding: arc-eye — Welding radiation can injure the cornea, cause delayed pain and harm other eye structures; no safe viewing time.
- HSE: Using the right type of PPE — Eye protection must match impact, splash, dust or radiation hazards and fit the task/user.
- Oxford University Hospitals NHS Foundation Trust: Tackling vision loss: normal signal pathway — Photoreceptors convert light to electrical signals, carried through the optic nerve to the brain. Research treatment content is not reused.
- NHS Organ Donation: About cornea donation — Injury or disease can leave the cornea cloudy/distorted and affect vision. Source is factual context, not donation advice in this lesson.
- University Hospital Southampton NHS Foundation Trust: Eye emergency department — Chemical injury, penetrating trauma and severe visual symptoms require emergency eye care. Local opening hours/contact instructions are not generalised.
How can abrasive wear create safety risk?
Abrasive wear creates safety risk when parts lose thickness, protection, smoothness, containment, insulation, alignment or guarding function. See HSE PUWER overview for the applicable decision.
Equipment wear quarantine
Two linked parts · 6 questions. Open Part 2 to complete the route.

Continue to questions 4–6 · Part 2 of 2


Read this visual as text
- Start: Use this route for the specific task described in the heading.
- Question 1: Could failure harm people or defeat a protective function? Decision owner: Supervisor and competent equipment owner.
- YES — STOP / REFER: Stop use, safely isolate and quarantine for competent assessment. STOP / REFER → APPROPRIATE RESPONSE.
- NO: No such warning is identified; continue the remaining checks. CONTINUE → QUESTION 2.
- UNKNOWN — PROTECT FIRST: Protect people and hold the affected work. Obtain the responsible specialist’s assessment; do not assume the warning is absent. HOLD → OWNER RESOLVES BEFORE RESUMING.
- Question 2: Are asset identity, duty and wear mechanism known? Decision owner: Supervisor and competent equipment owner.
- YES: The required evidence or condition is confirmed. CONTINUE → QUESTION 3.
- NO / UNKNOWN — HOLD: Keep it out of use until condition and safety significance are established. HOLD → REPEAT QUESTION 2 AFTER CORRECTION.
- Question 3: Does a competent assessment support repair, replacement or continued use? Decision owner: Supervisor and competent equipment owner.
- YES: The required evidence or condition is confirmed. CONTINUE → QUESTION 4.
- NO / UNKNOWN — HOLD: Retain quarantine; obtain the actual manufacturer or engineering basis. HOLD → REPEAT QUESTION 3 AFTER CORRECTION.
- Question 4: Has the rubbing cause been removed? Decision owner: Supervisor and competent equipment owner.
- YES: The required evidence or condition is confirmed. CONTINUE → QUESTION 5.
- NO / UNKNOWN — HOLD: Correct routing, support, clearance or contact rather than patching the symptom. HOLD → REPEAT QUESTION 4 AFTER CORRECTION.
- Question 5: Has repair or replacement passed the required checks? Decision owner: Supervisor and competent equipment owner.
- YES: The required evidence or condition is confirmed. CONTINUE → QUESTION 6.
- NO / UNKNOWN — HOLD: Do not return the item until the competent owner accepts the evidence. HOLD → REPEAT QUESTION 5 AFTER CORRECTION.
- Question 6: Record return to service Decision owner: Supervisor and competent equipment owner.
- ACTION: Record the item, correction, verifier, restrictions and future inspection trigger. OUTCOME → RECORD AND HAND OVER.
- Outcome: Quarantined, repaired and checked, or replaced with a recorded return-to-service decision.
Equipment wear is often visible before failure, but only if somebody is looking for the right signs. Rubbing marks, grooves, frayed belts, thinning hoses, exposed reinforcement, worn guards, sharp edges and recurring repairs all tell a story. The issue may be poor alignment, unsuitable material selection, trapped grit, excessive load, poor cleaning, weak maintenance or an operating condition that was not considered at design stage.
Good maintenance sets inspection frequencies and replacement limits before failure. It also asks why the wear is happening. Replacing the same belt, cable, glove, hose or floor patch again and again is not control; it is evidence that the underlying friction source has not been addressed.
| Wear pattern | What it means | What should be checked |
|---|---|---|
| Uniform surface wear | A surface, belt, lining, blade or component wears gradually across a broad area because contact is expected during normal operation. | Whether wear rate is acceptable, inspection frequency is suitable, replacement limits are defined and spare parts are available before failure. |
| Localised wear or grooves | A small area is wearing faster than expected, often because alignment, loading, tension, vibration, contamination or guarding is wrong. | Alignment, tracking, sharp contact points, trapped grit, loose fixings, overloaded conveyors, rubbing guards and whether maintenance has only treated symptoms. |
| Thinning, holes or exposed reinforcement | Belts, hoses, ducting, chutes, protective covers or linings are approaching loss of containment or loss of protective function. | Isolation arrangements, replacement criteria, leak risk, dust release, stored energy, guard integrity and whether continued operation is safe. |
| Sharp edges created by wear | Previously safe parts become cut or abrasion hazards as coatings fail, surfaces break down or material edges become exposed. | Deburring, edge protection, replacement, protective covers, handling methods and whether workers have reported snagging, cuts or glove damage. |
| Worn floors, steps and access routes | Repeated footfall, traffic, grit or dragging loads can roughen or damage surfaces and create trip, slip, knee or hand abrasion hazards. | Floor inspections, cleaning, resurfacing, drainage, access route design, vehicle movement, edge protection and reporting of damaged surfaces. |
| Worn cables, hoses and guards | Abrasion can remove insulation, expose conductors, weaken hoses, damage hydraulic lines or reduce the protection provided by guards. | Routing, clipping, sleeves, strain relief, guards, pre-use checks, planned maintenance and immediate removal from service where integrity is compromised. |
How can the hierarchy of controls reduce skin abrasion from rough materials and work equipment?
Abrasion risk should be reduced by removing unnecessary rough contact, reducing friction and isolating people from moving or abrasive surfaces before relying on PPE. See HSE machinery hazards: friction and abrasion, HSE PPE at work regulations guidance and 2022 update for the applicable decision.
ERICPD stands for Eliminate, Reduce, Isolate, Control, PPE and Discipline. It is useful here because many abrasion problems are wrongly treated as glove problems. Gloves matter, but they should not be used to excuse sharp edges, damaged shelving, poorly guarded conveyors, unnecessary manual dragging, dusty cutting methods or worn equipment.
The strongest solutions are usually design, purchasing and maintenance decisions. Rounded edges, smoother materials, mechanical aids, guarding, liners, route protection, extraction and planned replacement all reduce the chance that the worker has to absorb the problem through skin, eyes or lungs.
Consider a logistics worker opening strapped, rough-edged packages and then handling sharp sheet offcuts. The supervisor first asks whether the offcut can arrive deburred or be moved in a closed stillage, removing the hand-contact task: that is five-level elimination and ERICPD Eliminate. A supplier-approved smoother edge or alternative packaging may substitute for the abrasive contact, fitting five-level substitution and ERICPD Reduce. If the edge remains, a fixed fixture, deburring station or tool that keeps hands away is engineering control; it must be selected for the actual material, fitted before use and checked for loose guards or sharp remnants. ERICPD Isolate and Control describe that physical separation and its safe operation, not merely a written warning.
The team leader demonstrates the safe transfer and records a pre-use check of the fixture, glove compatibility, damaged packaging and the route for rejects. Handling instructions and supervision are administrative safeguards; a suitable glove may be the last layer for residual contact, but must not be used where it could snag on moving machinery. ERICPD Discipline means checking that the fixture remains effective, replacing worn parts and learning from grazes, not blaming the injured worker. If the material changes, an edge is uncontrolled, a guard is loose or the glove creates entanglement risk, stop handling and have the task owner reassess before restart.
How can the ERICPD hierarchy of controls reduce skin abrasion from rough materials and work equipment?

| ERICPD level | How it applies to abrasion | Practical examples |
|---|---|---|
| Eliminate | Remove the rough contact, abrasive material, manual contact point or friction-generating task where reasonably practicable. | Buy pre-finished materials, design out sharp edges, use pre-cut components, avoid manual dragging, automate abrasive handling or remove unnecessary contact with moving belts. |
| Reduce | Reduce friction, contact force, repetition, speed, roughness, dustiness or exposure time. | Use smoother surfaces, rounded edges, low-friction liners, lifting aids, rollers, lubricants where safe, lower-speed processes and task rotation for repetitive contact work. |
| Isolate | Separate people from abrasive surfaces, particles and moving friction points. | Guard conveyors and rollers, screen grinding or sanding areas, use enclosures, segregate blasting areas and restrict access to dusty or high-wear zones. |
| Control | Use engineering and management controls to keep abrasion at a safe level during normal work. | Local exhaust ventilation (LEV), water suppression, edge protection, planned maintenance, inspection limits, housekeeping, safe handling methods and first aid arrangements. |
| PPE | Use personal protective equipment for remaining skin, eye, foot and breathing risks. | Abrasion-resistant gloves, sleeves, kneepads, safety footwear, eye protection, face protection and respiratory protective equipment (RPE) where dust remains. |
| Discipline | Sustain the controls through training, supervision, reporting, inspection, maintenance and learning. | Pre-use checks, defect reporting, glove replacement rules, supervisor observations, action tracking and investigation of repeat minor injuries or wear patterns. |
How can the ISO 45001 hierarchy of controls reduce skin abrasion from rough materials and work equipment?

| ESEAP control level | How it applies to abrasion | Practical examples |
|---|---|---|
| Elimination | Remove the rough contact, abrasive material, manual contact point or friction-generating task where reasonably practicable. | Buy pre-finished materials, design out sharp edges, use pre-cut components, avoid manual dragging, automate abrasive handling or remove unnecessary contact with moving belts. |
| Engineering controls / Administrative controls | Reduce friction, contact force, repetition, speed, roughness, dustiness or exposure time. | Use smoother surfaces, rounded edges, low-friction liners, lifting aids, rollers, lubricants where safe, lower-speed processes and task rotation for repetitive contact work. |
| Engineering controls / Administrative controls | Separate people from abrasive surfaces, particles and moving friction points. | Guard conveyors and rollers, screen grinding or sanding areas, use enclosures, segregate blasting areas and restrict access to dusty or high-wear zones. |
| Engineering controls / Administrative controls | Use engineering and management controls to keep abrasion at a safe level during normal work. | Local exhaust ventilation (LEV), water suppression, edge protection, planned maintenance, inspection limits, housekeeping, safe handling methods and first aid arrangements. |
| PPE | Use personal protective equipment for remaining skin, eye, foot and breathing risks. | Abrasion-resistant gloves, sleeves, kneepads, safety footwear, eye protection, face protection and respiratory protective equipment (RPE) where dust remains. |
| Administrative controls | Sustain the controls through training, supervision, reporting, inspection, maintenance and learning. | Pre-use checks, defect reporting, glove replacement rules, supervisor observations, action tracking and investigation of repeat minor injuries or wear patterns. |
Practical takeaway: if the same glove, guard, hose, cable, floor finish or skin area keeps wearing, treat that as a design or management signal. Replacing the item may be necessary, but the better question is why the contact is still happening and who has authority to remove, reroute, guard, smooth, isolate or stop it.
What pre-use, during-use and completion checks are needed?
Checks should find rough contact, worn protection, moving friction points, contamination and equipment wear before a small sign becomes an injury or failure.
Pre-use stop decision
Two linked parts · 6 questions. Open Part 2 to complete the route.

Continue to questions 4–6 · Part 2 of 2


Read this visual as text
- Start: Use this route for the specific task described in the heading.
- Question 1: Are the material and any contamination identified? Decision owner: Supervisor and competent equipment owner.
- YES: The required evidence or condition is confirmed. CONTINUE → QUESTION 2.
- NO / UNKNOWN — HOLD: Stop and obtain reliable material and contamination information. HOLD → REPEAT QUESTION 1 AFTER CORRECTION.
- Question 2: Are contact surfaces, PPE and equipment suitable and intact? Decision owner: Supervisor and competent equipment owner.
- YES: The required evidence or condition is confirmed. CONTINUE → QUESTION 3.
- NO / UNKNOWN — HOLD: Replace damaged PPE; segregate damaged stock; isolate equipment defects. HOLD → REPEAT QUESTION 2 AFTER CORRECTION.
- Question 3: Are moving contact points guarded or isolated from people? Decision owner: Supervisor and competent equipment owner.
- YES: The required evidence or condition is confirmed. CONTINUE → QUESTION 4.
- NO / UNKNOWN — HOLD: Prevent access; restore guarding or use the approved isolated method. HOLD → REPEAT QUESTION 3 AFTER CORRECTION.
- Question 4: Are dust and particles controlled at source? Decision owner: Supervisor and competent equipment owner.
- YES: The required evidence or condition is confirmed. CONTINUE → QUESTION 5.
- NO / UNKNOWN — HOLD: Stop generation and provide suitable capture, containment and eye protection. HOLD → REPEAT QUESTION 4 AFTER CORRECTION.
- Question 5: Are people briefed on the task and stop signals? Decision owner: Supervisor and competent equipment owner.
- YES: The required evidence or condition is confirmed. CONTINUE → QUESTION 6.
- NO / UNKNOWN — HOLD: Resolve understanding and control gaps before work starts. HOLD → REPEAT QUESTION 5 AFTER CORRECTION.
- Question 6: Do the conditions still match the agreed method? Decision owner: Supervisor and competent equipment owner.
- YES: The required evidence or condition is confirmed. OUTCOME → RECORD AND HAND OVER.
- NO / UNKNOWN — HOLD: Stop on change and return to material, contact and control checks. HOLD → REPEAT QUESTION 6 AFTER CORRECTION.
- Outcome: Proceed with controls; or stop, correct and record the reason before restart.
Pre-use checks decide whether the task may start. During-use checks decide whether conditions are still controlled. Completion checks make sure people, equipment and the work area are safe to hand back, and that repeated weak signals are not dismissed as normal work.
| Check area | What to inspect | Stop work when |
|---|---|---|
| Skin, hands and existing wounds | Look for open cuts, cracked skin, dermatitis flare-ups, unprotected dressings or wounds that could contact dirt, dust, cement, swarf, waste or cleaning chemicals. | Broken skin cannot be covered, the task could contaminate a wound, or the worker is unsure whether the task will worsen an injury. |
| Gloves, sleeves and clothing | Check fit, grip, abrasion wear, holes, thinning, swelling, hardening, chemical contamination, wetness and compatibility with any substance or moving-part risk. | PPE is damaged, contaminated, too bulky for safe control, too thin for the material, or could increase entanglement or moving machinery contact. |
| Surfaces and materials | Check pallets, blocks, concrete, brick, timber, metal, handles, fixings, sheet edges, floor finishes and temporary works for burrs, splinters, protrusions or rough contact. | A rough or sharp surface can reasonably be removed, covered, guarded, finished or avoided but has not been controlled. |
| Tools, work equipment and moving contact | Check guards, rollers, belts, conveyors, hoses, cables, work rests, handles, casings, bearings, rubbing marks, isolation status and known maintenance limits. | There is exposed reinforcement, conductor damage, belt fraying, missing guarding, unexpected movement, rubbing marks near moving parts or unknown maintenance condition. |
| Dust, grit, swarf and eye risk | Identify sanding, grinding, scraping, blasting, cutting, dry sweeping, waste handling and wind-blown grit that could enter eyes or breathing zones. | Material identity is unknown, dust control is absent or ineffective, eye protection is not suitable, or first aid arrangements are not available. |
| Work area and emergency access | Check lighting, housekeeping, storage, kneeling points, slips and trips, bystanders, cleaning arrangements, first aid kit location and route to help. | The task forces dragging, crawling, over-reaching or contact with rough surfaces, or contamination cannot be kept away from others. |
| Condition to monitor | Who checks | Immediate action | Stop or escalation threshold | Restart authority | Record |
|---|---|---|---|---|---|
| Surface condition changes | Person doing the task, supported by the supervisor for changing work fronts | Remove loose grit, burrs or damaged material; adjust the task method or barrier. | Stop if the surface becomes sharper, unstable, contaminated or different from the assessed condition. | Supervisor or competent task lead confirms the changed condition is controlled. | Dynamic risk assessment note, briefing update or inspection record. |
| PPE deterioration | User, with supervisor checks during repeated or dirty work | Replace worn gloves, sleeves, kneepads or eye protection before failure. | Stop if PPE tears, thins, loses grip, becomes contaminated or cannot be matched to the hazard. | Supervisor or storekeeper confirms suitable replacement PPE. | PPE issue, replacement or defect record. |
| Dust-control performance | Worker and supervisor; maintainer if LEV or extraction is involved | Check capture, wetting, extraction position, filters and cleaning method. | Stop for visible uncontrolled dust, eye irritation, ineffective LEV, unknown material or dry sweeping of hazardous dust. | Supervisor or competent COSHH assessor confirms controls are effective. | COSHH control check, LEV defect or cleaning record. |
| Moving-part contact and abrasive wear | User observes; maintainer inspects and authorises restart | Keep hands, clothing and tools away from moving friction points; isolate before clearing or inspection. | Stop for rubbing marks, belt tracking faults, guard gaps, unexpected movement, exposed cables or worn hoses. | Competent maintainer or supervisor after isolation, defect control and restart check. | Isolation, defect, maintenance and restart evidence. |
| Housekeeping and bystander exposure | Worker and supervisor | Clear offcuts, splinters, dust, waste and trip hazards; protect people passing the work area. | Stop if debris spreads, cleaning cannot keep pace or others may contact contaminated or abrasive material. | Supervisor confirms the area is controlled. | Site inspection or close-out note. |
| Worker symptoms and first aid signals | Worker, first aider and supervisor | Report grazes, friction burns, eye irritation, embedded debris, worsening pain or signs of infection. | Stop for eye involvement, contaminated wounds, repeated minor injuries, infection signs or symptoms that affect safe work. | First aider and supervisor agree the person and task are safe; medical advice where required. | First aid record, incident report and action close-out. |
| New contamination or unknown material | Worker raises; supervisor or competent assessor decides | Pause, isolate the material, check source information and prevent spread. | Stop if coating, dust, residue, biological contamination or chemical content is unknown. | Competent assessor confirms material identity and controls. | COSHH/material check and revised method statement. |
| Completion area | What to confirm | Hand-over or record |
|---|---|---|
| People | No unreported grazes, friction burns, eye irritation or contaminated wounds; first aid records completed where treatment was needed. | First aid entry, supervisor note and any follow-up review. |
| Equipment and PPE | Worn gloves, sleeves, mats, belts, hoses, guards, cables and tools are replaced, quarantined or logged before next use. | Defect tag, quarantine record, maintenance request or PPE issue record. |
| Work area | Dust, grit, splinters, swarf and waste are removed by a method that does not expose others. | Cleaning check, waste note or supervisor close-out. |
| Learning | Repeated minor injuries, recurring worn PPE or repeated rough-surface defects have been escalated beyond simple replacement. | Trend review, action owner and effectiveness check. |
| Restart or hand-back | Machinery, conveyors, tools or public areas are handed back only after guarding, isolation removal, housekeeping and user briefing are complete. | Restart check, permit hand-back or inspection sign-off. |
How does abrasion control work in real activities?
Good abrasion control is practical: identify the contact, remove or reduce it, protect people from what remains, then learn from every repeat signal.
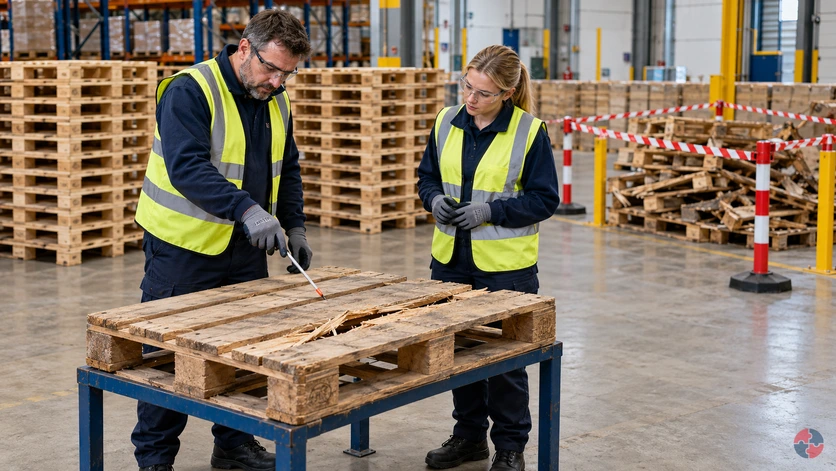
Remove rough contact before it reaches people
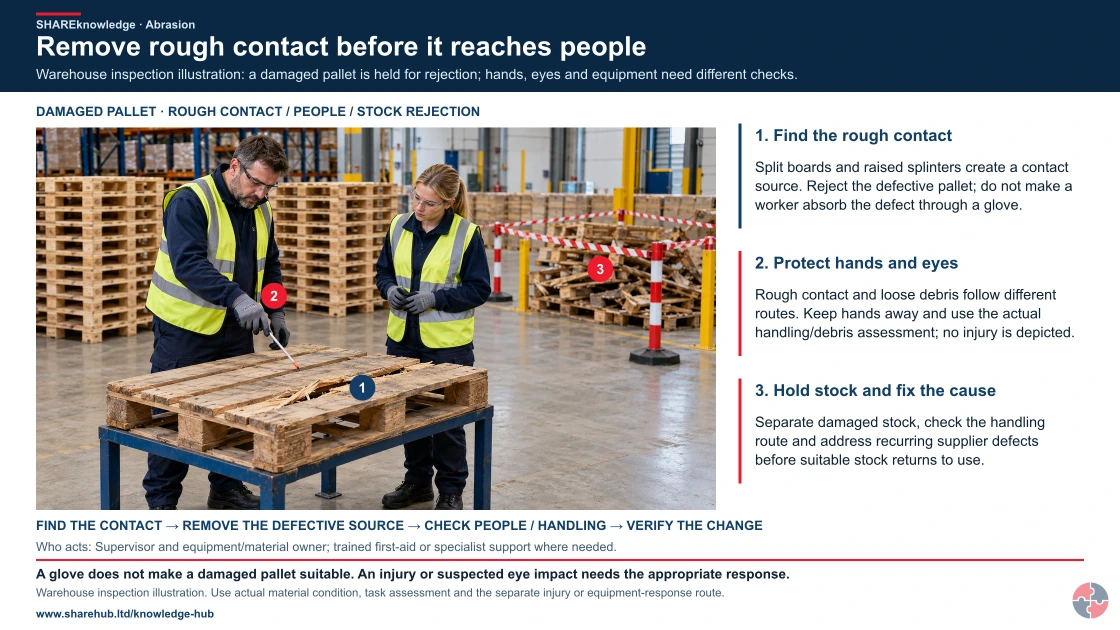
Full written explanation
A retained realistic HD warehouse scene shows two staff inspecting a split empty pallet with a pointer, keeping hands away from rough timber, beside a separate holding area. Three numbered explanations connect the rough contact source to hand/eye routes and the actual reject/handling decision. Gloves or glasses in the illustration do not establish suitability or a passed check. No injury, clinical anatomy or treatment is depicted. The second detailed equipment illustration distinguishes rubbing wear in a hose from personal skin or eye injury; the existing full source task and response controls remain.
Warehouse inspection illustration: a damaged pallet is held for rejection; hands, eyes and equipment need different checks.
- Find the rough contact. Split boards and raised splinters create a contact source. Reject the defective pallet; do not make a worker absorb the defect through a glove.
- Protect hands and eyes. Rough contact and loose debris follow different routes. Keep hands away and use the actual handling/debris assessment; no injury is depicted.
- Hold stock and fix the cause. Separate damaged stock, check the handling route and address recurring supplier defects before suitable stock returns to use.
Change the pathway
- Remove needless contact. Change materials, handling or layout so the person does not absorb the defect.
- Separate and control. Use suitable guarding, aids, edge treatment and debris control for the actual task.
- Protect and learn. Use suitable residual PPE; act on injuries, damaged gloves and repeat wear signals.
Evidence check: A glove does not make a damaged pallet suitable or prove a moving machine can be approached.
Use the complete pallet, conveyor and equipment-wear task examples
Primary references: HSE friction and abrasion mechanisms · HSE maintenance and actual energy boundaries · HSE skin-contact prevention · Parker hose construction and layer functions (2014 technical reference) · BFPA hose inspection: abrasion examples
Open the complete HD image (new tab)Download image
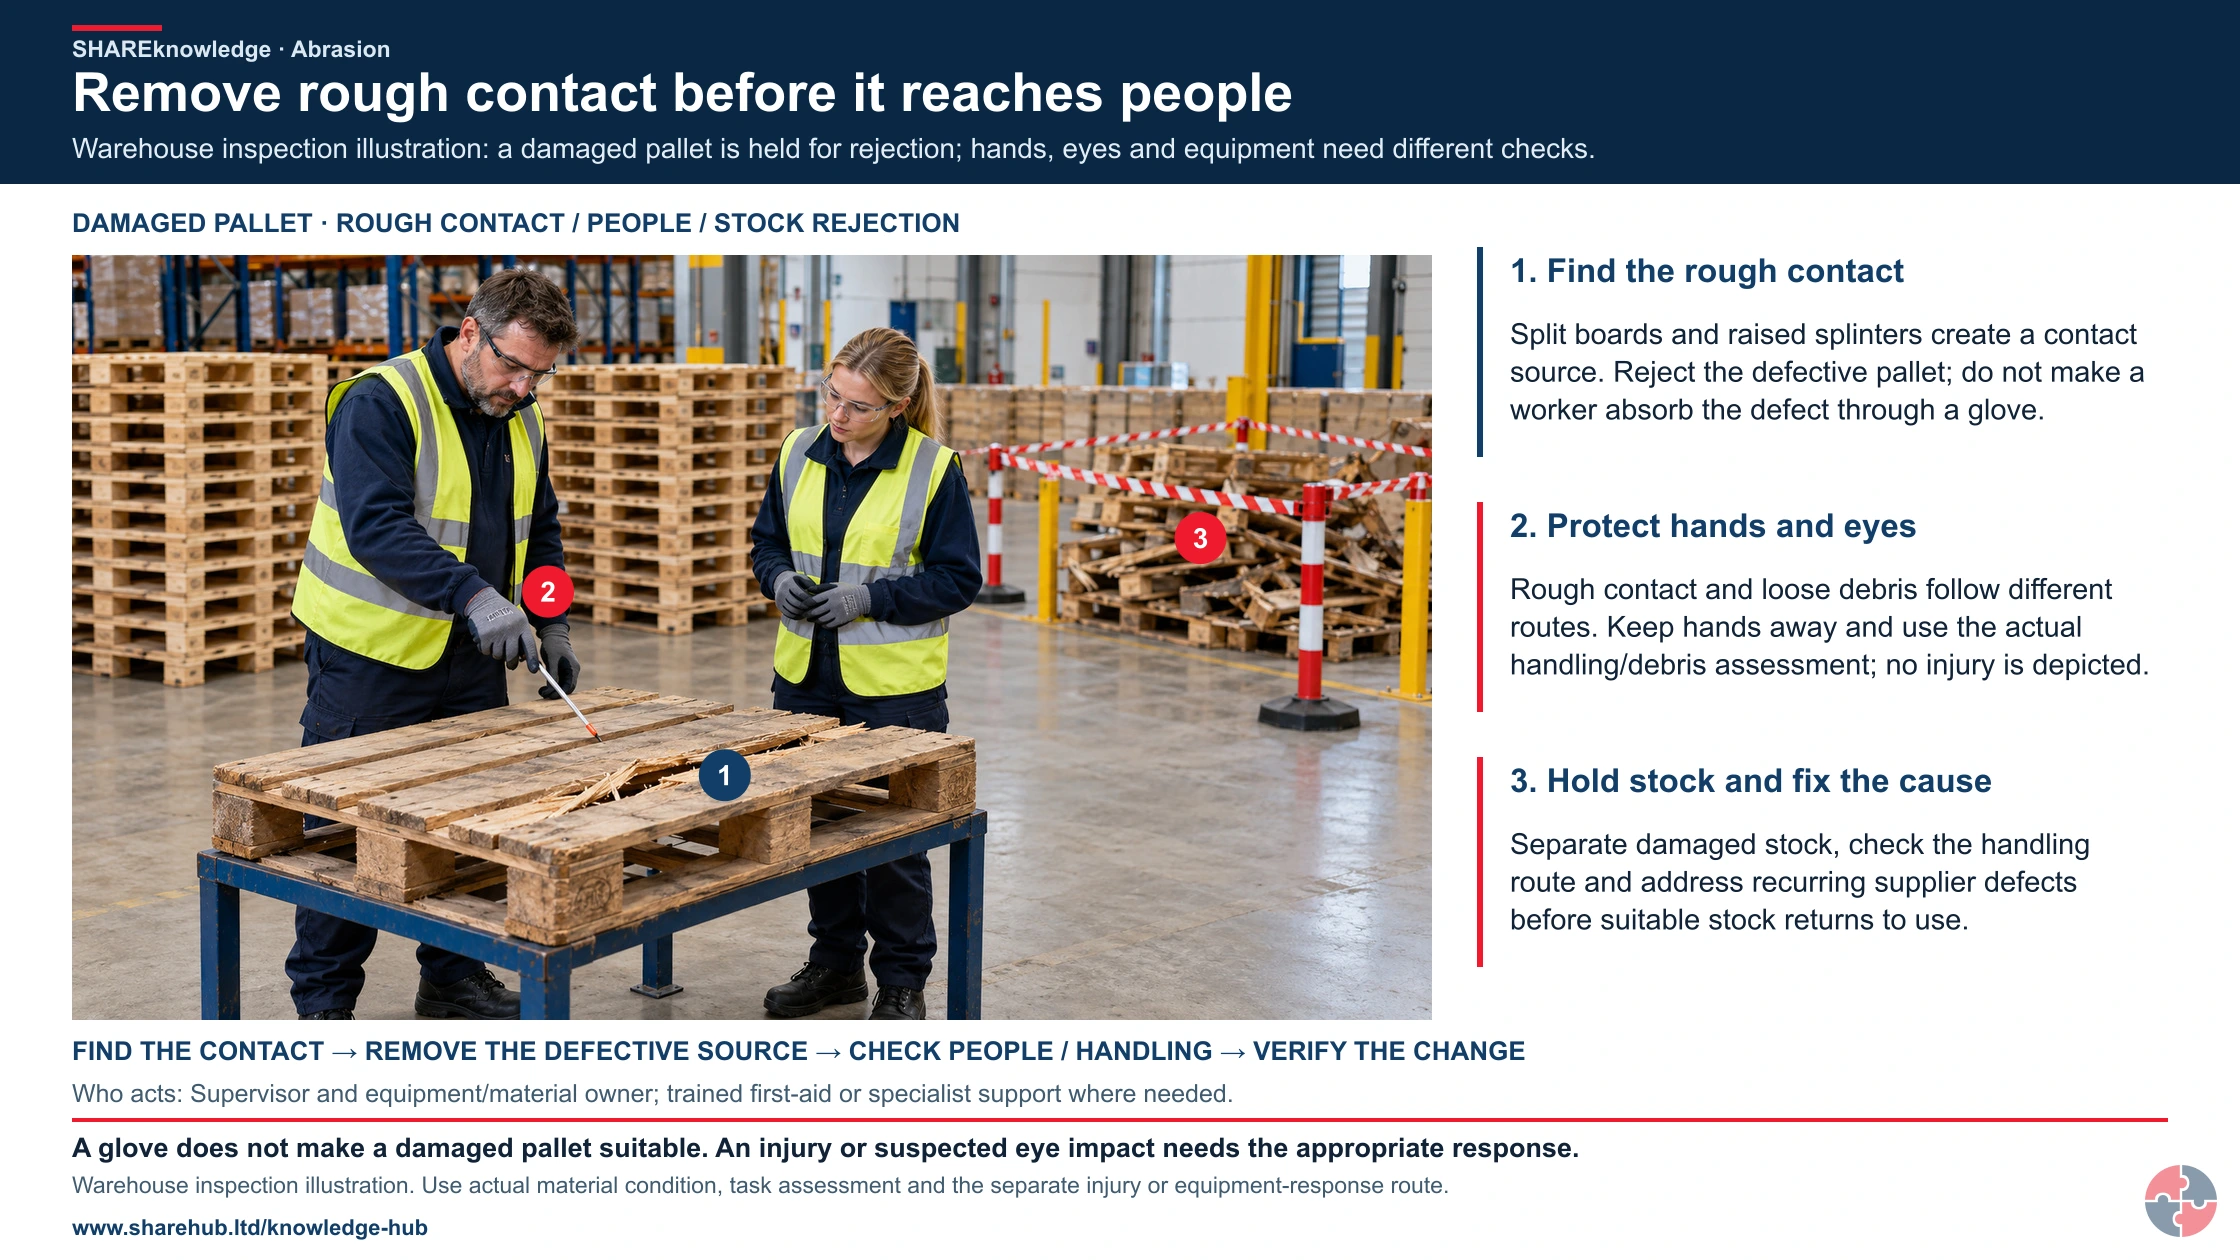
Use the complete pallet, conveyor and equipment-wear task examples
Primary references: HSE friction and abrasion mechanisms · HSE maintenance and actual energy boundaries · HSE skin-contact prevention · Parker hose construction and layer functions (2014 technical reference) · BFPA hose inspection: abrasion examples
Rubbing can wear through a hose wall
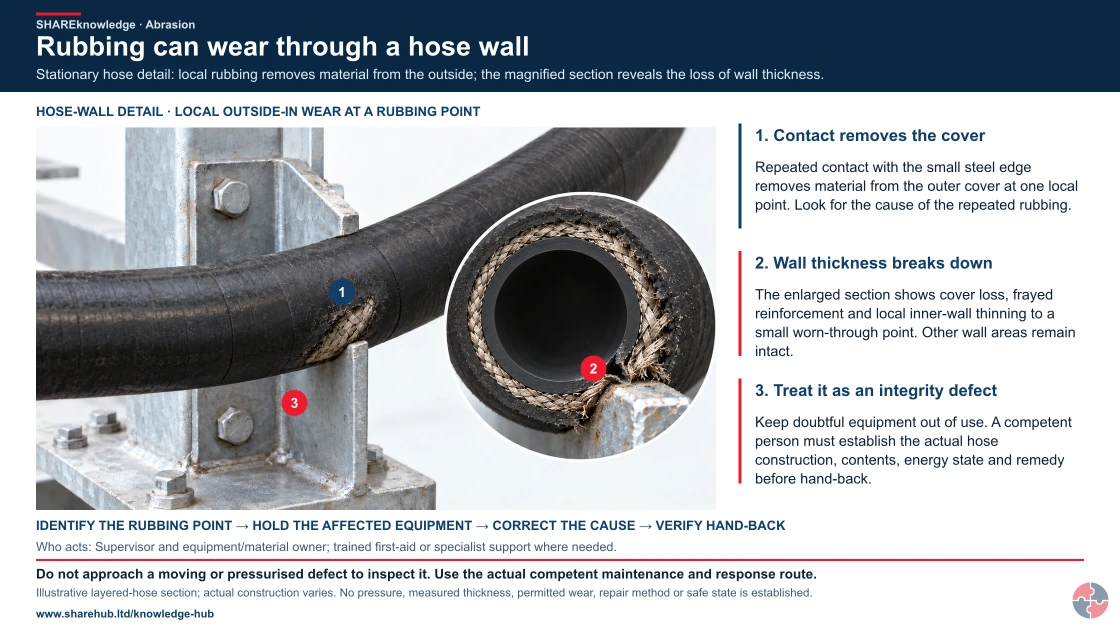
Full written explanation
A realistic HD hose detail shows one continuous reinforced hose passing in front of a steel support. A small external bracket edge contacts one local area of the continuous hose, with the steel remaining outside the wall. A magnified end-on section has one central lumen, normal wall on the opposite side and outside-in wear at the contact: lost outer cover, frayed reinforcement and local thinning to a small worn-through point. Three native annotations connect the physical mechanism to equipment integrity and a competent maintenance hold. The inactive specimen and conceptual section establish no pressure, actual hose material/rating, permitted wall loss, repair instruction or safe isolation. The correct source-specific equipment, injury or emergency route remains separate; no live inspection or clinical procedure is shown.
Stationary hose detail: local rubbing removes material from the outside; the magnified section reveals the loss of wall thickness.
- Identify the contact. Distinguish the material, movement, person and any equipment rubbing point.
- Hold the defective item. Remove damaged pallets or suspect equipment from use; protect people from further contact.
- Correct the source. Choose a suitable repair, replacement, material or method; do not rely on gloves alone.
- Verify before reuse. The responsible person checks condition, load/task suitability and whether the contact will recur.
When the evidence does not fit: An injury, suspected eye impact or equipment-integrity defect needs the relevant first-aid, emergency or maintenance response before collecting routine records.
Who acts: Supervisor and equipment/material owner; trained first-aid or specialist support where needed.
Changed workplace
Warehouse pallets: Quarantine rough or split stock and check the handling method before a suitable pallet returns to use.
Workshop rubbing hose: Make the equipment safe through the competent maintenance route; a worn hose is an integrity defect, not just a glove issue.
Evidence check: A glove does not make a damaged pallet suitable or prove a moving machine can be approached.
Use the complete pallet, conveyor and equipment-wear task examples
Primary references: HSE friction and abrasion mechanisms · HSE maintenance and actual energy boundaries · HSE skin-contact prevention · Parker hose construction and layer functions (2014 technical reference) · BFPA hose inspection: abrasion examples
Open the complete HD image (new tab)Download image
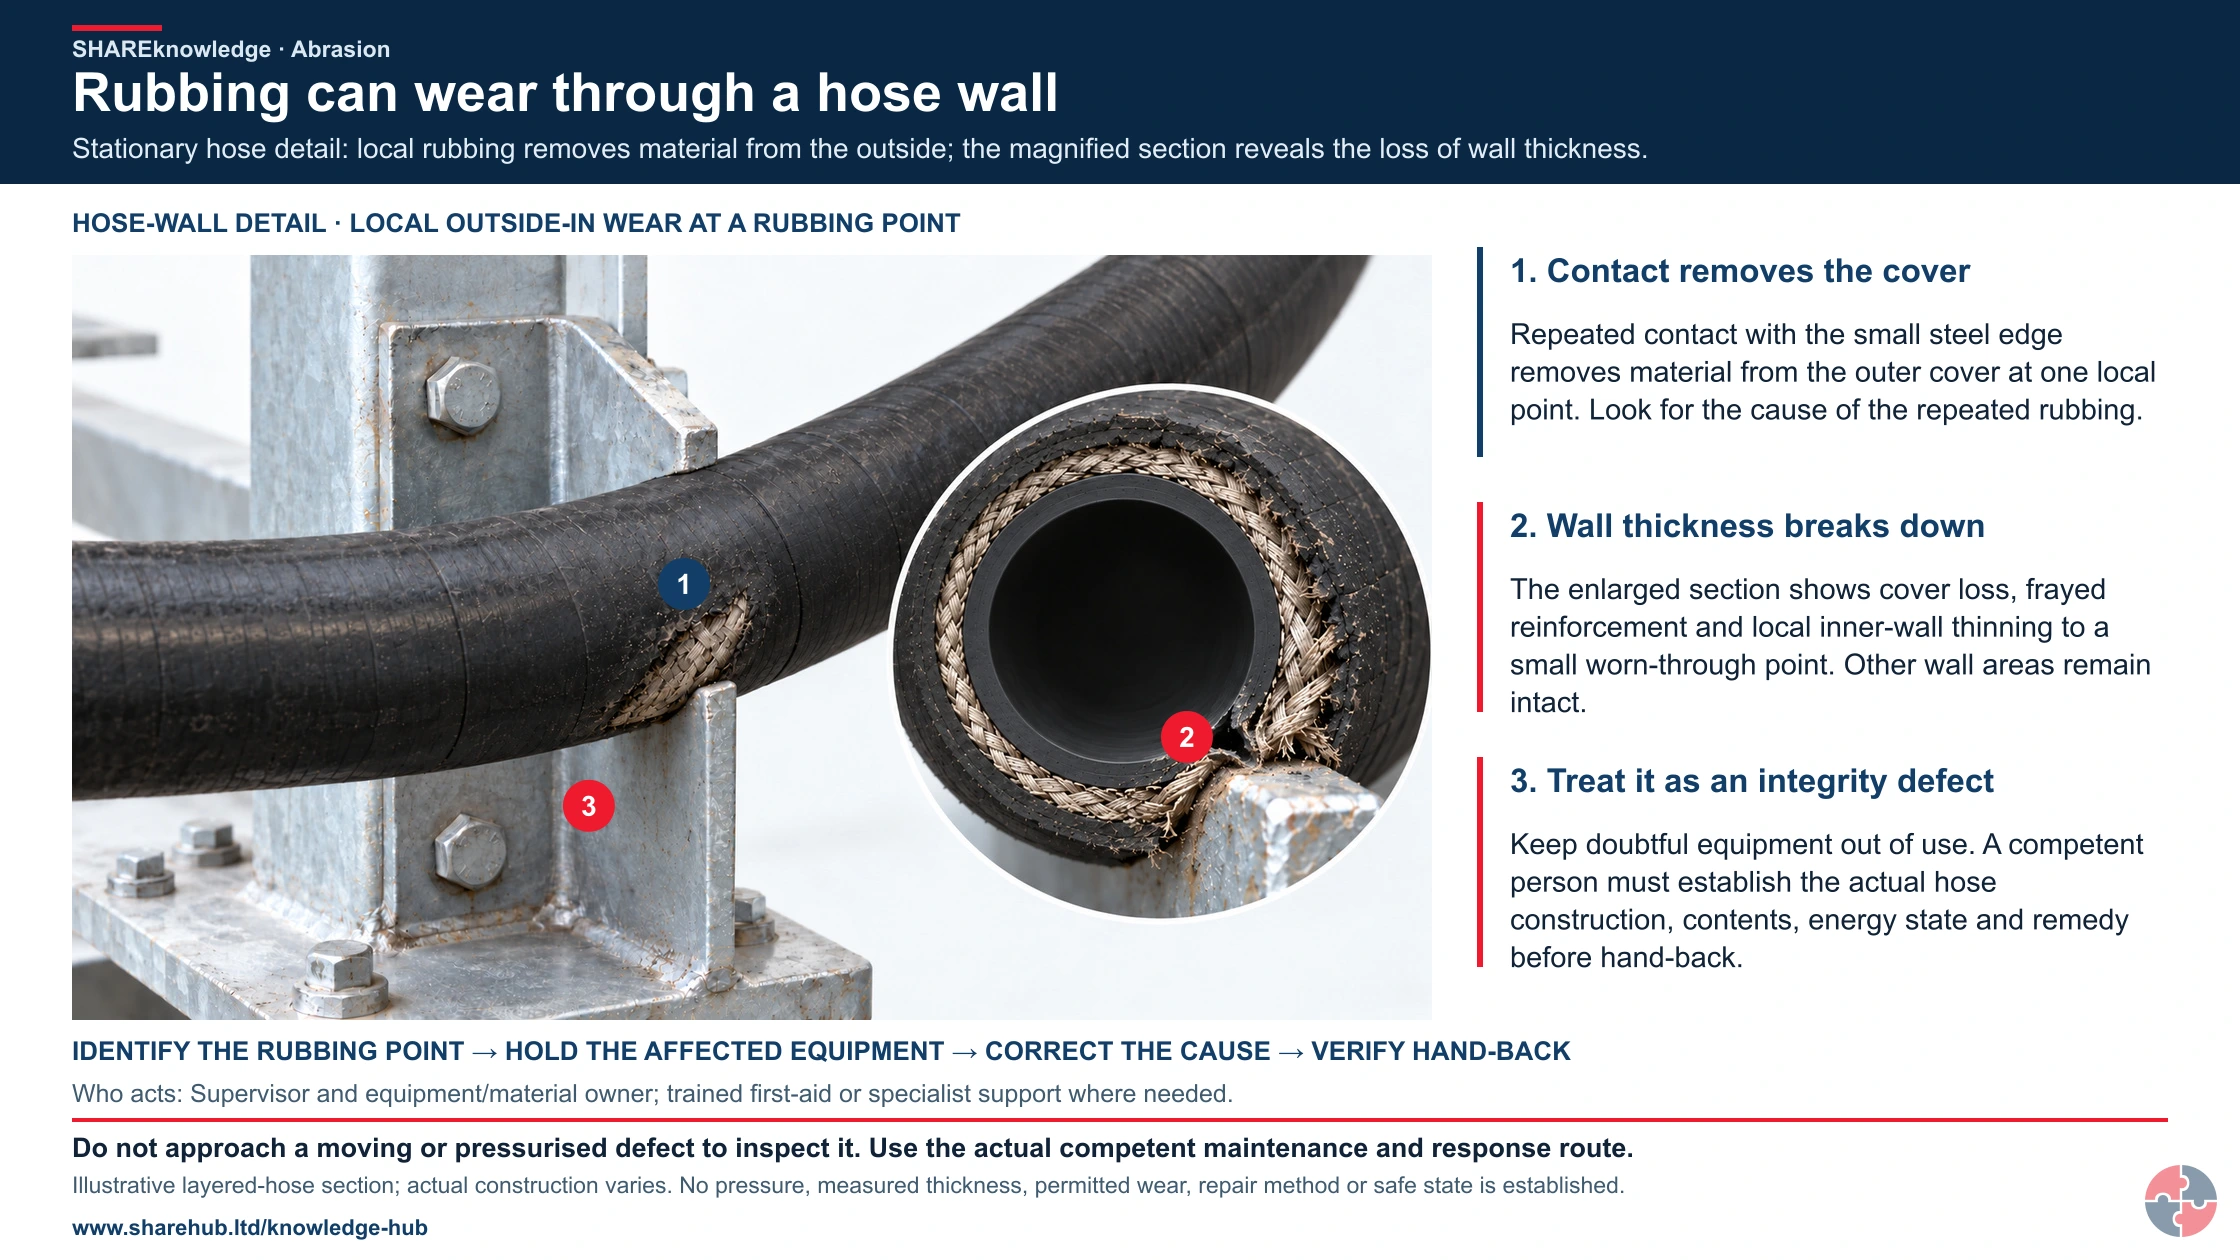
Use the complete pallet, conveyor and equipment-wear task examples
Primary references: HSE friction and abrasion mechanisms · HSE maintenance and actual energy boundaries · HSE skin-contact prevention · Parker hose construction and layer functions (2014 technical reference) · BFPA hose inspection: abrasion examples
A rough pallet is a control decision


Read this visual as text
- Splinters, damaged timber and worn gloves are warning signs. Remove damaged pallets from circulation and correct the contact source; gloves do not make a damaged pallet suitable for continued use.
- FIND THE CONTACT
- HOLD DAMAGED STOCK
- REMOVE THE CAUSE
Illustrative damaged-pallet example: hold use of the affected pallet and prevent further rough contact. Before reuse, the responsible person checks its condition and load suitability and confirms that the handling method will not repeat the damage.
The two worked examples show the full decision sequence. The short variations then show where the same approach changes with the task, material or people nearby.
Handling rough pallets in a busy warehouse
Task, material and setting: Move stock from timber pallets in a shared loading bay without hand injury, splinters or unstable loads. Pallet trucks, strapping, wrap and gloves are part of the task.
People and prerequisites: Warehouse and agency workers handle the pallets; pedestrians use a nearby route. The area may be crowded or damp, so grip and traffic separation matter. Workers know the local pallet rejection rule, handling method, glove issue route and first aid reporting process. A supervisor can remove defective stock from use.
Before: Inspect the pallet and route. Reject or segregate splintered pallets, arrange a stable load and use a handling aid and gloves suited to the actual grip and abrasion risk.
During: Keep hands away from rough timber and tensioned strapping, control the load and watch for glove damage or shifting stock. Do not make a worker finish handling a defective pallet.
Hold or stop: Stop for splinters, an unstable load, torn gloves or unknown contamination. Ask the supervisor to secure, replace or reject the pallet before handling resumes. Repeated supplier defects require a purchasing review.
Completion and hand-back: Segregate the damaged pallet, check the route and any injured person, and return only sound stock to use.
Evidence: Keep the defect or supplier record, PPE replacement note, first aid entry where relevant and evidence that the recurring cause was addressed.
Clearing a conveyor jam after a rubbing mark appears
Task, material and setting: Remove trapped product from a guarded conveyor in a production or waste-handling area without friction injury, entanglement or unexpected restart.
People and prerequisites: Operators, maintainers and other workers may be near the belt. A changed feed or worn guard can make an apparently routine jam a non-routine maintenance problem. Only people authorised under the local isolation and jam-clearance method take part. They know the equipment, stored-energy points, tool selection and hand-back route.
Before: Stop the conveyor, isolate and lock off under the local procedure, and verify that movement and stored energy are controlled. Keep other people clear.
During: Use the approved tool or method without reaching into a moving nip. Inspect the rubbing mark, guard and belt path; do not run the machine to clear debris or inspect the contact point.
Hold or stop: Keep the equipment isolated if movement is possible, the cause is unknown, a guard is defective, rubbing repeats or stored energy is uncertain. A competent maintainer and supervisor decide the repair and restart route.
Completion and hand-back: Remove debris, repair or protect the contact point, refit and check guards, clear people and tools, then restart through the local controlled process.
Evidence: Keep isolation, defect, repair, inspection and hand-back evidence, including what caused the rubbing and who authorised return to use.
Where the approach changes
- Kneeling on concrete: prepare the surface, work at a better height where possible and use suitable mats or kneepads. Stop for worsening skin damage, unstable access or uncontrolled dust.
- Sanding an unknown coating: hold the task until the coating and substrate are identified and the dust control method is assessed. Stop if dust escapes the agreed area.
- Worn hose or cable: keep doubtful equipment out of use, isolate where failure could harm people and obtain a competent inspection before repair and hand-back.
- Contractor or public interface: agree the method, exclusion and hand-back with the host before work; stop if particles or rough edges reach people outside the work area.
How should abrasion be assessed and controlled?
A good abrasion assessment identifies friction sources, exposed people, likely harm, practical controls and the evidence that controls are working.
Repeated minor injury learning loop
Two linked parts · 5 questions. Open Part 2 to complete the route.

Continue to questions 4–5 · Part 2 of 2


Read this visual as text
- Start: Use this route for the specific task described in the heading.
- Question 1: Is the repeat pattern supported by task and defect records? Decision owner: Supervisor and competent equipment owner.
- YES: The required evidence or condition is confirmed. CONTINUE → QUESTION 2.
- NO / UNKNOWN — HOLD: Collect comparable facts without treating low-severity injuries as routine. HOLD → REPEAT QUESTION 1 AFTER CORRECTION.
- Question 2: Have contact source, work design and material flow been examined? Decision owner: Supervisor and competent equipment owner.
- YES: The required evidence or condition is confirmed. CONTINUE → QUESTION 3.
- NO / UNKNOWN — HOLD: Observe real work with workers and identify the common rubbing cause. HOLD → REPEAT QUESTION 2 AFTER CORRECTION.
- Question 3: Does the proposed action change the cause at source? Decision owner: Supervisor and competent equipment owner.
- YES: The required evidence or condition is confirmed. CONTINUE → QUESTION 4.
- NO / UNKNOWN — HOLD: Improve the method, material or equipment; avoid reminders as the sole action. HOLD → REPEAT QUESTION 3 AFTER CORRECTION.
- Question 4: Have similar teams, tasks and equipment been checked? Decision owner: Supervisor and competent equipment owner.
- YES: The required evidence or condition is confirmed. CONTINUE → QUESTION 5.
- NO / UNKNOWN — HOLD: Extend the action to the actual exposed scope. HOLD → REPEAT QUESTION 4 AFTER CORRECTION.
- Question 5: Does follow-up evidence show recurrence has reduced? Decision owner: Supervisor and competent equipment owner.
- YES: The required evidence or condition is confirmed. OUTCOME → RECORD AND HAND OVER.
- NO / UNKNOWN — HOLD: Reopen the cause analysis and strengthen the controls. HOLD → REPEAT QUESTION 5 AFTER CORRECTION.
- Outcome: Effective control verified, or further action assigned and tracked.
The assessment should include visible injuries and hidden deterioration. It should ask where surfaces rub, where dust or particles are generated, what equipment is wearing, how PPE is selected, what first aid trends show and whether maintenance has clear intervention points. It should also include contractors and cleaners because they often handle rough waste, clear debris, enter worn areas or work near equipment after production has stopped.
Useful evidence is practical: inspection photos, worker feedback, first aid trends, defect reports, maintenance records and action close-out. A paper assessment has limited value if rough edges remain in place, gloves are failing, or the same hose is repeatedly repaired after rubbing through.
| Assessment question | What to look for | Good evidence |
|---|---|---|
| Where is friction created? | Rough materials, sharp or unfinished edges, moving belts, rollers, ropes, abrasive dust, grit, dragging loads, kneeling work and repeated manual contact. | Task observations, photographs, worker feedback, maintenance findings, material specifications and incident reports. |
| Who is exposed? | Operators, cleaners, maintenance workers, contractors, delivery teams, visitors, members of the public and anyone with skin conditions or open wounds. | Risk assessments, inductions, contractor RAMS, visitor controls and occupational health advice where needed. |
| What is the likely harm? | Skin grazes, friction burns, eye scratches, infection, inhalation of dust, PPE failure, equipment wear, loss of containment or mechanical failure. | Hazard register, COSHH assessment where dust is created, first aid trends, defect logs and maintenance records. |
| Which controls are strongest? | Design changes, guarding, smoother materials, mechanical aids, extraction, wet methods, cleaning, edge protection, PPE and supervision. | Control selection records, purchase standards, inspection checklists, training records and before-and-after improvement evidence. |
| How will controls be checked? | Whether inspections identify wear early, PPE is replaced before failure, first aid cases are reviewed and repeated minor injuries are treated as warning signs. | Audit records, action trackers, maintenance close-out, trend reports, toolbox talks and management review notes. |
What training and competence are needed for abrasion control?
Training should match the role, from general awareness for people exposed to rough contact through to specialist competence for supervisors, first aiders and maintenance teams.
General awareness can be short and practical: what abrasion looks like, why early reporting matters, how to protect skin and eyes, and what to do if a graze, friction burn or eye irritation occurs. Task-specific training should be more hands-on, covering the actual surfaces, tools, materials, PPE and cleaning methods used in the workplace.
Supervisors and managers need to understand trends and evidence. If the first aid book shows repeated hand grazes in one area, that is not simply a reminder to wear gloves. It may be a procurement, design, maintenance, housekeeping, staffing or supervision issue. Maintenance teams need separate competence to recognise abrasive wear before it becomes a breakdown or safety-critical failure.
| Role and level | Learning and practice | Competence evidence and record | Assessor and reassessment trigger |
|---|---|---|---|
| General awareness: Workers, contractors and visitors who may be exposed to rough surfaces, dusty work, sharp edges, moving belts or abrasive materials. | What abrasion is, why minor grazes matter, how to report rough edges and damaged PPE, basic housekeeping, hand protection and when to seek first aid. | Point out a rough contact or damaged guard, report it and choose the safe route; briefing or induction record. | Supervisor observes at induction and after a new area, material or recurring graze. |
| Task-specific practical training: People handling rough materials, kneeling on abrasive surfaces, using sanding or grinding processes, working near conveyors or cleaning dusty areas. | Safe handling, correct gloves and sleeves, eye protection, dust controls, avoiding contact with moving parts, cleaning methods, tool use and stop-work triggers. | Demonstrate handling, guards, isolation boundaries, suitable protection and a stop decision on the actual task; supervised-practice record. | Competent task supervisor checks before unsupervised work and after a method, material, tool or injury trend changes. |
| Supervisor and manager training: Supervisors, workshop leaders, site managers, facilities managers and contract managers. | How to assess abrasion risk, select stronger controls, check PPE suitability, review first aid trends, manage contractors, act on defects and verify maintenance close-out. | Challenge a weak risk assessment, choose source controls and close a recurring defect with field evidence; decision and observation record. | Manager or competent safety adviser checks after repeated injuries, contractor changes or failed action. |
| Maintenance and inspection competence: People inspecting conveyors, chutes, belts, hoses, guards, floors, access routes, tools and machinery exposed to abrasive wear. | Wear patterns, replacement limits, isolation, guarding, loss of containment, defect escalation, planned maintenance and learning from repeat failures. | Show safe isolation, wear measurement against the actual equipment standard, defect quarantine and hand-back; inspection record. | Competent maintenance lead checks before release and after a new failure mode, component or method. |
| First aid and escalation: First aiders, supervisors and nominated response staff in areas where cuts, grazes, friction burns or eye contamination can occur. | Cleaning and covering minor wounds, recognising infection or embedded material, eye injury escalation, recording treatment and feeding repeated injuries into risk review. | Demonstrate the local first-aid and escalation route within the appointed role; first-aid and referral records kept with appropriate privacy. | First-aid coordinator checks after a changed response arrangement or treatment concern; medical decisions remain with clinicians. |
| Purchasers, designers and safety advisers | Specify smooth-handling, guarding and replacement criteria; test whether abrasion creates contact or wear failure in the real task. | Approved procurement or design specification and field audit of the installed control. | Competent technical lead checks after a material, machine, supplier or failure-pattern change. |
Keep the record proportionate: identify the actual task, the demonstrated skill, who assessed it and the scope of authorisation. Reassess when the equipment, material, method or observed performance changes; no universal external certificate or fixed renewal period is implied.
Which Great Britain and Northern Ireland duties apply?
Abrasion is not controlled by one single abrasion regulation; the legal route depends on jurisdiction and on whether the issue is people, equipment, substances, PPE use, first aid, incident reporting or product supply. See Health and Safety at Work etc. Act 1974, Health and Safety at Work (Northern Ireland) Order 1978 for the applicable decision.
For UK-wide learning, keep the practical duty message consistent but keep legal citations precise. Great Britain and Northern Ireland often have equivalent control expectations, but the instruments and regulator routes are not always the same.
| Duty route | How it applies to abrasion | Evidence a business should hold |
|---|---|---|
| Great Britain: Health and Safety at Work etc. Act 1974 | The primary general health and safety statute for Great Britain; relevant to safe plant, safe systems, information, training, supervision and welfare. | GB legal register, risk assessments, safe systems, training, supervision, inspection, first aid and improvement evidence. Direct source: Health and Safety at Work etc. Act 1974 |
| Northern Ireland: Health and Safety at Work (Northern Ireland) Order 1978 | The Northern Ireland primary duty route; do not cite GB-only instruments as the NI legal basis. | NI legal register, HSENI route, local dutyholder evidence and review record. Direct source: Health and Safety at Work (Northern Ireland) Order 1978; HSENI Getting started: health and safety duties |
| Risk assessment: GB Management Regulations 1999 | Requires assessment, preventive arrangements, competent assistance, coordination and review where rough contact, dust, equipment wear or injury trends are foreseeable. | Task assessment, review triggers, competence route, contractor coordination and action tracking. Direct source: Management of Health and Safety at Work Regulations 1999 |
| Risk assessment: NI Management Regulations 2000 | Requires assessment, preventive arrangements, competent assistance, coordination and review where rough contact, dust, equipment wear or injury trends are foreseeable. | Task assessment, review triggers, competence route, contractor coordination and action tracking. Direct source: Management of Health and Safety at Work Regulations (Northern Ireland) 2000 |
| Work equipment: GB PUWER 1998 | Applies where conveyors, rollers, guards, hoses, cables, tools or machinery create friction hazards or suffer abrasive wear. | Suitability, inspection, maintenance, guarding, isolation, training and defect records. Direct source: Provision and Use of Work Equipment Regulations 1998; HSE PUWER overview |
| Work equipment: NI PUWER 1999 | Applies where conveyors, rollers, guards, hoses, cables, tools or machinery create friction hazards or suffer abrasive wear. | Suitability, inspection, maintenance, guarding, isolation, training and defect records. Direct source: Provision and Use of Work Equipment Regulations (Northern Ireland) 1999 |
| Workplace PPE use: GB PPE at Work Regulations 1992 as amended | PPE for residual abrasion risk must be suitable, compatible, maintained, stored, replaced and understood. This is a workplace-use duty, separate from product supply and conformity marking. | PPE selection rationale, issue, inspection, replacement, user training, compatibility checks and supplier information. Direct source: HSE PPE at work regulations guidance and 2022 update; Personal Protective Equipment at Work Regulations 1992 |
| Workplace PPE use: NI PPE Regulations 1993 | PPE for residual abrasion risk must be suitable, compatible, maintained, stored, replaced and understood. This is a workplace-use duty, separate from product supply and conformity marking. | PPE selection rationale, issue, inspection, replacement, user training, compatibility checks and supplier information. Direct source: Personal Protective Equipment at Work Regulations (Northern Ireland) 1993 |
| Hazardous substances: GB COSHH 2002 | Applies where abrasive work creates hazardous dust, fume or contaminated debris, or where broken skin may contact hazardous substances. | COSHH assessment, source controls, LEV/RPE decisions, cleaning method, exposure review and health surveillance decision. Direct source: Control of Substances Hazardous to Health Regulations 2002; HSE COSHH control |
| Hazardous substances: NI COSHH 2003 | Applies where abrasive work creates hazardous dust, fume or contaminated debris, or where broken skin may contact hazardous substances. | COSHH assessment, source controls, LEV/RPE decisions, cleaning method, exposure review and health surveillance decision. Direct source: Control of Substances Hazardous to Health Regulations (Northern Ireland) 2003 |
| First aid: GB First-Aid Regulations 1981 | First aid arrangements should reflect foreseeable cuts, grazes, friction burns, eye contamination and infection risk. | First aid needs assessment, first aid records, kit checks, worker information and escalation arrangements. Direct source: Health and Safety (First-Aid) Regulations 1981; HSE first aid at work |
| First aid: NI First-Aid Regulations 1982 | First aid arrangements should reflect foreseeable cuts, grazes, friction burns, eye contamination and infection risk. | First aid needs assessment, first aid records, kit checks, worker information and escalation arrangements. Direct source: Health and Safety (First-Aid) Regulations (Northern Ireland) 1982 |
| Incident reporting: GB RIDDOR 2013 | Most minor grazes are not reportable. A work-related injury may be reportable for a specified injury or more than seven consecutive days away from work or unable to do normal duties. Check the current GB route for other outcomes and dangerous occurrences. | RIDDOR decision record, investigation, corrective actions and learning review. Direct source: RIDDOR 2013; HSE RIDDOR guidance |
| Incident reporting: NI RIDDOR 1997 as amended | Most minor grazes are not reportable. The NI route includes major injuries and more than three days away from work or unable to do normal duties. Check the current HSENI route for other outcomes and dangerous occurrences. | RIDDOR decision record, investigation, corrective actions and learning review. Direct source: Reporting of Injuries, Diseases and Dangerous Occurrences Regulations (Northern Ireland) 1997; HSENI accident reporting |
| Product supply and conformity marking | Buying gloves, machinery or other products is a product-supply and procurement assurance issue; it must not be confused with the employer's workplace-use assessment. | Supplier declaration, UKCA/CE/UKNI route where relevant, instructions, compatibility decision and acceptance check. Direct source: GOV.UK placing UKCA or CE marked products on the GB market; BS EN 388:2016+A1:2018; ISO 21420:2020 |
What should a risk register for abrasion include?
A useful abrasion risk register separates skin injury, eye injury, dust exposure, equipment wear, moving friction points and public exposure.
A single register line for "abrasion" is rarely enough. The controls for a friction burn from a conveyor are not the same as those for a scratched eye from grit, a worn hose, a dusty sanding task or rough flooring in a public area. Each harm route needs controls, evidence, owners and review triggers.
| Risk register item | Possible event or exposure | Controls and evidence to record |
|---|---|---|
| Skin abrasion and friction burns | Worker suffers grazes, burns or open skin from rough materials, ropes, belts, kneeling, dragging loads or contact with abrasive surfaces. | Edge protection, handling aids, abrasion-rated gloves and sleeves, kneepads, work method briefing, first aid and trend review of minor injuries. |
| Eye abrasion and particles | Dust, grit, swarf or debris enters the eye during sanding, grinding, sweeping, maintenance or outdoor work. | Eye protection, screens, extraction, wet methods, cleaning controls, eyewash, first aid escalation and incident learning. |
| Abrasive dust exposure | Abrasive work releases hazardous dust from wood, silica-containing materials, cement, metals, coatings or other substances. | COSHH assessment, substitution, local exhaust ventilation (LEV), wet suppression, respiratory protective equipment (RPE), cleaning standards and exposure review. |
| Equipment wear and failure | Belts, guards, hoses, cables, linings, floors or components wear through and create secondary hazards. | Inspection schedule, wear limits, maintenance planning, replacement criteria, defect escalation and verification after repair. |
| Moving friction points | Hands, clothing or skin contact moving belts, rollers, wheels or abrasive surfaces, causing friction burns or entrapment-related injury. | Fixed guarding, interlocks where appropriate, isolation before clearing jams, no-touch rules, supervision and training. |
| Public or visitor abrasion | Visitors or service users scrape skin on rough flooring, damaged fixtures, play surfaces, pool edges or temporary works materials. | Premises inspections, repair standards, edge protection, cleaning, activity supervision, first aid arrangements and defect reporting routes. |
How could BuildOut Ltd manage abrasion?

BuildOut Ltd manages abrasion as a practical construction risk that links rough materials, skin protection, dust control, equipment wear, maintenance and contractor management.
BuildOut Ltd carries out refurbishment and fit-out work where workers handle blockwork, timber, steel sections, plasterboard, packaging, tools, waste, temporary flooring and rough surfaces. The company also uses equipment and temporary services that can wear through rubbing, grit, dragging or poor routing. Its approach is to spot early contact and wear before it becomes injury, exposure or equipment failure.
The example below shows how the topic becomes useful inside a business rather than remaining a generic definition.
| Management area | How BuildOut Ltd manages it | Evidence and improvement loop |
|---|---|---|
| Assessment and planning | BuildOut Ltd identifies abrasion risks during project planning by looking at rough materials, unfinished edges, kneeling tasks, demolition debris, conveyor or hoist contact points, sanding and grinding work, and pedestrian routes across rough surfaces. | Project risk assessments, RAMS reviews, pre-start inspections and worker feedback are reviewed when first aid reports or defect logs show repeated grazes, glove damage or rough-edge complaints. |
| Risk register ownership | The company risk register separates skin abrasion, eye injury, abrasive dust, equipment wear, damaged PPE and moving friction points so each risk has a named owner and practical control standard. | Monthly health and safety meetings review first aid trends, tool defects, contractor findings and maintenance backlog to decide whether controls need strengthening. |
| Procurement and design control | Procurement specifies abrasion-resistant gloves and kneepads for relevant tasks, durable cable and hose protection, edge covers, dust-control attachments and materials that arrive pre-finished or pre-cut where practical. | Approved supplier lists, PPE trials, worker wearer feedback and defect rates are used to refine purchasing rather than simply buying the cheapest product. |
| Implementation on site | Supervisors require rough edges to be capped or deburred, walking routes to be kept clear of abrasive debris, dusty sanding or grinding to use source control, and workers to avoid dragging loads by using trolleys, skates or lifting aids. | Daily briefings, site inspection photos, housekeeping checks, PPE replacement records and corrective action close-out show whether the method is actually being used. |
| Training and competence | General awareness is included in site induction, while task-specific briefings cover glove choice, eye protection, kneeling protection, dust controls, conveyor or hoist pinch points and how to treat and report grazes. | Training records, toolbox talks, supervisor observations and first aid reports are compared so repeat injuries trigger coaching, design changes or procurement changes. |
| Contractor management | Contractors must explain how they will control abrasive dust, rough edges, waste, moving equipment and PPE suitability. BuildOut checks that contractor controls do not expose other trades or the public. | RAMS review, induction records, coordination meetings, non-conformance reports and stop-work actions are retained and used during contractor performance reviews. |
| Maintenance and inspection | Site teams check work equipment, cable protection, hoses, guards, ladders, temporary surfaces and access routes for abrasion wear. Damaged items are tagged out rather than left for the next team. | Inspection checklists, defect logs, repair records and trend analysis show whether maintenance is preventing repeat wear-related failures. |
| Learning and improvement | A minor graze, torn glove, scratched eye, dusty task or worn hose is treated as useful intelligence. The question is not only what the worker did, but why the contact point, surface or control was present. | Incident learning feeds into revised RAMS, better edge protection, changed PPE, improved storage, clearer supervision standards and updates to the project risk register. |
Which ISO and product standards help manage abrasion?
Standards help translate abrasion risks into management controls, machinery design, PPE selection and assurance, but they do not replace task assessment, legal duties or manufacturer instructions.
Standards are support tools. They help purchasers, maintainers, designers and auditors ask better questions, but a performance rating or certificate does not prove that a control is suitable for the task, material, environment, wearer or machine.
| Standard | Edition verification | Use for abrasion | Boundary and limitation | British adoption or purchase note |
|---|---|---|---|---|
| ISO 45001:2018 and ISO 45001:2018/Amd 1:2024 | Publication status and technical requirements must be checked in an authorised current copy before use. | Management-system structure for leadership, worker participation, risk control, competence, operational control, monitoring and improvement. | Does not specify which glove, guard or inspection interval is suitable for a specific abrasion task. | Use any adopted UK version through BSI where certification or client requirements specify it. |
| ISO 12100:2010 | Publication status and technical requirements must be checked in an authorised current copy before use. | Supports machinery risk assessment where abrasion comes from moving parts, rough contact, ejection, failure or maintenance access. | Use with the actual machine design and manufacturer information; not a worker checklist by itself. | Often encountered as BS EN ISO 12100 in UK machinery files. |
| BS EN ISO 13857:2019 | Publication status and technical requirements must be checked in an authorised current copy before use. | Supports guard openings and safety distances to prevent people reaching moving abrasive contact points. | Only relevant where reach distance and guard openings are part of the risk reduction design. | British adoption matters where UK technical files, purchaser specifications or machinery assurance require it. |
| BS EN ISO 14120:2015 | Publication status and technical requirements must be checked in an authorised current copy before use. | Supports fixed and movable guard design, including foreseeable wear, damage and access to hazardous parts. | Guard material, inspection and maintenance still need machine-specific assessment. | Use with PUWER duties and manufacturer information, not as a substitute for either. |
| ISO 14119:2024 | Publication status and technical requirements must be checked in an authorised current copy before use. | Supports interlocking devices associated with guards where access to moving parts creates contact, drag or abrasion risk. | Interlocks do not replace isolation for maintenance, jam clearing or stored-energy tasks. | Check whether the project or machine file requires the British/European adoption. |
| BS EN ISO 13849-1:2023 | Publication status and technical requirements must be checked in an authorised current copy before use. | Relevant when control-system reliability affects access to moving abrasive contact points. | Requires competent design and validation; not general awareness guidance. | Useful for machinery designers, maintainers and auditors rather than general workers. |
| BS EN 388:2016+A1:2018 | Publication status and technical requirements must be checked in an authorised current copy before use. | Classifies protective gloves against mechanical risks including abrasion, blade cut, tear, puncture and impact where tested. | A high abrasion rating does not prove chemical compatibility, dexterity, thermal protection or suitability near moving machinery. | Use with BS EN ISO 21420 and task assessment before selecting gloves. |
| BS EN ISO 21420:2020+A1:2024 | Publication status and technical requirements must be checked in an authorised current copy before use. | General glove requirements: design, construction, harmlessness, comfort, sizing, marking and manufacturer information. | Does not address protective performance alone; use with the relevant specific glove standard. | Important when checking supplier data, user information and glove traceability. |
The table applies standards at a general level. For design, procurement or a formal clause audit, use the current licensed edition and competent specialist interpretation.
What are the warning signs that abrasion risk is not being managed?
Warning signs include repeated minor injuries, worn PPE, rough edges, dusty work, worn equipment and weak learning from low-level reports.
During-use monitoring
Two linked parts · 5 questions. Open Part 2 to complete the route.

Continue to questions 4–5 · Part 2 of 2


Read this visual as text
- Start: Use this route for the specific task described in the heading.
- Question 1: Is there skin damage, eye irritation, torn PPE or uncontrolled dust? Decision owner: Worker / supervisor.
- YES — STOP / REFER: Pause work, protect the person and use the appropriate first-aid or clinical route. STOP / REFER → APPROPRIATE RESPONSE.
- NO: No such warning is identified; continue the remaining checks. CONTINUE → QUESTION 2.
- UNKNOWN — PROTECT FIRST: Protect people and hold the affected work. Obtain the responsible specialist’s assessment; do not assume the warning is absent. HOLD → OWNER RESOLVES BEFORE RESUMING.
- Question 2: Is equipment rubbing, heating, leaking or wearing unexpectedly? Decision owner: Supervisor and competent equipment owner.
- YES — STOP / REFER: Stop and isolate where needed; ask the competent equipment owner to assess the item. STOP / REFER → APPROPRIATE RESPONSE.
- NO: No such warning is identified; continue the remaining checks. CONTINUE → QUESTION 3.
- UNKNOWN — PROTECT FIRST: Protect people and hold the affected work. Obtain the responsible specialist’s assessment; do not assume the warning is absent. HOLD → OWNER RESOLVES BEFORE RESUMING.
- Question 3: Is the cause understood rather than assumed? Decision owner: Supervisor and competent equipment owner.
- YES: The required evidence or condition is confirmed. CONTINUE → QUESTION 4.
- NO / UNKNOWN — HOLD: Preserve facts and investigate contact, task changes and failed controls. HOLD → REPEAT QUESTION 3 AFTER CORRECTION.
- Question 4: Has the cause been corrected and the control checked? Decision owner: Supervisor and competent equipment owner.
- YES: The required evidence or condition is confirmed. CONTINUE → QUESTION 5.
- NO / UNKNOWN — HOLD: Keep the task stopped, revise the correction and check comparable work. HOLD → REPEAT QUESTION 4 AFTER CORRECTION.
- Question 5: Has the responsible lead accepted the restart and briefed people? Decision owner: Supervisor and competent equipment owner.
- YES: The required evidence or condition is confirmed. OUTCOME → RECORD AND HAND OVER.
- NO / UNKNOWN — HOLD: Record the evidence and unresolved restrictions before any restart. HOLD → REPEAT QUESTION 5 AFTER CORRECTION.
- Outcome: Controlled restart, medical route, or equipment quarantine.
These signs matter because abrasion often escalates slowly. A torn glove becomes a skin injury, a worn hose becomes a leak, a rubbing cable becomes an electrical risk, and a repeated graze becomes accepted as normal. Good supervisors take small signals seriously because they show where the workplace is rubbing against people or equipment.
| Warning sign | How it can cause harm | How it may show up at work |
|---|---|---|
| Repeated minor grazes or first aid cases | Minor injuries can become infected, hide a worsening contact problem or normalise unsafe handling methods. | First aid book entries for hands, forearms or knees; workers self-treating cuts; or supervisors describing injuries as just part of the job. |
| Torn gloves or worn sleeves | Protection has failed and skin may be exposed to rough materials, contaminants, sharp edges or friction burns. | Workers taping gloves, using the wrong glove type, frequent glove replacement without investigation, or no system for selecting abrasion resistance. |
| Rough or unfinished edges left in work areas | Hands, arms, legs, clothing and equipment can catch or scrape, causing injury and damaging PPE. | Uncapped steel, broken pallets, rough shelving, damaged fixtures, splintered timber, exposed mesh, worn floors or snagging points. |
| Dusty sanding, grinding or cleaning | Airborne particles can irritate eyes and skin or create respiratory exposure depending on the material. | Visible dust, dry sweeping, dusty clothing, no extraction, no wet method, eye complaints or masks used without face-fit evidence. |
| Worn belts, hoses, guards or cables | Abrasion can remove protective layers, create leaks, expose electricity, reduce guarding strength or cause equipment failure. | Frayed hoses, exposed cable cores, belts rubbing frames, guard wear marks, repeated breakdowns or maintenance deferrals. |
| No learning from low-level reports | The same rough surface, contact point or handling problem remains until it causes a more serious injury. | Repeated findings closed as PPE reminders, no root cause review, no procurement change, no resurfacing, no design action and no trend analysis. |
What should happen after an abrasion, eye injury or wear defect?
First make the person and area safe. Use emergency care for uncontrolled bleeding, a severe wound, a high-speed eye impact or a change in sight; then record, quarantine and learn from the event. See NHS cuts and grazes, NHS eye injuries, NI Direct urgent and emergency care for the applicable decision.
First aid and escalation
Two linked parts · 5 questions. Open Part 2 to complete the route.

Continue to questions 4–5 · Part 2 of 2


Read this visual as text
- Start: Use this route for the specific task described in the heading.
- Question 1: Is the person protected from further contact? Decision owner: Supervisor / first aider.
- YES: The required evidence or condition is confirmed. CONTINUE → QUESTION 2.
- NO / UNKNOWN — HOLD: Stop the task and make the scene safe before helping. HOLD → REPEAT QUESTION 1 AFTER CORRECTION.
- Question 2: Is bleeding uncontrolled, the wound deep, an object embedded, or movement or feeling lost? Decision owner: First aider / emergency services.
- YES — STOP / REFER: Use emergency care under current NHS guidance; call 999 for a life-threatening emergency. Do not remove an embedded object. STOP / REFER → APPROPRIATE RESPONSE.
- NO: No such warning is identified; continue the remaining checks. CONTINUE → QUESTION 3.
- UNKNOWN — PROTECT FIRST: Protect people and hold the affected work. Obtain the responsible specialist’s assessment; do not assume the warning is absent. HOLD → OWNER RESOLVES BEFORE RESUMING.
- Question 3: Was there a high-speed eye strike, penetration, sight change or severe eye pain? Decision owner: First aider / clinical service.
- YES — STOP / REFER: Arrange immediate emergency eye assessment; do not delay for the incident form. STOP / REFER → APPROPRIATE RESPONSE.
- NO: No such warning is identified; continue the remaining checks. CONTINUE → QUESTION 4.
- UNKNOWN — PROTECT FIRST: Protect people and hold the affected work. Obtain the responsible specialist’s assessment; do not assume the warning is absent. HOLD → OWNER RESOLVES BEFORE RESUMING.
- Question 4: Is a small wound still dirty, worsening or showing infection? Decision owner: First aider / clinical service.
- Yes / uncertain: Seek prompt local clinical advice; use the current nation-specific route. STOP / REFER → APPROPRIATE RESPONSE.
- No: Use appropriate local first aid for the small graze and protect it. CONTINUE → QUESTION 5.
- Question 5: Has the event and contact cause been reviewed? Decision owner: Supervisor and competent equipment owner.
- YES: The required evidence or condition is confirmed. OUTCOME → RECORD AND HAND OVER.
- NO / UNKNOWN — HOLD: Record facts and remove the cause before repeat work. HOLD → REPEAT QUESTION 5 AFTER CORRECTION.
- Outcome: Emergency care, urgent medical advice, or first aid with task review.
| Event | Immediate action | Follow-up and record |
|---|---|---|
| Minor clean graze | Stop the task long enough for first aid. Clean and cover the wound using workplace first aid arrangements. | Record first aid where required, replace damaged PPE and review whether the rough contact can be removed. Direct source: NHS cuts and grazes |
| Contaminated wound | Do not continue dirty, wet, chemical or biological exposure through broken skin. Clean, cover and seek advice where contamination remains a concern. | Record the exposure route, check COSHH or biological controls and review return-to-work restrictions. Direct source: NHS cuts and grazes; HSE COSHH control |
| Heavy bleeding, embedded object or deep wound | Use workplace first aid and call 999 or go to an emergency department for bleeding that cannot be stopped, a very large or deep wound, an embedded object, or loss of movement or feeling. Do not remove an embedded object. | Preserve evidence, investigate causes and check whether reporting duties apply. Direct source: NHS cuts and grazes |
| Eye pain, grit or suspected eye abrasion | Stop work and do not rub the eye. Go to an emergency department or call 999 after a high-speed impact, any change in sight after injury, a penetrating injury or severe eye pain. For a less severe eye injury that is not improving, seek urgent local care advice. | Record the case, check eye protection, dust control and screens, and review others exposed to the same task. Direct source: NHS eye injuries; NI Direct urgent and emergency care |
| Worn safety-critical part | Isolate or take out of service, label or lock off, and prevent reuse until assessed by a competent person. | Keep defect, inspection, repair and return-to-service records, and review whether routing, guarding or cleaning caused repeat wear. |
| Repeated minor injuries or torn PPE | Treat each case, but escalate the pattern to the supervisor or risk owner. | Trend the data, identify root causes, assign actions and confirm effectiveness rather than simply issuing more PPE. |
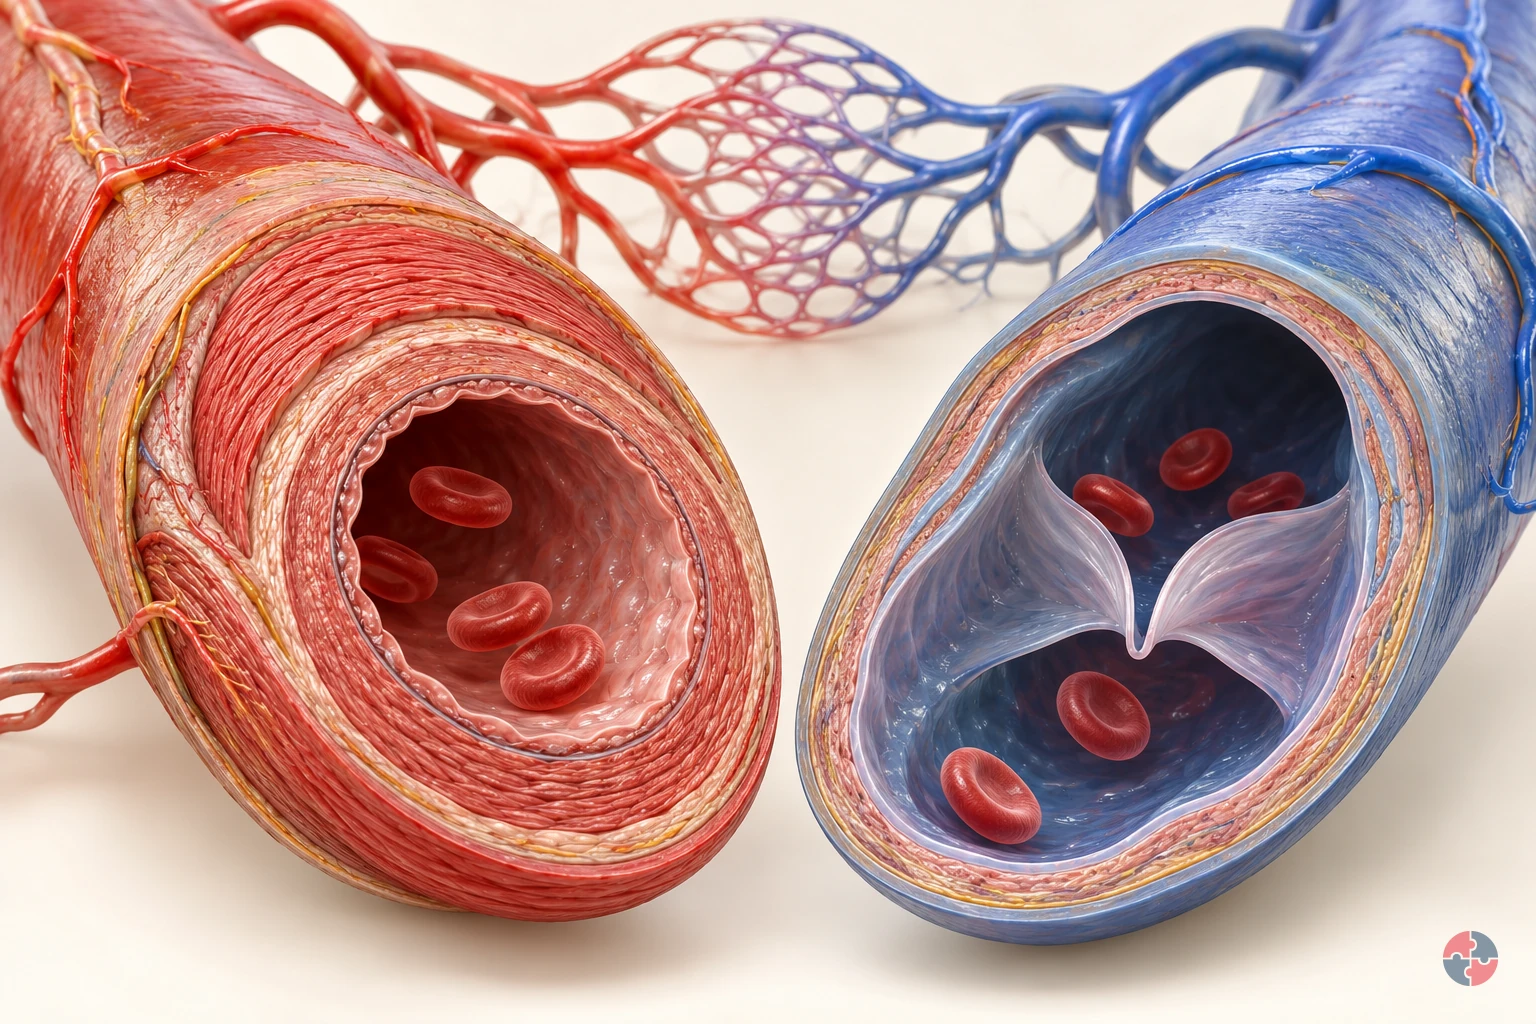
How do blood vessels work, and what should you do when bleeding is serious?
Interactive anatomy · Blood vessels and bleeding first aid · Updated 2026-10-23
Read all anatomy and process explanations without the viewer
Adult external limb examples. Not paediatric, obstetric, internal, eye, neck, chest or abdominal wound instruction. Amount, speed, control and condition guide urgency. No blood-colour grade, mandatory vessel identification, numerical blood-loss limit or loss calculator. Optional arterial/venous appearance cards omitted: they add little to the decision and can encourage unsafe identification delay. Do not enter unresolved machinery, electrical, traffic or sharp-object danger to reach a casualty. Ordinary pressure and embedded-object pressure are separate states. Around-object markers must not overlap the object; never probe or remove it. No universal scored choice to add or remove a soaked dressing. Maintain effective pressure and follow the selected reviewed training procedure and 999 directions. No universal leg elevation, independent walking or return-to-work clearance. No improvised belt/string exercise, placement geometry, packing every wound, loosening schedule, device dose or practical certificate. A quiz result does not authorise a device procedure. Emergency text uses 999; the general UK emergency alternative is 112. For non-emergency wound concerns use a GP or local urgent-care route, avoiding a universal NHS 111 instruction. Offer text-only before injury imagery. No gore, spray, alarm, distress audio, timed score, speed reward or emergency advice behind a pass mark. These are simplified original teaching scenes, not a diagnosis or substitute for live emergency instructions or hands-on skills.
Artery
Carries blood away from the heart. Pressure in arteries varies with the pumping cycle. Direction, not blood colour, defines an artery. University Hospitals Bristol NHS: Circulation information for patients and families, printed pages 36–38 · Manchester University NHS Foundation Trust: Blood vessels
Arterial wall
A strong, elastic wall accommodates pressure. The magnified wall surrounds an open lumen. This teaching cutaway does not display measured wall thickness or flow. University Hospitals Bristol NHS: Circulation information for patients and families, printed pages 36–38
Vein
Returns blood towards the heart. Venous return generally operates at lower pressure than the arterial supply. A vein injury can still cause dangerous bleeding. University Hospitals Bristol NHS: Circulation information for patients and families, printed pages 36–38 · NHS England / NHS ambulance services: Ten Second Triage: non-clinical responders supplementary information, bleeding section
Venous valve example
Many veins have valves that limit backward flow. This example is not present in every vein. The valve is shown inside the return vessel. University Hospitals Bristol NHS: Circulation information for patients and families, printed pages 36–38
Capillary network
Tiny vessels link small arterial and venous branches. Capillaries connect small arterial and venous branches close to the tissues. The network is greatly enlarged so its connections and exchange role can be discussed. Compare it with the larger-vessel labels rather than judging real vessel size from the screen. The model does not measure flow or use this network to determine the seriousness of a wound. University Hospitals Bristol NHS: Circulation information for patients and families, printed pages 36–38 · Manchester University NHS Foundation Trust: Blood vessels
Exchange wall
A very thin wall supports exchange with tissues. A thin vessel wall separates blood from surrounding tissue while allowing exchange of substances. Oxygen and nutrients can move towards tissues and wastes towards the blood. Follow that normal boundary before comparing the wound-opening example. Exchange through a normal wall is different from blood escaping through damaged vessels, and the illustration does not measure either process. University Hospitals Bristol NHS: Circulation information for patients and families, printed pages 36–38
Skin surface
A shallow graze can injure small surface vessels. This is a controlled minor-injury example, not a prediction that every shallow-looking wound is harmless. NHS: Cuts and grazes · North West Ambulance Service NHS Trust: Cuts and grazes: ambulance academy
Wound opening
A tissue break can let blood escape. The restrained wound icon identifies an opening. Its size or colour cannot establish the amount of blood already lost. NHS: Cuts and grazes · NHS England / NHS ambulance services: Ten Second Triage: non-clinical responders supplementary information, bleeding section
Pressure area
Ordinary-wound example: firm pressure over the bleeding area. Use a suitable dressing or clean folded cloth. An embedded object changes the pressure location; keep effective pressure and follow emergency guidance. NHS: Cuts and grazes · London Ambulance Service NHS Trust: Bystander Bleed Control: a London Joint Position Statement
Embedded object
Leave it in place and press around it. In this forearm example, pressure areas sit on either side without pressing onto the glass. Do not remove it or probe the wound. NHS: Cuts and grazes · NHS 111 Wales: First aid: heavy bleeding and shock sections
Circulating volume
Major blood loss threatens supply to vital organs. Shock means inadequate circulation, not simply feeling frightened. The volume symbol gives no safe-loss threshold or diagnosis. NHS 111 Wales: First aid: heavy bleeding and shock sections
Limb tourniquet: training context
An escalation device for appropriate life-threatening limb bleeding. Some uncontrolled arm or leg bleeding needs a suitable device and trained or emergency-directed response. This label does not show where or how to apply one. London Ambulance Service NHS Trust: Bystander Bleed Control: a London Joint Position Statement · Health and Safety Executive: First aid at work: L74, 2024 amendment
Open the complete process transcript
The process, step by step
Follow the circulation loop
Follow the direction arrows from an artery, through the capillary network and towards a vein. Arteries carry blood away from the heart; veins return it towards the heart. Capillaries connect the smaller branches and provide an exchange region near tissues. Compare these roles before opening the wound view so that normal circulation remains the reference. The vessels are enlarged and separated for teaching; their screen size and colour do not identify the seriousness of an actual wound. Trace the connected loop rather than treating each vessel as a separate container. University Hospitals Bristol NHS: Circulation information for patients and families, printed pages 36–38 · Manchester University NHS Foundation Trust: Blood vessels
What to watch: Follow the artery, capillary-network and vein labels in sequence, using the direction arrows to connect the three structures.
Why it matters: Normal circulation depends on connected supply, exchange and return. Understanding the loop makes the later wound explanation clearer without relying on blood colour or an assumed vessel type to judge an injury.
Explore this step: Trace the direction through all three vessel labels and describe each vessel’s normal role.
Compare the vessel walls
Compare the arterial wall, the valve example inside a vein and the much thinner capillary exchange wall. Each has a different role: the arterial wall accommodates pumping pressure, the valve example limits backward movement in that vein, and the thin exchange wall separates blood from nearby tissue. Many veins have valves, but this example is not present in every vein. The capillary is greatly enlarged for visibility. Compare structure with function without reading the illustrated wall thickness or opening as a measurement of an individual’s blood vessels. University Hospitals Bristol NHS: Circulation information for patients and families, printed pages 36–38
What to watch: Locate the arterial wall, the venous-valve example and the capillary exchange wall, comparing their labelled functions rather than screen dimensions.
Why it matters: Different vessel structures support different functions within the same circulation. The comparison explains those roles without making the model a way to identify a bleeding vessel or measure its pressure from appearance.
Explore this step: Select each structure and match its label to pressure accommodation, limited backward flow or exchange.
Separate exchange from an injury
At a capillary, substances normally pass across a thin boundary between blood and tissue. That exchange is not the same as blood escaping from an open wound. Compare the exchange-wall label with the wound-opening label: one explains normal transport, while the other identifies a break through which blood can leave damaged vessels. The simplified pictures make the distinction visible without measuring a loss of blood. Return to the vessel network after examining the opening so that the injury is understood against the normal connected circulation. University Hospitals Bristol NHS: Circulation information for patients and families, printed pages 36–38 · NHS: Cuts and grazes
What to watch: Compare the capillary exchange-wall label with the separate wound-opening label, keeping the normal boundary and the tissue break distinct.
Why it matters: Normal exchange supplies tissues while blood remains within the circulation. A wound is a different event, so the amount and control of bleeding cannot be inferred from the normal capillary illustration.
Explore this step: Describe the difference between crossing the normal exchange boundary and escaping through an injured vessel.
Look at the wound and the person
This supported forearm shows where the skin is broken. Judge the amount and speed of bleeding, whether it is controlled and how the person is. Severe bleeding needs pressure and 999 immediately; this close-up is an explanation, not a waiting stage. The wound and circulating-volume labels connect the local opening with the wider circulation. Their illustrated size or colour does not measure how much blood has been lost or establish that the person is safe. NHS: Cuts and grazes · NHS England / NHS ambulance services: Ten Second Triage: non-clinical responders supplementary information, bleeding section · North West Ambulance Service NHS Trust: Cuts and grazes: ambulance academy
What to watch: Compare the skin break and wound opening with the circulating-volume label, keeping the person’s overall condition in view.
Why it matters: A small drawing cannot establish the seriousness of bleeding or the person’s condition. The visual explanation supports understanding without creating an extra assessment stage before the existing immediate emergency response.
Explore this step: Compare the wound and circulation labels without treating completion of this step as a condition for accessing emergency help.
See sustained pressure through a dressing
Watch the hand settle onto the dressing and hold it against the wound. The visual compression explains pressure; reduced illustrated flow does not prove bleeding is controlled. Keep pressure and emergency help going for severe bleeding. Select Embedded object to see the separate pressure-around example. In that example the pressure areas remain beside the object, not on it; leave the object in place. The comparison explains an existing boundary, not a new procedure or a reason to delay 999. NHS: Cuts and grazes · London Ambulance Service NHS Trust: Bystander Bleed Control: a London Joint Position Statement · NHS 111 Wales: First aid: heavy bleeding and shock sections
What to watch: Locate the dressing and pressure-area labels, then compare them with the separate embedded-object example and its pressure areas.
Why it matters: The pressure location matters when an object is embedded. Comparing the two examples preserves that distinction while keeping continuous pressure and emergency help ahead of completing the teaching sequence.
Explore this step: Read the ordinary-wound and embedded-object captions side by side, keeping their different pressure locations distinct.
Practise the next decision
Try the four adult scenarios. Every answer has an explanation. Emergency help remains available without completing the sequence or passing a quiz. Compare the wording of the wound, embedded-object and training-context labels before reading the answer feedback. The scenarios are decision explanations, not permission to attempt a device technique or a substitute for training. Keep the existing severe-bleeding priority in view: pressure and 999 immediately, with no requirement to finish this activity first. NHS: Cuts and grazes · London Ambulance Service NHS Trust: Bystander Bleed Control: a London Joint Position Statement · Health and Safety Executive: First aid at work: L74, 2024 amendment
What to watch: Compare the pressure-area, embedded-object and training-context labels with the scenario wording before reading the explanation for an answer.
Why it matters: Feedback explains why different situations need different decisions. Finishing the activity is neither proof of practical competence nor a prerequisite for emergency help, and the existing immediate response hierarchy remains unchanged.
Explore this step: Explore a scenario and compare its explanation with the relevant label; emergency help remains independent of the activity.
Mechanisms and their limits
Superficial injury: the controlled example Small vessels near the surface can be damaged in a graze. Here the small amount of bleeding stops with pressure and the person remains well, so gentle cleaning and covering follow. This scene describes one controlled minor injury, not all capillary injuries. If bleeding will not stop, switch immediately to the escalation branch. Persistent dirt or infection concerns need professional advice. NHS: Cuts and grazes · North West Ambulance Service NHS Trust: Cuts and grazes: ambulance academy
NHS cuts, grazes and when to seek help
Superficial injury: the controlled example — follow the anatomy
Look at: The small surface vessels broken by the graze.
What changes: Damage to tiny vessels lets blood leak onto the skin surface.
Why it matters: Small wounds may settle with pressure, but contamination and wound care still matter.
What to do: Use clean direct pressure and the wound-care guidance; reassess if bleeding continues.
A small forearm graze near a rough storage edge
An adult brushes the forearm against a rough storage edge. This example follows a small superficial graze; its minor-care outcome applies only once bleeding is controlled and the person remains well. The 48-second playback allows time to read each explanation. It is not a treatment timer: severe bleeding needs immediate pressure and 999 throughout. If bleeding will not stop or the condition changes, the minor branch ends and emergency escalation replaces it. No tourniquet is needed for the described controlled graze.
Check safety and the actual wound Move clear of the rough edge and check for an embedded object or other injury. The minor example applies only because bleeding is small, controlled and the person remains well. NHS: Cuts and grazes
A superficial break can damage small vessels The shallow contact opens the skin surface and small vessels can bleed. The learner does not need to name the vessel or judge blood colour before using appropriate pressure. NHS: Cuts and grazes · North West Ambulance Service NHS Trust: Cuts and grazes: ambulance academy
Look closely at the superficial injury The close-up reveals the shallow wound on the forearm. The appearance alone does not establish that bleeding is controlled; watch the pressure response next. NHS: Cuts and grazes
Apply pressure, then use minor care only if controlled The dressing meets the wound and the hand holds pressure. Once this small bleed is controlled, clean and cover it. If bleeding continues or the person becomes unwell, leave the minor-care branch and seek emergency help. NHS: Cuts and grazes · Bradford District Care NHS Foundation Trust: Looking after your wound · London Ambulance Service NHS Trust: Bystander Bleed Control: a London Joint Position Statement
Read the practice situations and all answer explanations
BL-Q1: What should happen immediately?
An adult cuts their forearm on sheet metal. The machinery is stopped and the area is safe. Blood is flowing heavily and rapidly soaking their sleeve. They are awake; a helper is beside you.
Apply firm pressure and ask the helper to call 999 and bring the first-aid kit. — Correct. Begin bleeding control while the helper calls. Keep helping where it is safe, and follow emergency directions.
Decide whether the blood is bright or dark first. — Do not delay for colour or vessel identification. Heavy continuing loss already needs urgent action.
Wash the wound thoroughly before controlling the bleeding. — Cleaning is for the appropriate minor-care stage. It must not delay pressure and help for severe bleeding.
Send them alone to the first-aid room. — Keep assistance with them. Sending them away alone delays control and risks deterioration without support.
London Ambulance Service NHS Trust: Bystander Bleed Control: a London Joint Position Statement · NHS 111 Wales: First aid: heavy bleeding and shock sections · NHS England / NHS ambulance services: Ten Second Triage: non-clinical responders supplementary information, bleeding sectionBL-Q1-control: What should you do next?
The bleeding now appears controlled while the ambulance is on its way. The person says they feel better.
Keep monitoring them, maintain control and follow emergency advice. — Correct. Stay with them, watch for changes and tell the call handler if bleeding restarts or their condition worsens.
Cancel help because they feel better. — Feeling better does not establish that the earlier heavy loss was harmless. Follow emergency advice rather than cancelling independently.
Send them back to work to see whether they cope. — An apparent improvement is not medical clearance. Keep assistance with them.
London Ambulance Service NHS Trust: Bystander Bleed Control: a London Joint Position Statement · NHS 111 Wales: First aid: heavy bleeding and shock sections · NHS: When to call 999BL-Q2: What is suitable for this described injury?
An adult has a shallow knee graze, a small amount of oozing, no embedded object and feels well. Simple pressure stops the bleeding.
Gently rinse with clean water, dry and cover with an appropriate dressing. — Correct for this controlled minor wound. Keep the dressing clean and watch for problems; changed symptoms need changed advice.
Use a tourniquet. — A controlled superficial graze does not call for this escalation device.
Scrub the raw surface hard. — Clean gently. Harsh scrubbing is not the advised minor-wound care.
Ignore it because capillary injuries never need care. — Minor wounds still need cleaning, protection and monitoring. The label does not remove infection risk.
NHS: Cuts and grazes · North West Ambulance Service NHS Trust: Cuts and grazes: ambulance academyBL-Q2-contamination: What is the appropriate follow-up?
The small graze remains dirty after gentle cleaning, or later becomes increasingly painful, swollen or produces pus.
Seek prompt professional advice through a GP or the local urgent-care route. — Correct. Persistent contamination or possible infection needs assessment. Mention feeling unwell or fever when asking for help.
Keep ignoring it because the original bleeding was small. — Small initial blood loss does not rule out an infection or a wound that needs treatment.
Scrub the wound deeply or remove embedded material yourself. — Do not probe or force out embedded material. Seek professional wound care.
NHS: Cuts and grazes · Bradford District Care NHS Foundation Trust: Looking after your woundBL-Q2-uncontrolled: What should replace the minor-wound advice?
The situation has changed: the bleeding will not stop. This is no longer the controlled minor graze described at the start.
Apply firm pressure and obtain emergency help now. — Correct. Bleeding that will not stop needs urgent assessment. Call 999, keep effective pressure and follow the call handler.
Carry on with minor cleaning and wait for the quiz score. — The new warning sign overrides the minor branch. Do not let cleaning or a score delay help.
Assume a graze cannot cause a serious problem. — The current bleeding and condition determine the response, not the original label.
NHS: Cuts and grazes · London Ambulance Service NHS Trust: Bystander Bleed Control: a London Joint Position StatementBL-Q3: What is appropriate for this explicit trained scenario?
A power-tool injury causes heavy lower-leg bleeding. The tool is isolated, a helper has called 999 and firm pressure has not controlled the loss. A trained responder has the commercial tourniquet they have practised using.
Escalate with the specified device according to training and emergency guidance. — Correct for this specified life-threatening limb-bleeding scenario and trained responder. Continue emergency communication. Use approved hands-on training for the practical procedure; this activity does not demonstrate or authorise it.
Repeat ineffective pressure indefinitely without reporting the continuing loss. — Continuing major loss needs prompt escalation and an update to 999, not indefinite repetition without reassessment.
Wait until the blood looks bright red. — Colour does not determine the indication. The severe uncontrolled bleeding is already the concern.
Use the device merely because the injury is painful. — Pain alone is not the indication. The scenario specifies serious limb bleeding that pressure has not controlled.
London Ambulance Service NHS Trust: Bystander Bleed Control: a London Joint Position Statement · Health and Safety Executive: First aid at work: L74, 2024 amendment · NHS: When to call 999BL-Q3-untrained: What should you do while emergency help is coming?
The same leg wound is still bleeding heavily despite pressure. You have not been trained in the device in the trauma kit.
Tell 999 that pressure is failing, keep assistance with the person and follow the call handler’s guidance. — Correct. Clearly report the continuing loss and available kit. Follow live emergency guidance; this activity does not teach placement or substitute for device instructions and training.
Stop pressure to search for a belt or string to improvise a device. — Do not abandon pressure to find or improvise a tourniquet. Keep emergency communication and effective bleeding control.
Say you cannot help at all because you do not hold a device certificate. — You can summon help, maintain pressure and follow emergency instructions. A quiz certificate is not the boundary for calling or assisting.
London Ambulance Service NHS Trust: Bystander Bleed Control: a London Joint Position Statement · Health and Safety Executive: First aid at work: L74, 2024 amendment · NHS: When to call 999BL-Q4: What should you do?
An adult has a large piece of glass embedded in the forearm. The area is secured, but bleeding continues around it.
Leave the glass in place, apply pressure around it and obtain emergency help. — Correct. Keep pressure away from the object. This is a forearm illustration; it does not teach treatment of eye, neck, chest or abdominal wounds.
Pull it out to make a dressing fit. — Do not remove the object yourself. Removing it can worsen the injury or bleeding.
Press on the glass or probe for its tip. — Do not push on it or probe. Pressure should be around the object while emergency help is arranged.
NHS: Cuts and grazes · NHS 111 Wales: First aid: heavy bleeding and shock sectionsBL-Q4-deterioration: What should you do?
The person with the embedded glass becomes cold, clammy and weak.
Update 999, continue appropriate bleeding control, keep them warm and monitor responsiveness and breathing. — Correct. These may be warning signs of serious circulatory deterioration. Act and update the call handler; you do not need to diagnose shock.
Treat it only as fright and leave them to settle. — After significant bleeding, weakness and clamminess must not be dismissed as an emotional reaction.
Make them walk around or raise their injured limb regardless of other injuries. — Avoid unnecessary movement. Positioning must account for injuries and emergency advice; there is no universal leg-raising answer.
NHS 111 Wales: First aid: heavy bleeding and shock sections · NHS: Broken leg · NHS: When to call 999Sources and how the model is made
The opening images are AI-generated anatomical illustrations. The interactive 3D models and labelled SVG diagrams use original procedural artwork. These teaching images are not medical scans or diagnostic tools. Source references support the learner explanations and do not grant artwork rights.
- University Hospitals Bristol NHS: Circulation information for patients and families, printed pages 36–38 — Normal arterial/venous direction, elastic wall, valve example and capillary exchange only. NHS-hosted patient/family resource; no congenital management advice or illustration copied.
- Manchester University NHS Foundation Trust: Blood vessels — Arteries, veins and capillaries and their normal function; no first-aid procedure.
- NHS: Cuts and grazes — Controlled minor wound cleaning/covering, gloves, pressure, embedded-object exception and when urgent/emergency assessment is needed. Current page checked; no universal soaked-dressing, elevation, medication or tourniquet rule adopted.
- London Ambulance Service NHS Trust: Bystander Bleed Control: a London Joint Position Statement — 21 August 2024 NHS-led joint statement: continuous pressure, 999, training, specific tourniquet knowledge and uncontrolled limb bleeding. Do not stop pressure to find or improvise a tourniquet. London position, not a product demonstration or certification.
- NHS 111 Wales: First aid: heavy bleeding and shock sections — Heavy bleeding, embedded objects, physiological shock, warmth and emergency communication only. Older general page; unrelated procedures, universal elevation and its recovery-position wording are not adopted. Current dedicated cardiac-arrest source controls gasping.
- University Hospital Southampton NHS Foundation Trust / Wessex Trauma Network: Adult major trauma guidelines: tourniquet handover — Professional context only: record application time, alert receiving team and require urgent clinical reassessment. Hospital conversion/release schedules, device pressures, placement, drugs and surgical procedures are not learner instructions. Explicit layperson post-application wording requires named trainer review.
- NHS England / NHS ambulance services: Ten Second Triage: non-clinical responders supplementary information, bleeding section — April 2023 major-incident training context: not every life-threatening bleed is pulsatile. Used only to avoid blood-pattern delay. No triage, wound-packing or multiple-casualty algorithm taught.
- North West Ambulance Service NHS Trust: Cuts and grazes: ambulance academy — Basic gentle minor-graze care and 999 for heavy bleeding that does not stop. Child-facing explanation used only for general care principles; adult severe-bleeding decisions use the NHS ambulance statement.
- Bradford District Care NHS Foundation Trust: Looking after your wound — Definition of skin wound and infection-awareness context. Its district-nursing dressing plan is not substituted for the separate minor-injury branch or emergency control.
- NHS: Broken leg — Possible fracture limits movement and weight bearing; supports avoiding universal limb elevation or walking after limb trauma. No fracture manipulation taught.
- Health and Safety Executive: First aid at work: L74, 2024 amendment — Needs assessment, additional equipment and training, including wound packing and tourniquets for life-threatening bleeding; paragraphs 39 and 72–73 and Appendix 4. HSE does not approve this activity or training provider.
- NHS: When to call 999 — Emergency call-handler directions, staying with the person and updating 999 when their condition changes. No universal NHS 111 advice for every UK nation.
- NHS 111 Wales: Cardiac arrest — Dedicated adult recognition and response: unresponsive and abnormal breathing, including gasping, immediate 999, CPR and AED. Qualified review must approve combined traumatic bleeding/airway branches.
Standards named on this page are background context. Confirm the current edition, scope and exact requirements from an authorised copy before applying them. The open official sources below support the specific public-law and regulator guidance claims they are cited for.
What do the acronyms and key terms mean?
Abrasion sits across skin protection, work equipment, hazardous substances, personal protection, maintenance and incident reporting, so common terms should be clear.
| Acronym or term | What it means | Why it matters |
|---|---|---|
| Abrasion | Damage caused by rubbing, scraping, grinding or friction. | The term can describe injury to people and wear or damage to materials and equipment. |
| Friction burn | A burn-like injury caused by fast or prolonged rubbing. | Can occur from ropes, belts, conveyor contact, falls or repeated manual handling. |
| PPE | Personal protective equipment. | Includes gloves, sleeves, kneepads, footwear, eye protection and protective clothing for residual risk. |
| RPE | Respiratory protective equipment. | May be needed where abrasive dust remains after stronger source controls. |
| LEV | Local exhaust ventilation. | Captures dust close to sanding, grinding, cutting or abrasive processes. |
| COSHH | Control of Substances Hazardous to Health. | Applies where abrasive work creates hazardous dust, fumes or contaminated material. |
| PUWER | Provision and Use of Work Equipment Regulations. | Applies where machinery, tools, guards, conveyors or equipment condition affect abrasion risk. |
| RAMS | Risk assessment and method statement. | Commonly used to describe how higher-risk tasks and contractor controls will be managed. |
| APC | Avoid, Protect, Check. | A simple HSE skin protection message that fits abrasion prevention. |
| RIDDOR | Reporting of Injuries, Diseases and Dangerous Occurrences Regulations. | Some serious abrasion-related injury outcomes may be reportable. |
| ERICPD | Eliminate, Reduce, Isolate, Control, PPE, Discipline. | A practical hierarchy for reducing abrasion risk before relying on behaviour or PPE. |