Focused awareness learning based on SHAREhub pages. Apply the actual workplace arrangements and your role; completion is not practical competence or permission for specialist work.
This reader supplies the complete teaching. Use the interactive LMS course for assessed activities, saved progress and completion.
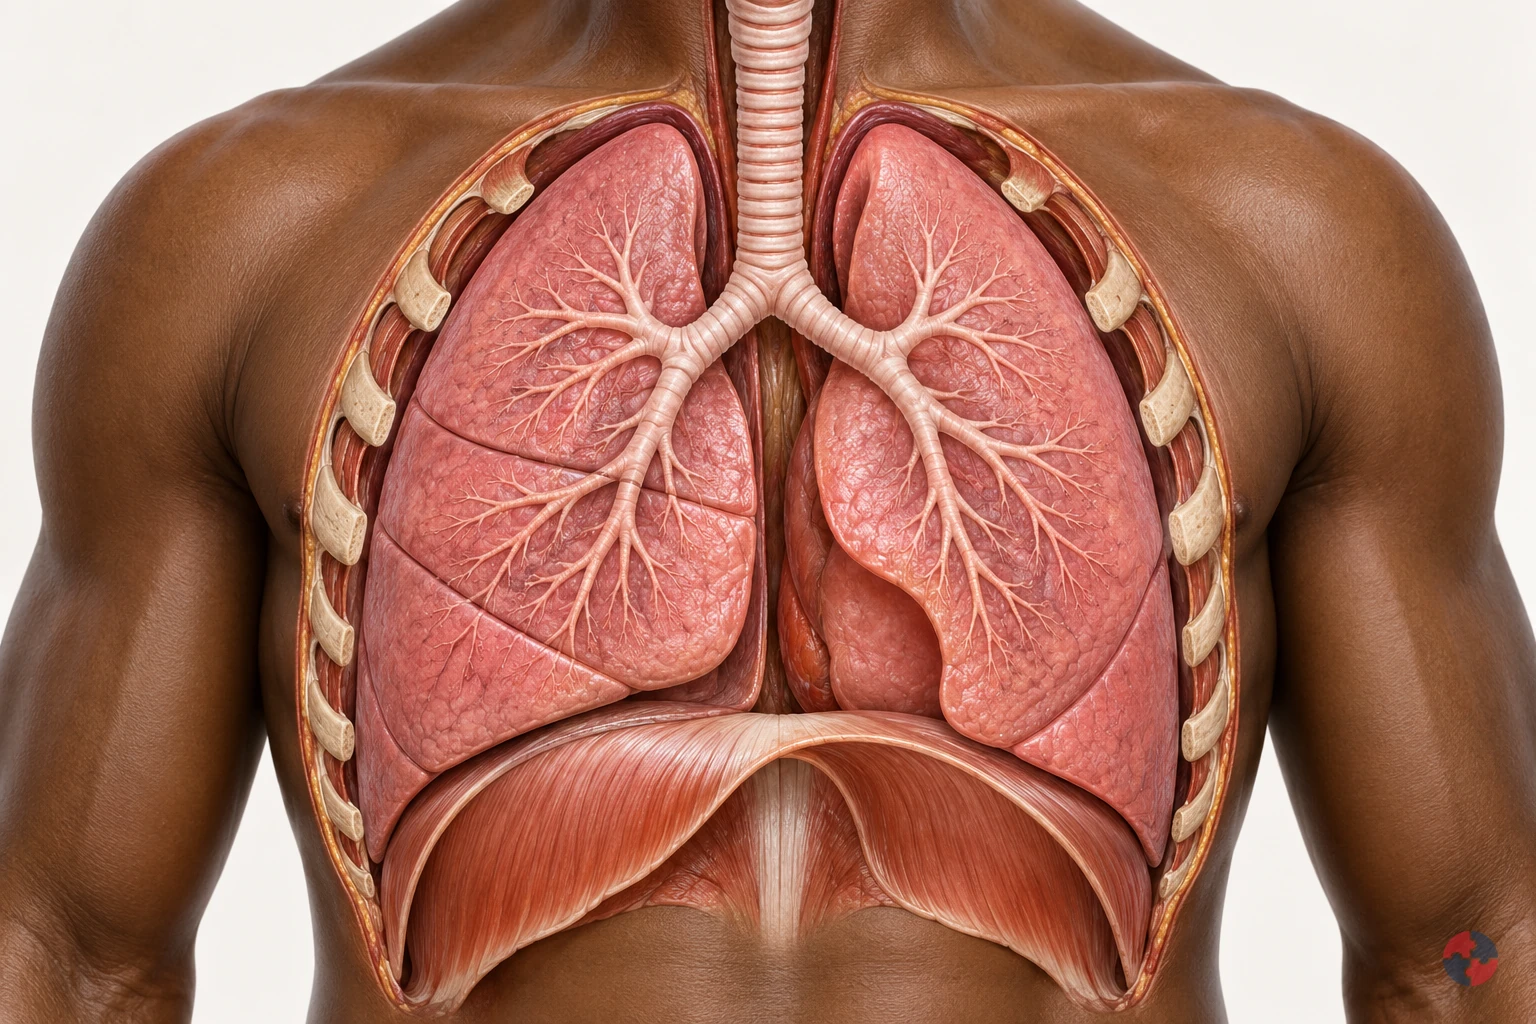
Locate the lungs, branching airways and diaphragm below them. The cutaway reveals structures normally hidden by the chest wall.
Trace the source-to-breathing-zone route in this lesson. Which change would prevent the contaminant reaching the person?
educational illustration · healthy anatomy; enlarged details and teaching colours.
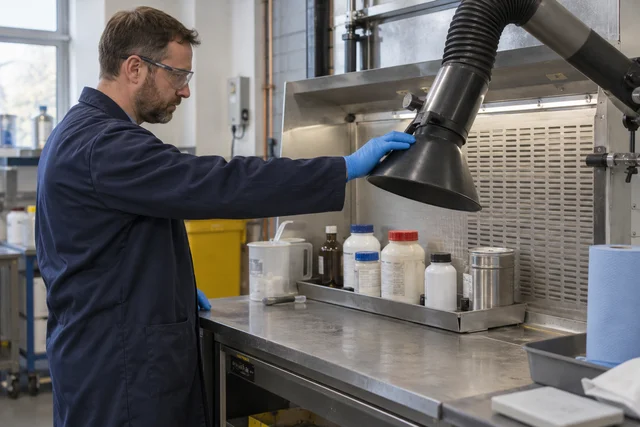
Existing SHAREhub photographic illustration. The written fictional case supplies the condition and decision evidence.
Intercept the contaminant before inhalation
Local exhaust ventilation removes contaminated air close to where dust, fume, mist or vapour is produced. The purpose is to intercept the release before it passes through a person breathing zone or spreads to others. A clean-looking room can still contain hazardous airborne material. Some exposures irritate immediately; others contribute to asthma, cancer or long-term lung disease. Seeing little dust and feeling well are therefore weak assurances of control.
Follow the source, the work position and the intended path into the hood. An extraction system must suit the task and substance, with stronger opportunities to avoid or reduce the release considered first. It is not a general room fan that can be placed anywhere and assumed to protect every activity.
Applied case
A sanding task has moved to the far end of a bench. The room looks clean, and the operator assumes the nearby extraction still covers the new position.
Look beyond the label
The breathing zone is the route to the person. A hood that collects some visible dust may still fail if the contaminant crosses that zone before entering the system.
Test your decision
What must the user establish?
That the actual release is captured using the assessed working arrangement.
Only that the room looks tidy.
Only that extraction equipment is installed somewhere nearby.
Compare the explanation
That the actual release is captured using the assessed working arrangement.
Protection depends on intercepting the actual release, not the presence of equipment or the appearance of the room.
Existing SHAREhub 2D teaching schematic. Use alongside the explanation and fictional case in this lesson.
Understand the connected airflow chain
The hood is the visible beginning of a connected system. Ducts transport the contaminated air; suitable cleaners or collectors deal with the relevant contaminant; the fan moves air against system resistance; discharge arrangements must not expose others or allow contamination to return. Make-up air, dampers, enclosures and monitoring devices can also affect performance. Designs differ, so do not assume every filter removes every gas or that every system has identical components.
A defect anywhere along the path can weaken capture. A crushed hose, blocked filter, moved damper or damaged enclosure matters even when a fan runs. Use the system information to recognise the installed parts and designated checks. Cleaning or opening contaminated components can expose maintainers and needs its own assessed, competent arrangements.
Applied case
The fan runs normally, but a flexible duct is crushed behind the machine. The operator suggests checking only the hood because it is the part nearest the work.
Look beyond the label
A collector, fan and hood perform different functions. Their presence is not proof of safe discharge, suitable filtration or effective capture; the installed system basis defines what each should do.
Test your decision
Which approach is appropriate?
Ignore everything downstream of the hood.
Open the collector without a maintenance assessment.
Treat the damaged duct as a system defect and follow the reporting arrangement.
Compare the explanation
Treat the damaged duct as a system defect and follow the reporting arrangement.
The system works as a chain; a running fan cannot demonstrate the condition or suitability of the whole route.
Keep the task inside the assessed capture arrangement
Keep the task inside the assessed capture arrangement.
Existing SHAREhub 2D teaching schematic. Use alongside the explanation and fictional case in this lesson.
Keep the task inside the assessed capture arrangement
The capture zone is the area in which the hood can draw the contaminant into the system. The working zone is where the job happens; the breathing zone is the air the person inhales. Good layout connects the source to the hood without taking contamination past the face. A person standing between the source and hood, a moving workpiece or a cross-draught can disturb that path.
Use the commissioned method and designated hood position rather than a universal distance or a guessed airflow. Move an extraction arm with the task only as the assessed method requires. If the task, workpiece or surrounding conditions change, review whether capture still works. A bigger fan is not a substitute for resolving an unsuitable hood or work arrangement.
Applied case
A bench operator leans between the dusty workpiece and hood while an open door creates a cross-draught. The indicator remains within its stated operating range.
Look beyond the label
A normal indication can coexist with a poorly positioned task. Check the source-to-hood path and user position rather than promoting one reading into proof of effective exposure control.
Test your decision
What needs attention?
Only a request for a larger fan without examining the task.
The contaminant path, worker position and draught affecting actual capture.
Only the indicator because it settles every capture question.
Compare the explanation
The contaminant path, worker position and draught affecting actual capture.
An indicator does not replace observing whether the source is controlled in the actual working conditions.
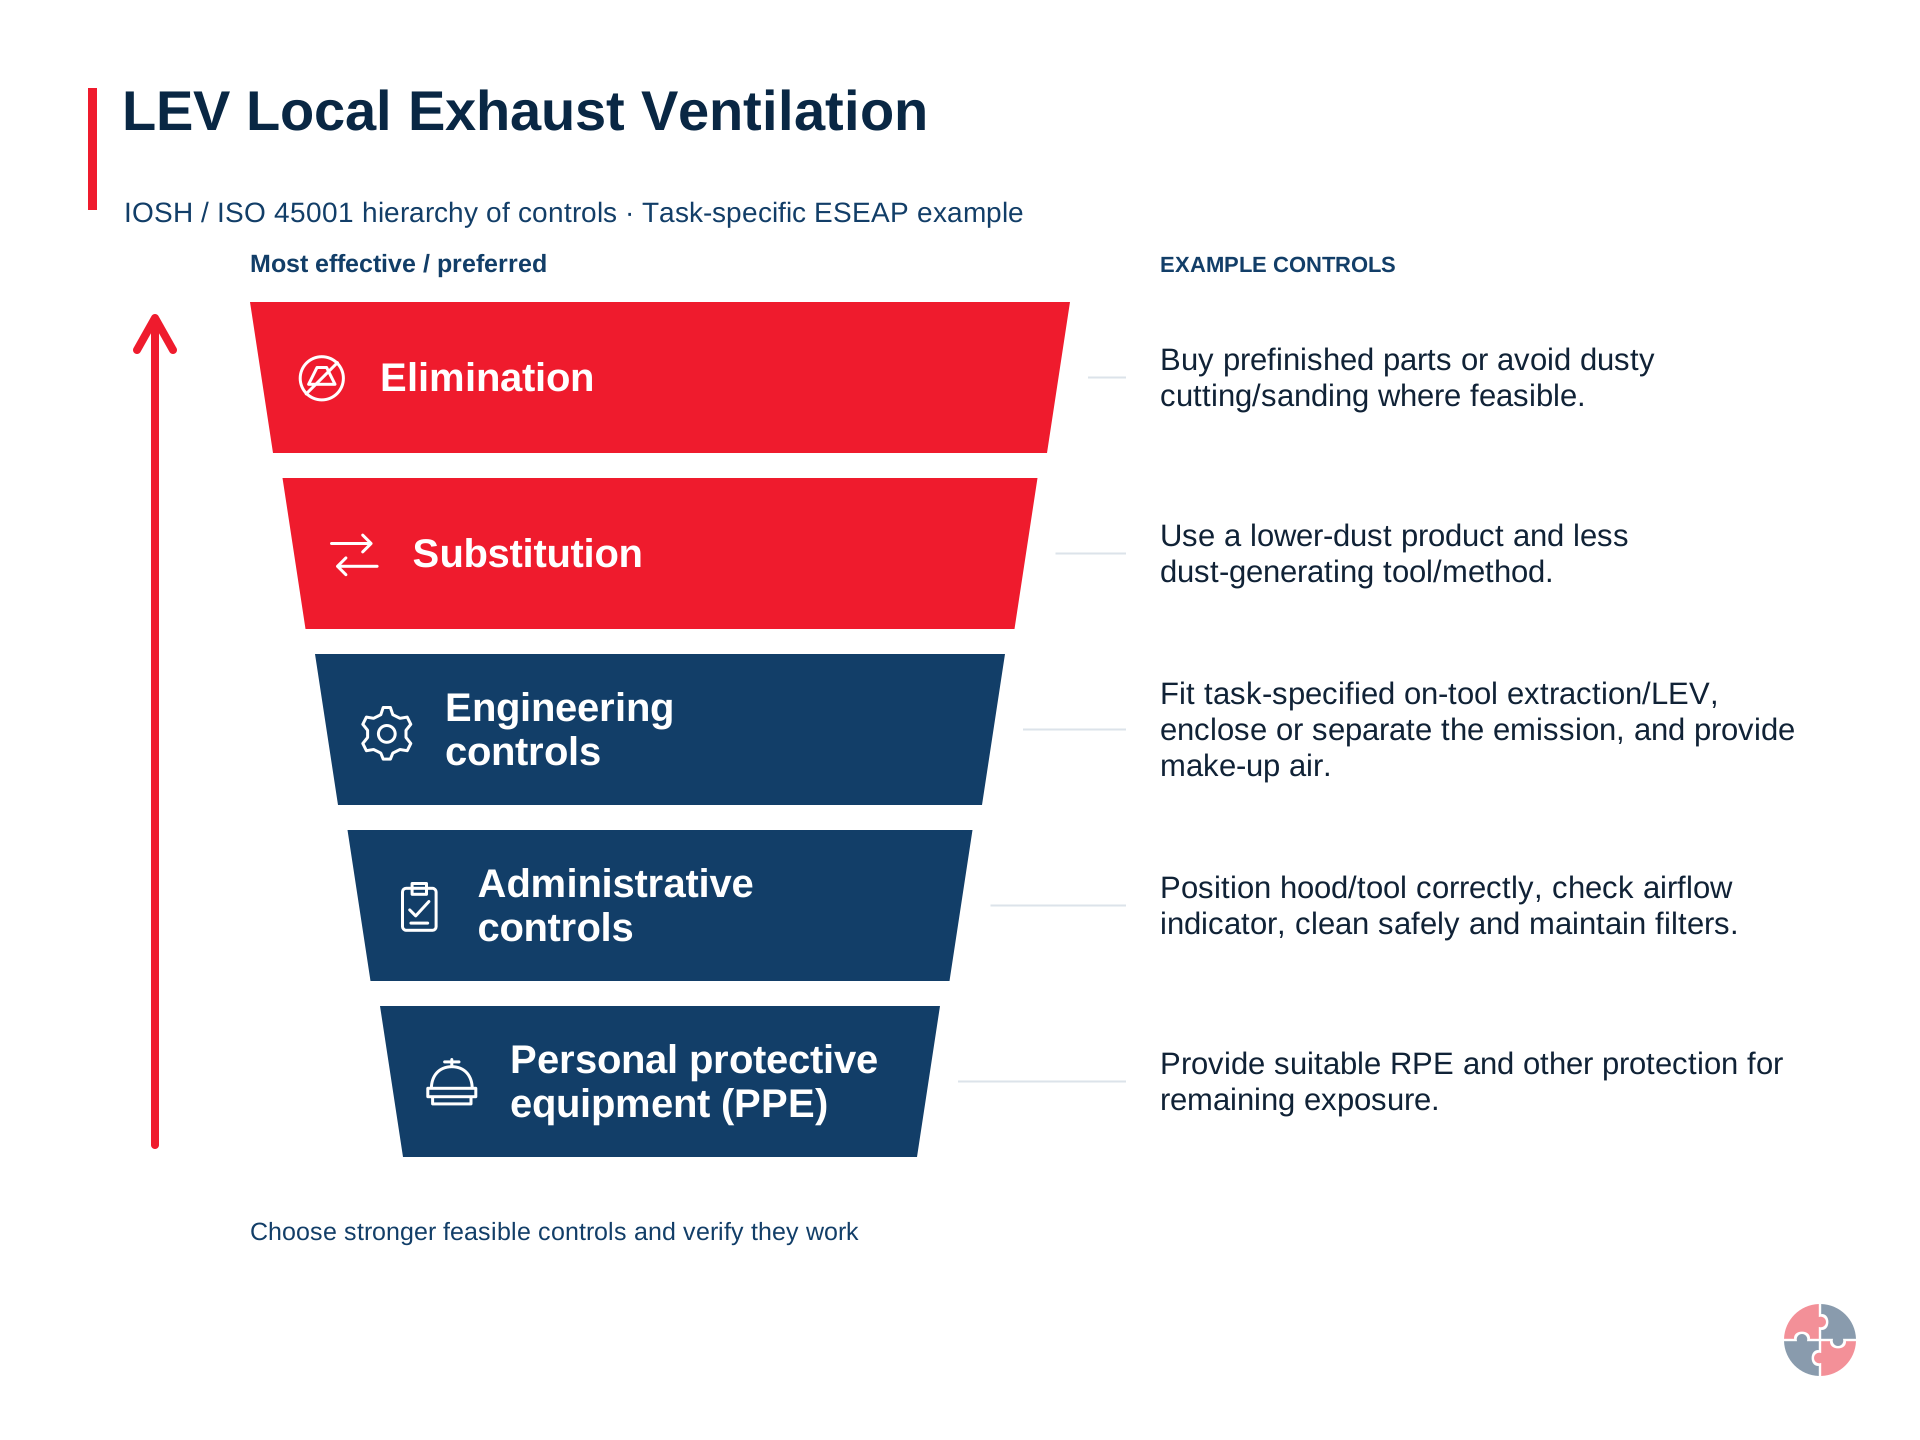
Photorealistic illustrative UK workplace scene. Review checks: Eliminate: Buy prefinished parts or avoid dusty cutting/sanding where feasible. Reduce: Use a lower-dust product and less dust-generating tool/method. Isolate: Fit task-specified on-tool extraction/LEV, enclose or separate the emission, and provide make-up air. Control: Position hood/tool correctly, check airflow indicator, clean safely and maintain filters. PPE: Provide suitable RPE and other protection for remaining exposure.
Use specific pre-use and task checks
Users need to know what their system should look, sound and indicate when ready. The manual and logbook should support clear checks of hood position, damage, duct condition, the specified indicator range and any alarms. A current examination label is useful background, but it does not override a split hose, active alarm or escaping dust noticed today. Checks must relate to the installed system and actual task, not a generic tick list.
Observe performance while work occurs as well as before starting. If dust escapes, a hose breaks or the required indication is wrong, stop the affected activity safely and report it. Do not adjust dampers or bypass alarms to obtain an acceptable-looking reading. Record what was observed and which operation was affected.
Applied case
A pre-use sheet is signed before the machine starts. During work, dust escapes and a filter alarm appears; a colleague says the signed sheet permits the whole shift.
Look beyond the label
A checklist captures an observation at a time. It is useful only when users act on changed conditions and retain an honest record of defects, restrictions and the task affected.
Test your decision
What should happen now?
Stop the affected task safely and report the changed control condition.
Continue until the signed shift ends.
Silence the alarm and keep the completed sheet.
Compare the explanation
Stop the affected task safely and report the changed control condition.
Current evidence of failure overrides the assumption that an earlier check guarantees an entire shift.
Existing SHAREhub photographic illustration. The written fictional case supplies the condition and decision evidence.
Distinguish the assurance questions
Commissioning establishes whether an installed or modified system meets its intended control specification before people rely on it. User checks look for readiness and deterioration during everyday operation. Maintenance preserves condition. Thorough examination and test is a competent periodic assessment of continuing effectiveness. They connect, but one does not replace another. A historic test cannot establish the effect of an unreviewed modification or present damage.
The commissioned benchmark, manual, logbook and earlier findings help people judge the current system. Managers need to resolve defects, not simply file reports. If the process or extraction arrangement changes, obtain the appropriate competent review and verification. Users must not invent test intervals, airflow limits or acceptance criteria from a generic course; the actual system and applicable requirements govern them.
Applied case
A machine connection is added after the last system examination. The manager proposes using the old pass to accept the new arrangement without checking the changed demand.
Look beyond the label
Daily checks, commissioning and periodic examination are complementary evidence. Extending an old result to a new connection hides a change instead of demonstrating that the new duty is controlled.
Test your decision
What is missing?
Another copy of the old label.
A user statement that the fan sounds familiar.
Competent assessment and verification of the changed system against its intended control duty.
Compare the explanation
Competent assessment and verification of the changed system against its intended control duty.
The old result describes an earlier arrangement and cannot establish performance after an unassessed change.
Photorealistic illustrative UK workplace scene. Review checks: Assessing: the site team identifies dust, fume, mist and vapour tasks and links each LEV asset to a COSHH assessment and health risk. Specifying: LEV purchases require task description, contaminant type, worker position, capture requirement and commissioning evidence. Implementing: Operators use hoods, on-tool extraction, booths and gauges correctly, with stop-work triggers for failed capture.
Report defects and require verified restoration
LEV can deteriorate through filter loading, damaged hoses, worn fan components, corrosion, failed seals and changed settings. Maintenance must consider the contaminant retained inside the system as well as the mechanical defect. Filter changes, collector cleaning or duct access can expose maintainers; they need suitable methods, isolation and contamination controls through competent arrangements. An operator must not open equipment simply to find out why capture has failed.
After repair, verify the required control function for the actual process, not merely that a motor starts. Keep the task restriction until the responsible person accepts restored performance. Where RPE is also required, maintain it alongside LEV rather than treating either as permission to ignore the other. Communicate remaining defects and restrictions to the incoming team.
Applied case
A split duct has been replaced and the motor starts. The planned capture check has not occurred, and the incoming operator is told that maintenance completion means unrestricted use.
Look beyond the label
Restoration concerns the control function, not just the repaired part. Match the verification to the task and communicate remaining limitations so the next user does not inherit false assurance.
Test your decision
What evidence supports return to the task?
The repair booking being marked complete without the required check.
Verified restoration of the required capture function and responsible acceptance.
The motor starting alone.
Compare the explanation
Verified restoration of the required capture function and responsible acceptance.
A repair record is not itself proof that the engineering control performs its required duty.

 View full detail ↗